4: INSTALLATION
1. Power on the machine and bring it out of Reset.
2. Select the Page Up key on the keyboard to move the
spindle head up (Z+).
3. Remove and discard the shipping block from the
machine table.
4. Use the keyboard to verify axes motion:
l Select the Right Arrow key and then the Left Arrow
key.
The table moves left, then right.
l Select the Down Arrow key and then the UpArrow
key.
The table moves away from you, then toward you.
l Select the Page Down key and then the Page Up key.
The spindle head moves down(Z-), then up (Z+).
5. Reference the axes:from the PathPilot interface, select
Ref Z, Ref X and Ref Y.
Figure 4-41: Ref Z, Ref X, and Ref Y buttons.
The machine moves to the reference position.
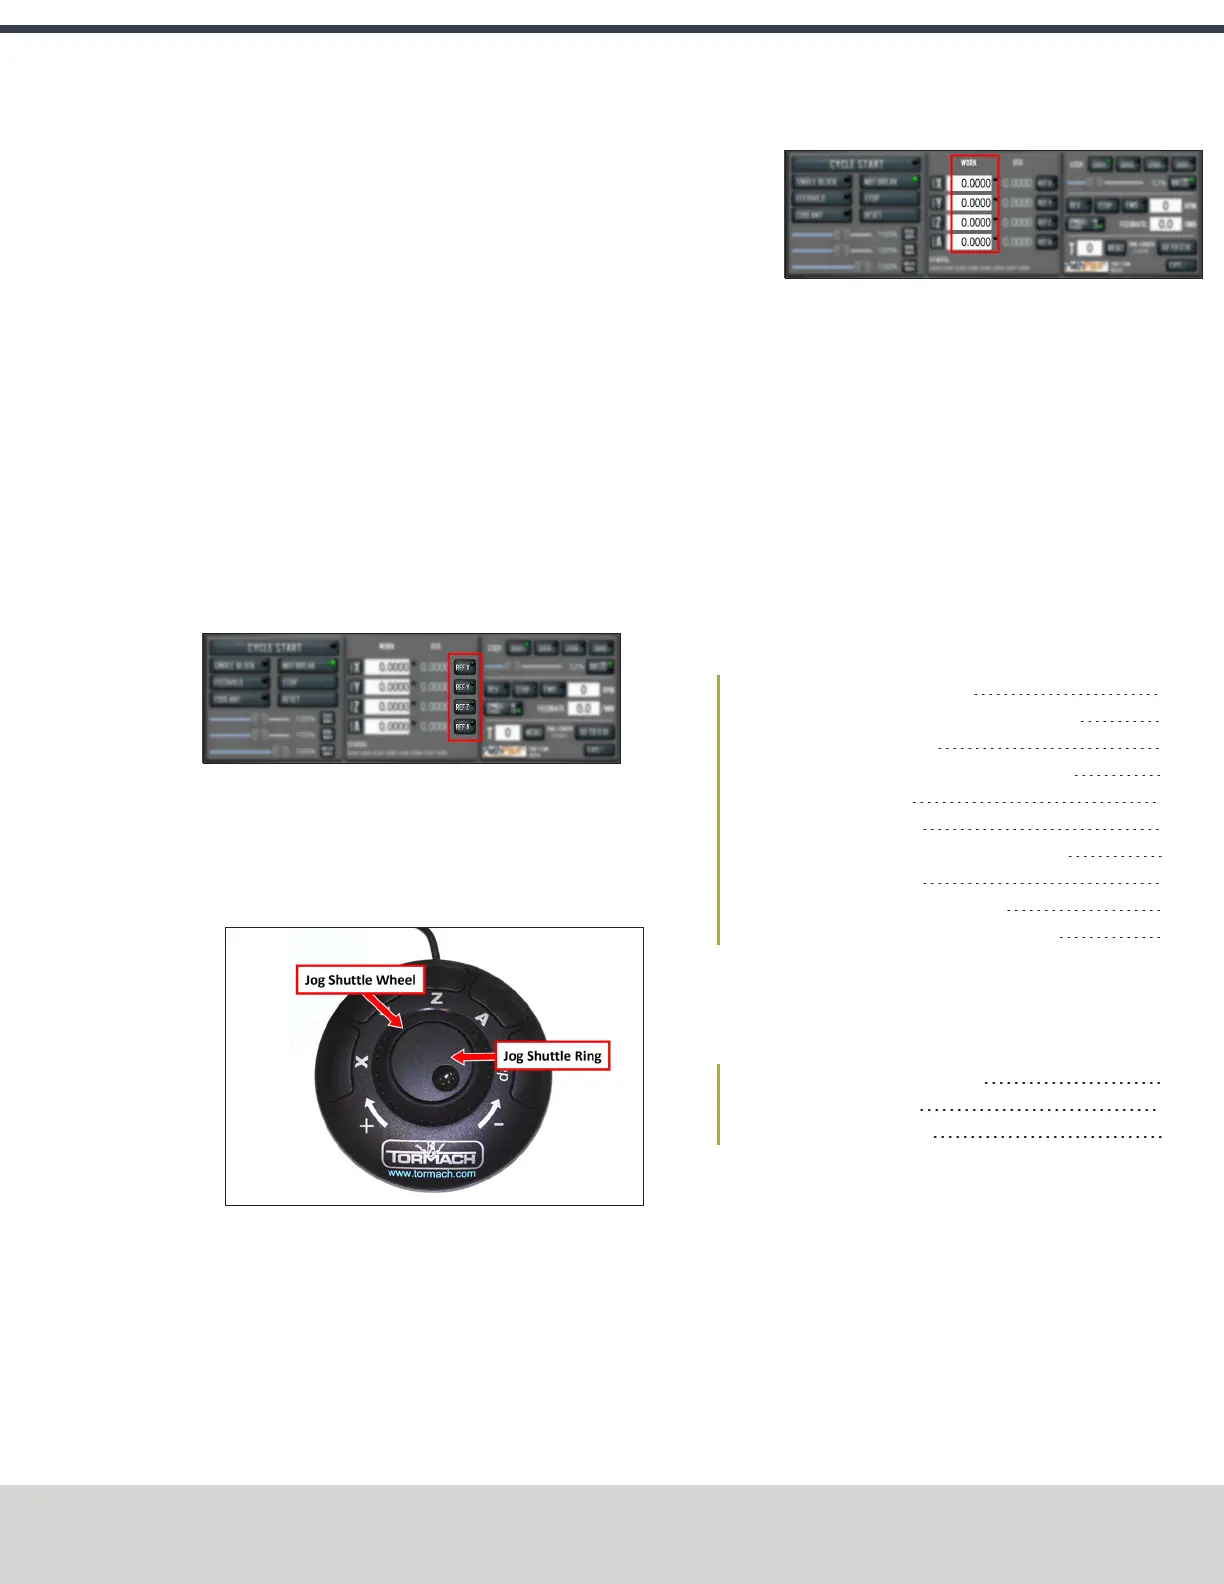
6. If applicable, verify the optional JogShuttle:
l Press any axis button on the JogShuttle — X, Y, Z, or
A — to select an axis.
Figure 4-42: Functions on the optional JogShuttle.
From the PathPilot interface, on the Main tab, the
corresponding green Axis light comes on.
Figure 4-43: Axis lights.
l Turn the Jog Shuttle Ring in any direction to move the
selected axis, then turn it in the opposite direction to
reverse the direction.
4.8 INSTALL ACCESSORY COMPONENTS
Install accessory components in the order specified, skipping
any components that you don't have. Otherwise, you may need
to remove an item in order to install another one. For example,
if you install the Full Enclosure Kit, you must remove it in order
to install any other component.
When you're finished installing accessory components, go to
"Set Up the PathPilot Controller" (page90).
4.8.1 Set Up the Automatic Oiler 53
4.8.2 Install the FRLFilter-Regulator-Lubricator 54
4.8.3 Set Up the Coolant Kit 55
4.8.4 Install the Automatic Tool Changer (ATC) 56
4.8.5 Install the 4th Axis 64
4.8.6 Install the Chip Pans 68
4.8.7 Install the Backsplash and Splash Guard 69
4.8.8 Install the Enclosure 69
4.8.9 Set up the Door Lock Switch Kit 80
4.8.10 Install the PathPilot Operator Console 84
4.8.1 Set Up the Automatic Oiler
If you installed an automatic oiler, you must now set it up.
Complete the following steps in the order listed:
Look for Leaks and Clear the Lines 53
Specify the Interval Time 53
Specify the Actuation Time 54
Look for Leaks and Clear the Lines
1. Power on the oiler.
2. On the oiler's control panel, push and hold the Feed
button for two seconds.
The oiler pushes oil through the distribution system.
3. Examine the distribution system to make sure that oil
doesn't leak while the system is operating.
Specify the Interval Time
The oiler distributes oil at the following times:
©Tormach® 2020
Specifications subject to change without notice.
Page 53 Tormach 1100MX Operator's Manual (Version 0720A)
For the most recent version, see tormach.com/support
 Loading...


