4: INSTALLATION
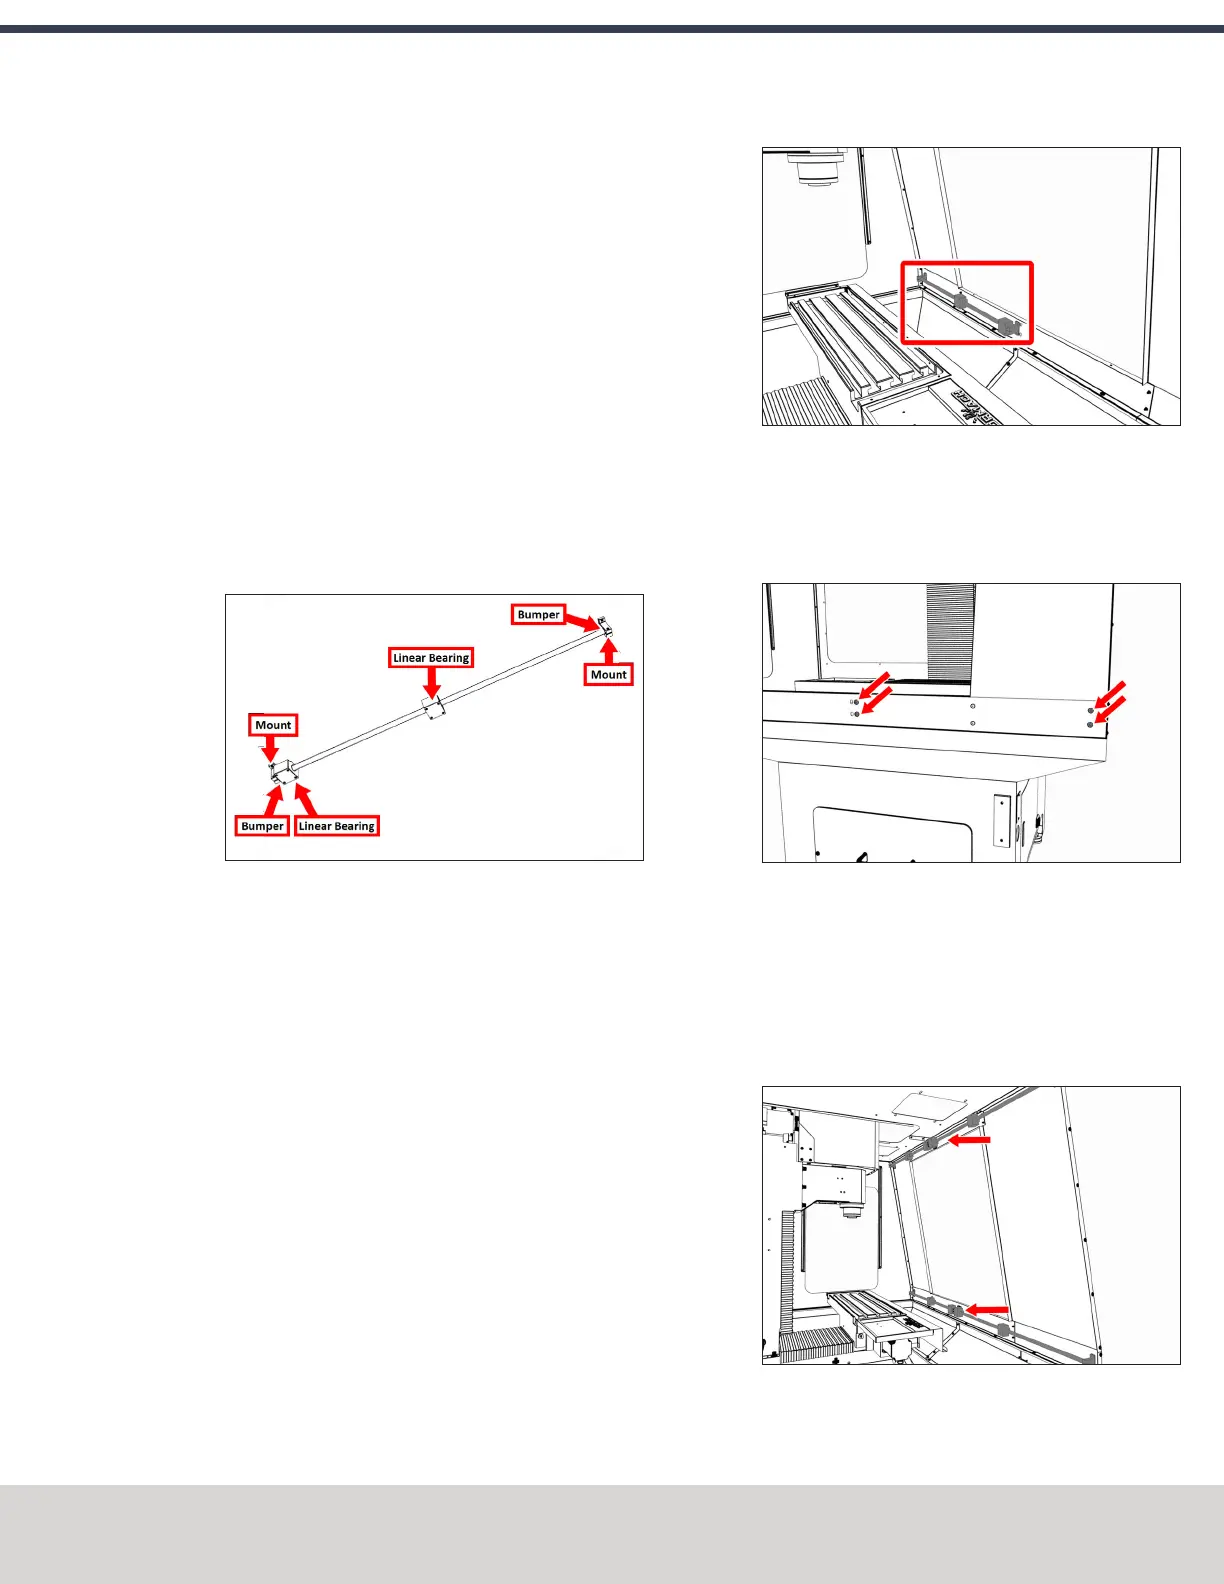
2. Assemble each linear rail in the following order:
a. Slide one linear rail mount onto the linear rail.
Don't completely tighten the clamping screw on the
linear rail mount. It's easier to install and align the
linear rails with loose clamping screws.
b. Slide one bumper onto the linear rail.
c. Slide two linear bearings to meet the bumper on the
linear rail.
d. Slide one bumper onto the opposite end of the linear
rail.
e. Slide one linear rail mount onto the opposite end of
the linear rail.
Make sure that the linear rail mount's clamping
screw faces the same direction as the linear rail
mount that you installed in Step A.
Figure 4-102: Linear rail assembly.
3. Repeat Step 2 for the remaining three linear rails.
Install the Linear Assemblies
1. Align one short linear rail assembly to the two holes on
the inside of both the right front panel and the front
lower panel.
The linear rail mount's clamping screws must face up.
Figure 4-103: Right lower linear assembly attached to
the inside of the enclosure's lower right side.
2. Attach the short linear rail assembly to the outside of
both the right front panel and the front lower panel with
two sets of two M6 × 1.0 - 12 screws.
Figure 4-104: Right lower linear assembly attached to
the outside of the enclosure's lower right side.
3. Repeat Steps 1 to 2 for the remaining three linear rails,
with the linear rail mount's clamping screws face in the
following directions:
l Up on the lower linear assemblies
l Down on the upper linear assemblies
Figure 4-105: Four linear assemblies attached to the
enclosure.
©Tormach® 2020
Specifications subject to change without notice.
Page 75 Tormach 1100MX Operator's Manual (Version 0720A)
For the most recent version, see tormach.com/support
 Loading...


