4: INSTALLATION
Verify the Installation 67
Required Tools
This procedure requires the following tools. Collect them
before you begin.
l #2 Phillips screwdriver
l Dead-blow hammer (or similar)
l Magnetic dial indicator
l Newspaper (or similar)
Unpack the 4th Axis
1. Inspect the item(s):
l Photograph any damage that may have occurred
during shipping.
l Note any damage on the delivery receipt before
signing for the shipment.
l Verify the received goods against the packing list.
If there is any damage or shortages, you must contact
Tormach within 30 days of receipt. Email
support@tormach.com to contact Tormach Technical
Support for guidance on how to proceed.
2. Make sure that all loose parts are removed from the
package before discarding any shipping materials.
Lubricate the Rotary Table
NOTICE! Never operate the 4th Axis without lubrication.
Operating the 4th Axis without lubrication may void your
warranty.
The rotary table is shipped without oil. Before operating, you
must fill the rotary table with oil. Only use AGMA 2 gear oil or
SAE 30 weight motor oil. Do not use way oil.
Note: After the rotary table is filled with oil, you must
allow it to drain the excess oil, which may take up to
two days. You may use the 4th Axis while it drains.
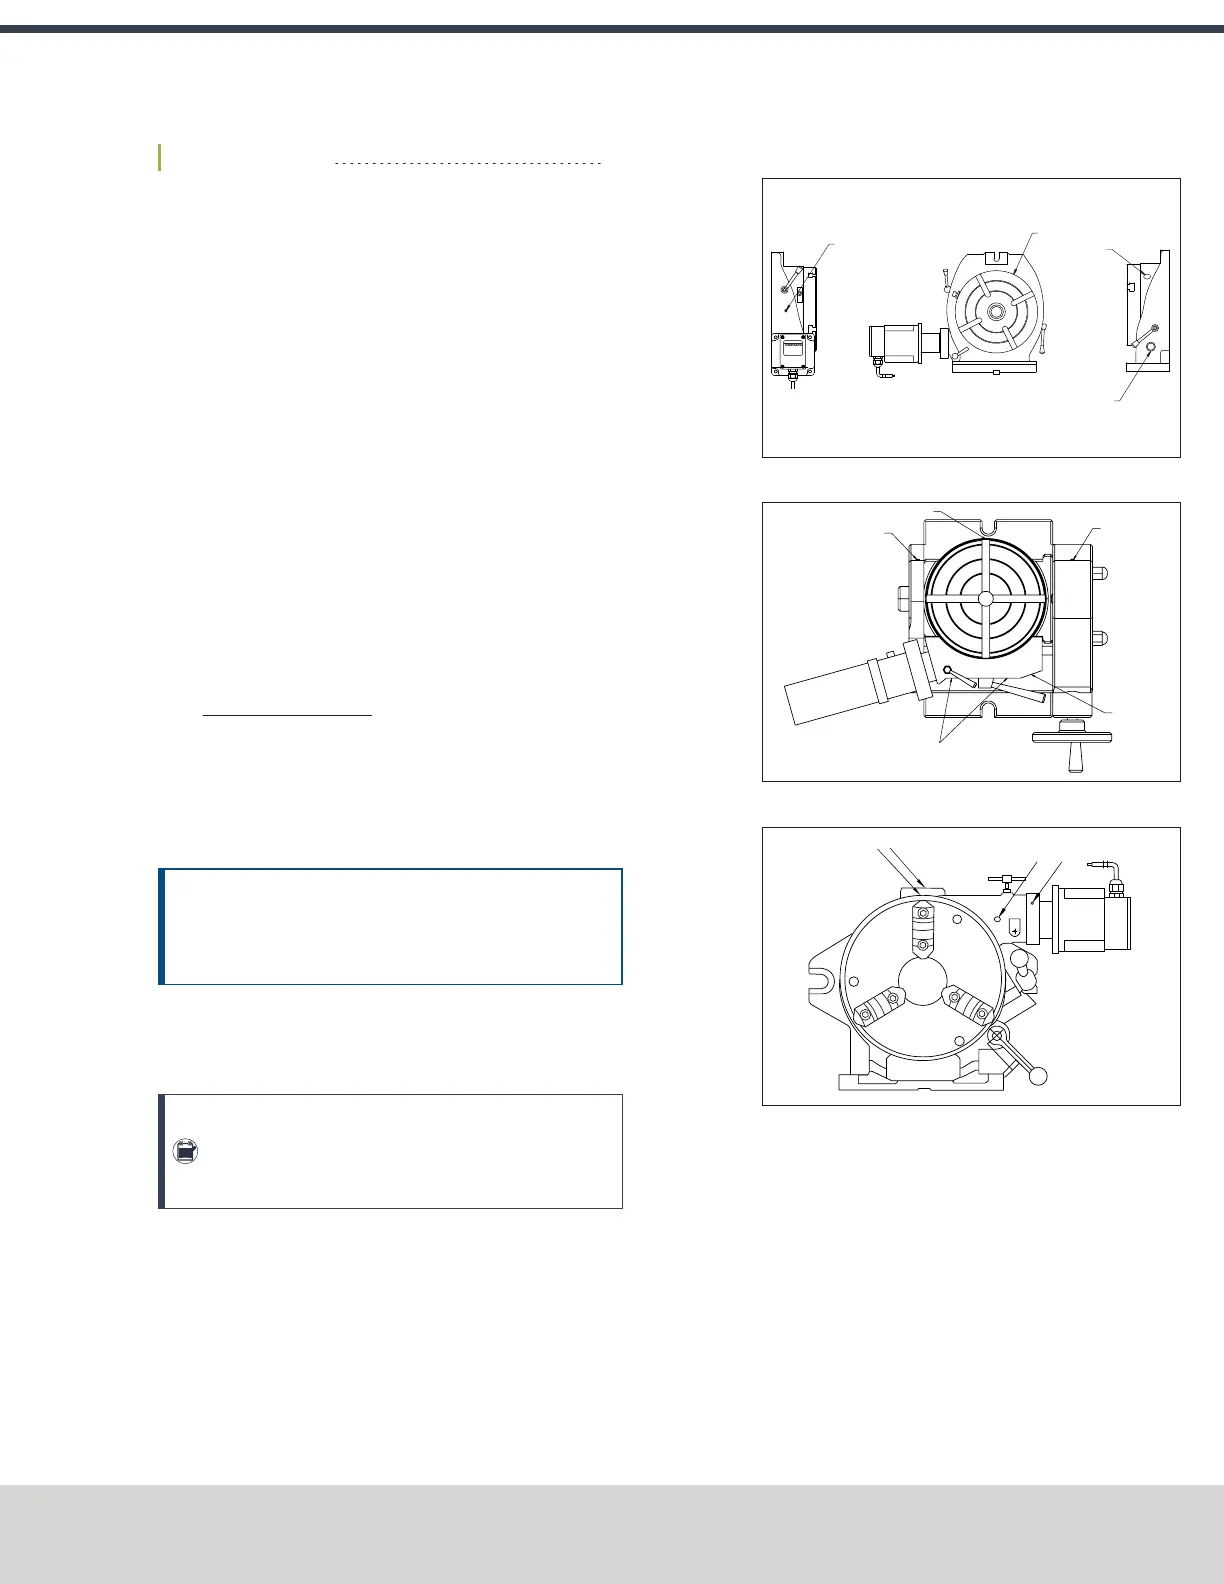
1. Identify the oil fittings on the rotary table.
OIL POINT
OIL PLUG
OIL SIGHT
GLASS
OIL POINT
Figure 4-71: Oil fittings on a standard rotary table.
OIL POINT
OIL POINT
OIL POINT
OIL POINT
OIL POINTS
Figure 4-72: Oil fittings on a tilting rotary table.
Figure 4-73: Oil fittings on a super spacer rotary table.
2. On the standard rotary tables (6 in. Rotary Table or 8 in.
Rotary Table), identify the oil reservoir.
3. Use a trigger-style oil can to fill the oil fittings: Insert the
tip of the oil can into each fitting, and pump in oil until
you can feel back pressure.
©Tormach® 2020
Specifications subject to change without notice.
Page 65 Tormach 1100MX Operator's Manual (Version 0720A)
For the most recent version, see tormach.com/support

 Loading...


