36
EN
Timer Recording
You can programme the unit to record up to 32
programmes within a month in advance. Daily or
weekly recordings are available.
Preparing for Timer Recording:
• Be sure to set the clock before programming a
Timer Recording. Refer to “Setting the clock” on
page 26.
• Check that the recording media (internal HDD or
DVD) has enough recordable space for the time
you set.
• Insert a recordable disc if you are recording to a
DVD.
• Use only the HDD or CPRM-compatible VR
mode DVD-RW discs for recording copy-once
programmes. (See page 30.)
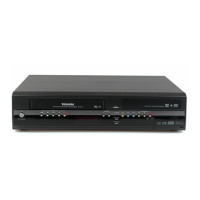
1 Press [TIMER PROG.].
Timer Programming List will appear.
• You can access this screen from the Setup
Menu also.
2 Select a line indicated “New
Program” using [Cursor
U / D], then
press [ENTER].
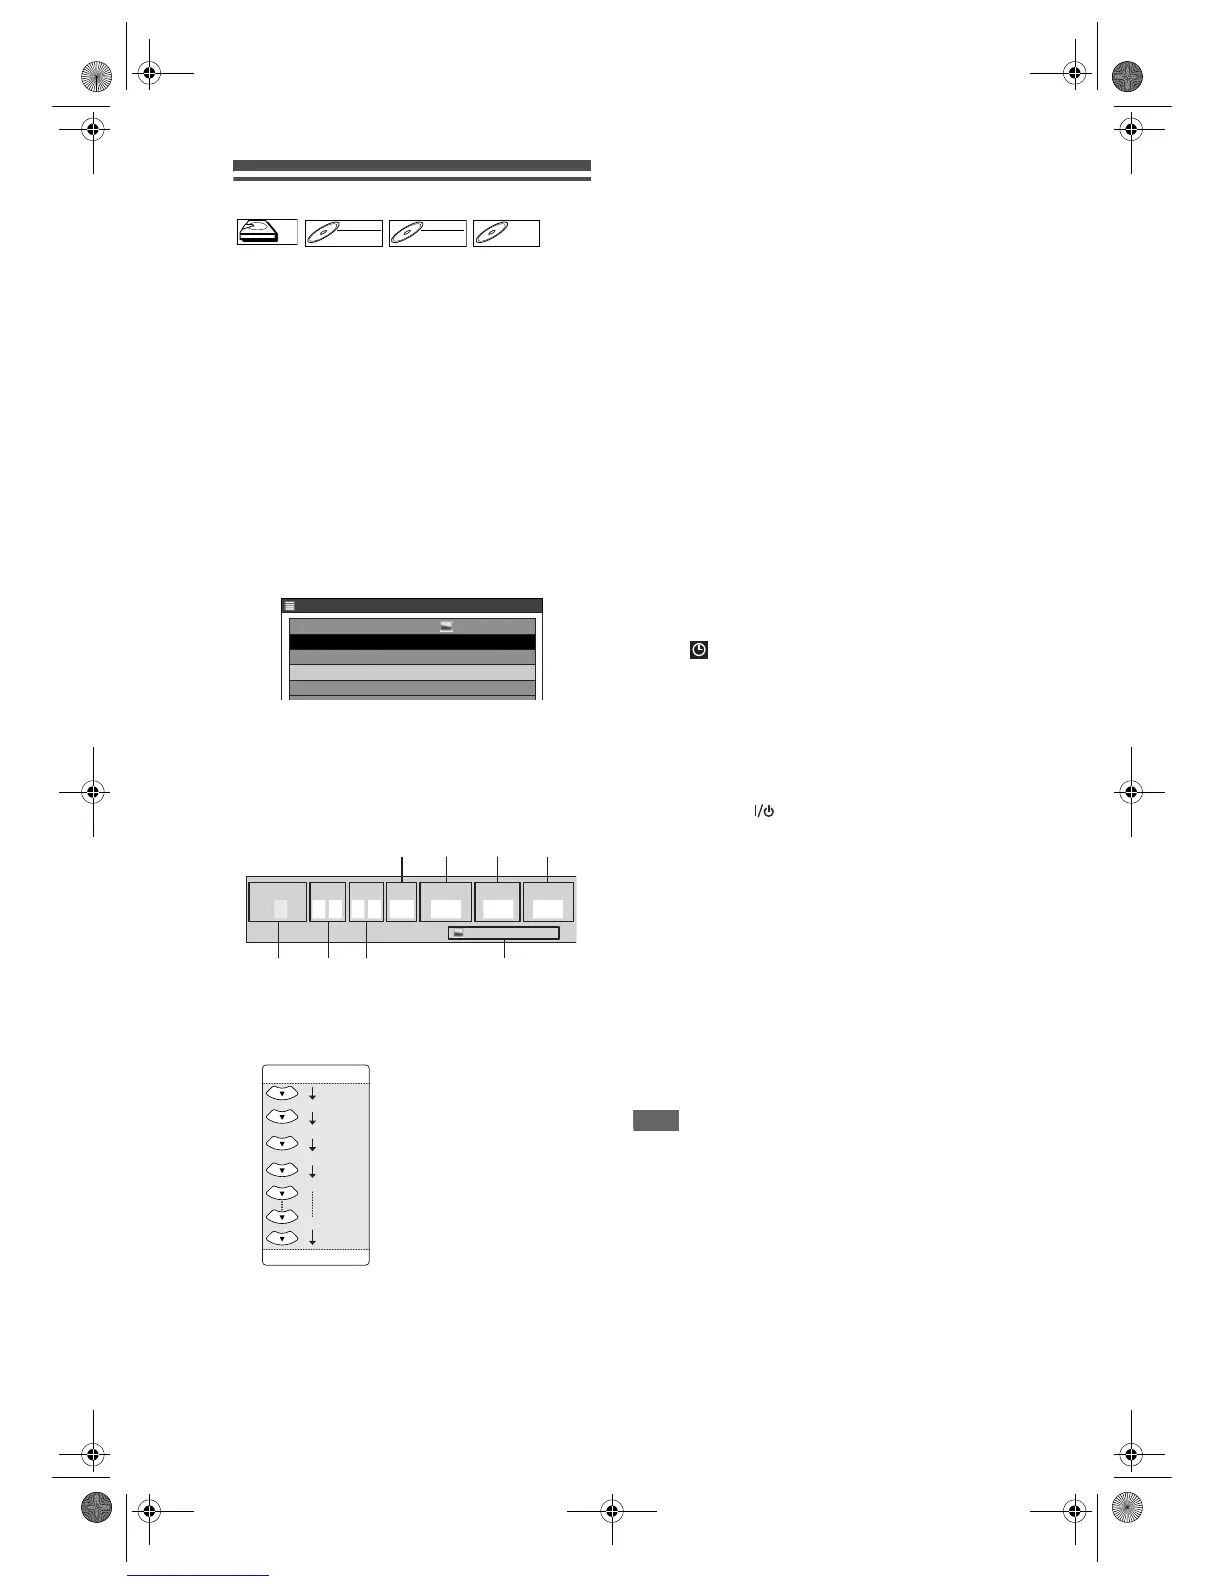
Timer Programming Window will appear.
1 Recording Date:
When pressing [Cursor D] at the current date,
the setting will change as follows.
e.g., 1st January
2 Start Time:
3 End Time:
4 Recording Channel:
To record from an external input, select “AV1”,
“AV2” or “AV3”. (Using camcorder or other
source.)
5 Recording Media (HDD or DVD):
To record onto the HDD, select “HDD”. To record
onto a disc, select “DVD”. VCR is not compatible
with Timer Recording.
6 Rec Mode:
Refer to “Rec Mode” on page 29.
7 Available recording time left on the HDD /
DVD under the programmed Rec Mode.
• If there are more than one programme, the
recording time of the programmes other than the
one being edited currently will not be counted in
the calculation of the total remaining time on the
HDD disc.
8 PDC system:
Refer to “PDC (Programme Delivery Control)” on
page 37.
• PDC system is only available for HDD.
3 Select an item to set using
[Cursor
L / P], and set the contents
to suit your preference using
[Cursor
U / D].
• Pressing [RETURN] will reset all the information
entered.
4 Press [ENTER] when all the
information is entered.
The icon will appear on the Front Panel
Display indicating one or more Timer Recordings
are in standby.
• To set another programme, repeat steps 2 to 4.
• When programmes are overlapped, a warning
message “Timer program overlap.” will appear.
For details on overlapped Timer Programmings,
refer to “Hints for Timer Recording” on page 38.
5 Press [TIMER PROG.] to exit.
• If you press [ ON / STANDBY] to turn the unit
to standby mode, it will turn on before 3 minutes
from the programmed recording time, and start
recording at the programmed recording time.
When the recording is completed, you will be
asked whether to turn off the unit. The unit will be
turned off automatically if you select “Yes” or if you
do not make any selection within 1 minute.
• To stop recording in progress, press and hold
[STOP S] for 2 seconds, or press [STOP S] on
the front panel.
Relay Recording:
If the disc runs out of the space during Timer
Recording to a DVD, or if there is no recordable
disc in the unit, it automatically detects it and
change the recording media to the HDD. This
feature is available only for Timer Recording but
not for OTR.
Note
• If you have not set the clock, the clock setting
window will appear instead of Timer Programming
List at step 1. Continue from step 3 in “Setting the
clock” on page 26 before programming the timer.
• If a basic recording or One-touch Timer Recording is
in progress on the VCR and the Timer Recording set
for HDD or DVD is about to begin, the unit will
automatically switch to the programmed channel
within 15 seconds before the programmed time, and
the recording in progress on the VCR will be
cancelled UNLESS their recording channel is the
same. If their recording channel is the same, the
Timer Recording for HDD or DVD will start without
cancelling the recording currently in progress on the
VCR. In this case, the recording of the same channel
will be made on both VCR and the HDD or DVD.
HDDHDD
DVD-RWDVD-RW
VR
DVD-RWDVD-RW
Video
DVD-RDVD-R
TIMER PROGRAMMING
1 / 1
PDC
Sun
New Program
31/12 19:00 20:00 P12 HDD Off
Mode
SP
Wed 20 / 12 23:30
Date
Start
End CH
HDD/DVD
1:00HDD SP
31/12
19:00 20:00
0:39HDD SP
Mode PDC
P12 HDD OffSP
Date
Start
End
CH
HDD/DVD
Sun
1
2
3
7
4
58
6
Daily
Mon-Fri
01/01
31/01
W-Sat
W-Fri
W-Sun
E439BBD_EN.book Page 36 Wednesday, May 31, 2006 4:01 PM
 Loading...