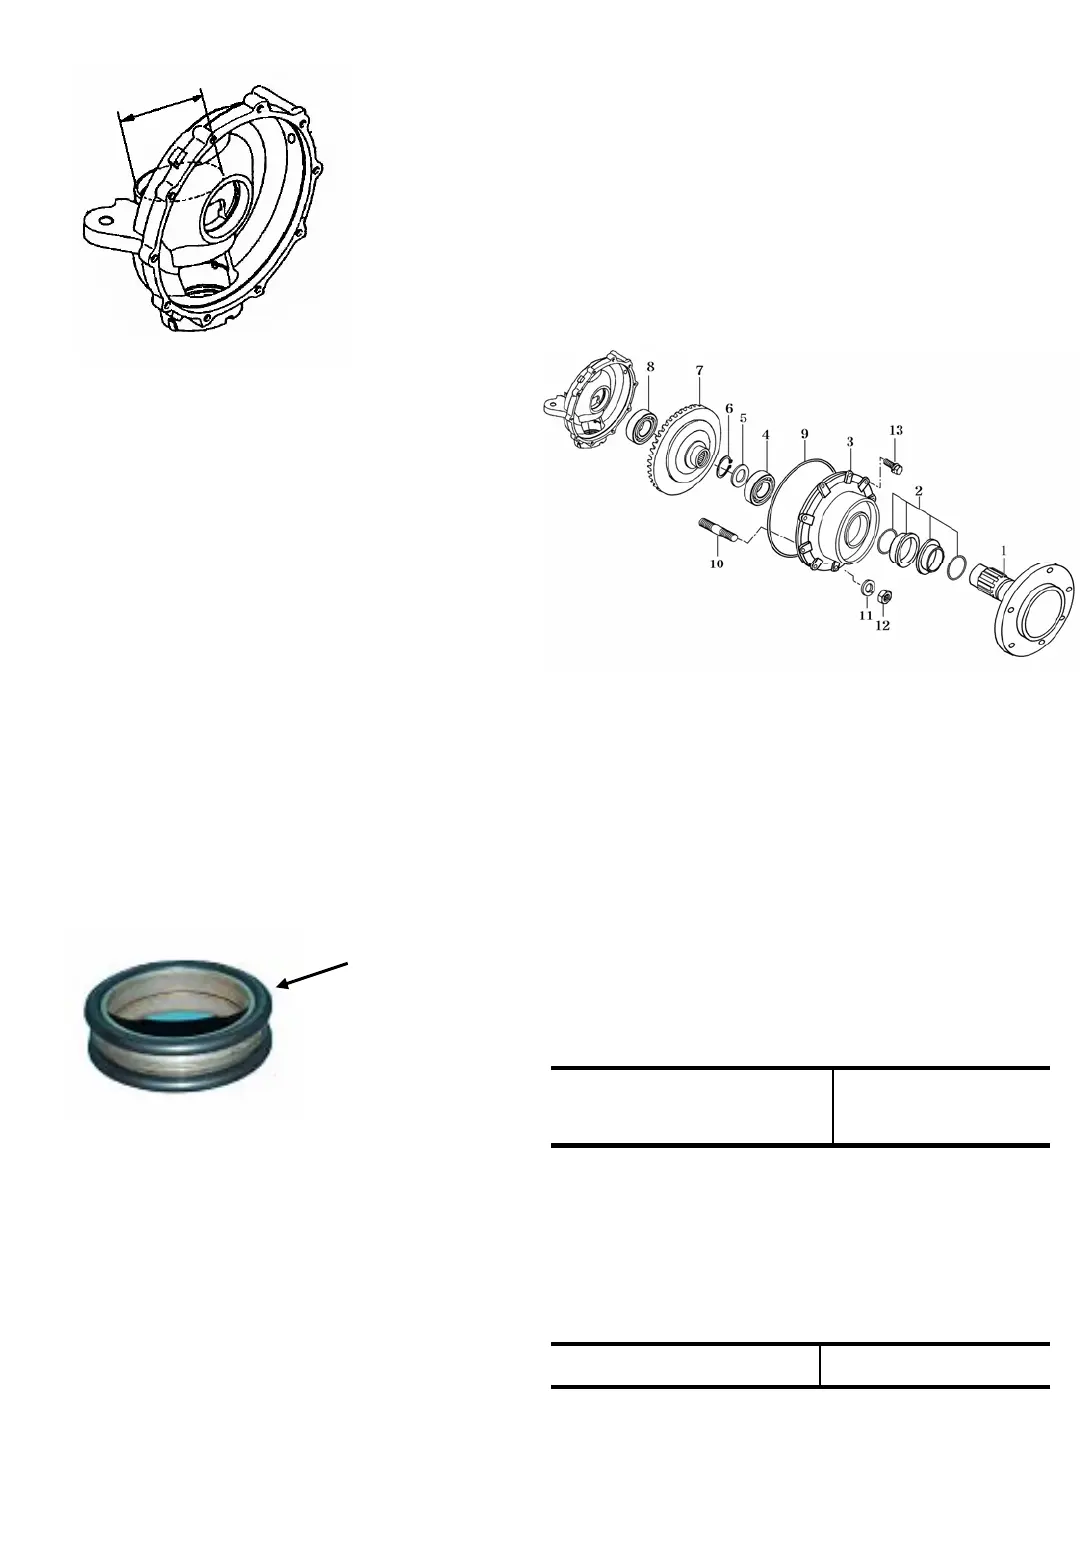
Fig.6-25
6-13
3.3 REASSEMBLY
Reassemble the parts in reverse order of
disassembly, following these instructions.
1) Apply an adhesive (THREE BOND TB1215)
to the following parts.
a.Contact surfaces between the final case B and
wheel shaft cover.
b.Contact surfaces between the final case A and
front axle.
2) The installed wheel shaft should turn smoothly.
3) When installing unitized seals on the wheel
shaft cover and the rotating part between the
final cases (A and B),apply force only to the
outer circumference of the seal as shown in
Fig.6-26 to avoid deformation.
Fig.6-26
4) The oil seal should be coated with grease in
advance.Then install them carefully,assuring
that their lips are not turned over.
5) The reassembled final case (B) should turn
smoothly until it makes contact the stopper.
6) When the wheel (tire) is reinstalled, turn it by
hand to make sure that all the mechanism
turns smoothly without making any noise.
7) After adjustment of the toe-in,perform road
tests.There should be no abnormalities such
as vibration,abnormal noises,defected
steering wheel operation,etc.
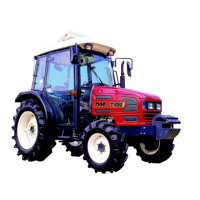
-Wheel shaft cover
1) Every snap ring(6) should be seated securely
in its groove.
2) Be sure the numbers of Bevel gear is correct
Fig.6-27
-Final drive case A
1) Each parts should be washed clean before
reassembly.
2) Apply multi-purpose,quality grease to bearings
in advance
3) Every time a gear and bearings are installed,
its smooth rotation should be checked
4) Adjust Back lash between bevel gear (25) and
bevel gear (23) with collar(28) .
Back lash
mm(in)
0.1-0.2
(0.003-0.008 in)
5) Apply oil to the housing ahead of time to
install the mechanical seal.
6) Be sure that the length of shaft.
7) Tighten the bolts to the specified torque.
Take care not
to deform
these portions
Tightening torque 550-700Kgf.cm