1. Open the front door of the
distribution cabinet (if furnished).
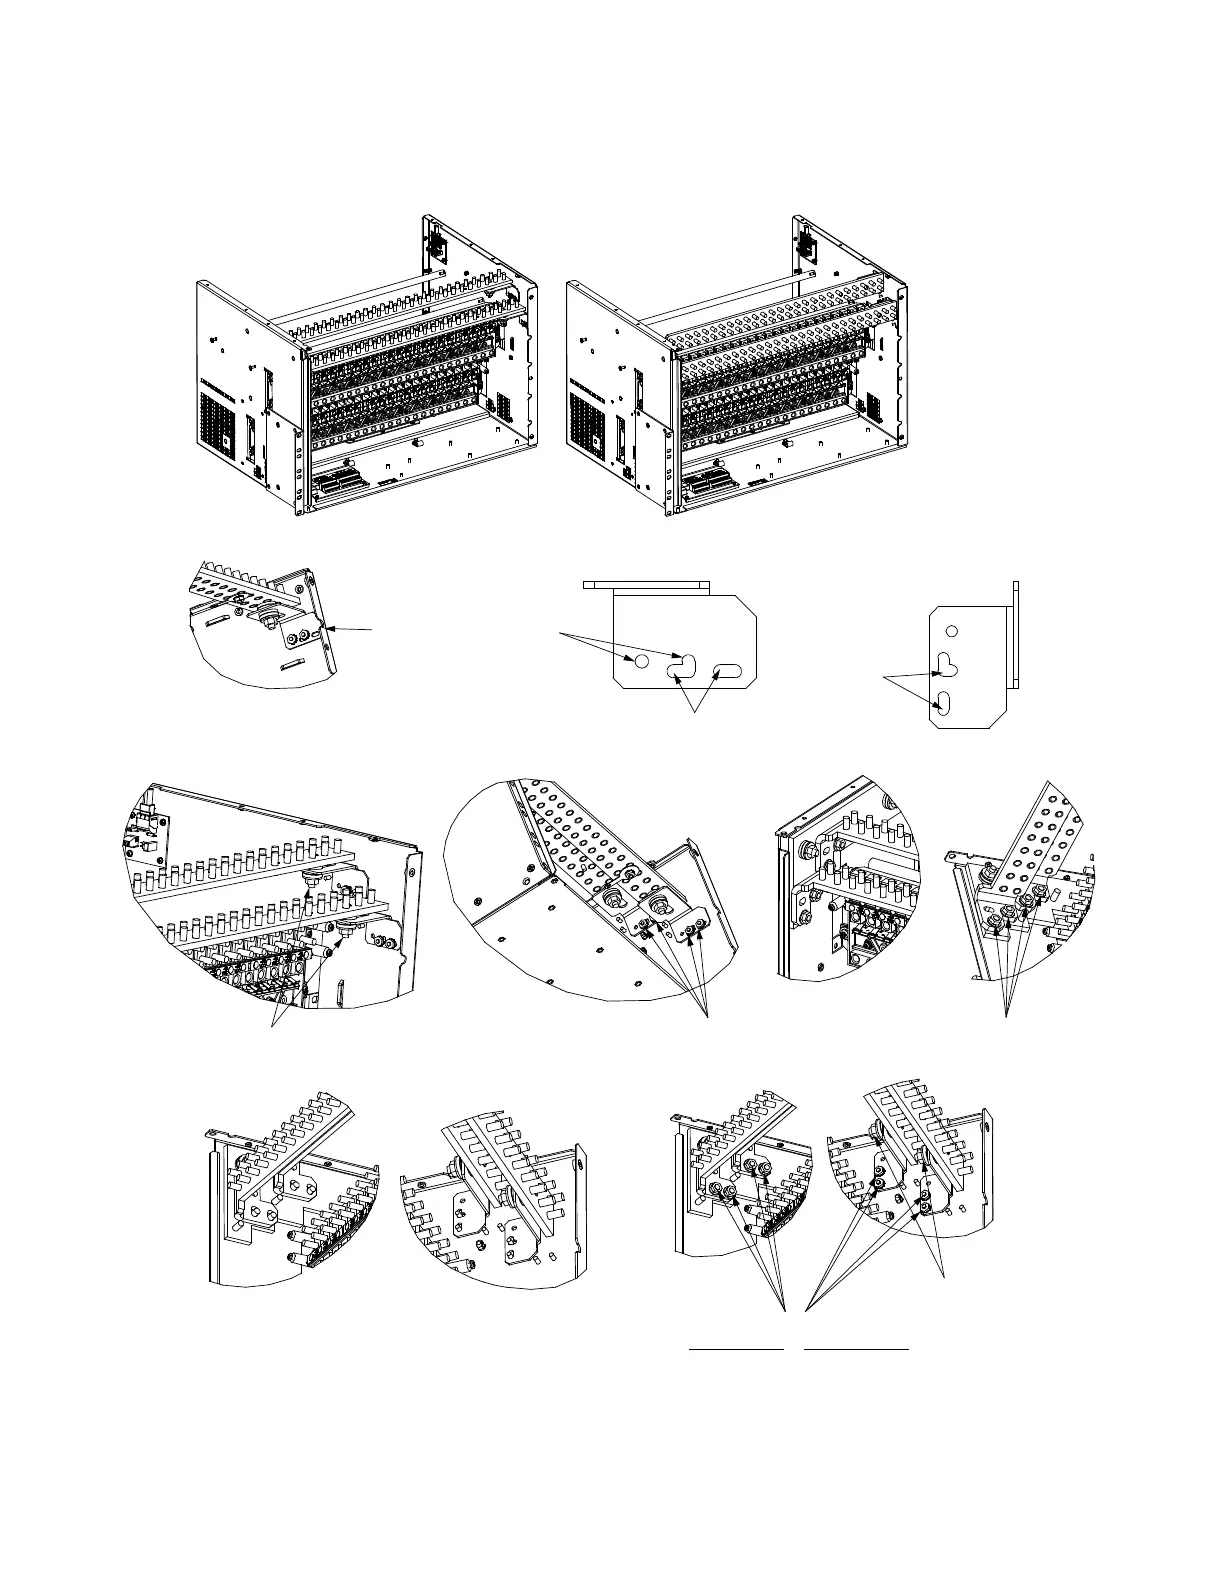
Changing Orientation
from Horizontal to Vertical
Vertical Orientation
(wire routing top)
Front
Front
Horizontal Orientation
(wiring routing rear)
WARNING! In a List 25, if you change the orientation in the
field of the load return busbars (from horizontal to vertical),
visually check that with the door closed the return busbar
studs do not contact the door sheet metal surface. Instead, if
contact is made it is with the insulation strip adhered on the
door.
5. Rotate busbars and slip onto studs.
6. Replace hardware and tighten.
7. Tighten hardware.
(Torque to 75 in-lbs).
Right Side
Left Side
Right Side
Left Side
Left Side Studs
Busbar Assembly
1/4” Flat Washers
1/4” Lock Washers
1/4” Nuts
(Torque to 75 in-lbs).
Right Side Studs
Busbar Assembly
6-32 Keps Nut
(Torque to 9.6 in-lbs).
2. Loosen this hardware.
Right Side
Left Side
3. Remove this hardware.
4. Remove this hardware.
Vertical Busbar Orientation
Horizontal Busbar Orientation
Bottom holes of the
slots to be used to
position the bracket
and tighten with
hardware.
Left side holes of the slots to be used
to position the bracket and tighten
with hardware.
The same bracket is used in a
List 27 system as well. These
holes to be used to position
the bracket in List 27 system
(also when using the old
revision return busbars [with
flanges]) and tighten with
hardware.
List 27
System
Right Side Bracket Hole Pattern Detail for Installation Orientations

 Loading...


