QUICK START SETTING UP A TRANSITION
19
Each time you press the button the color changes in the background color sam-
ple and at the Output. Continue pressing the button until you see a color you
like.
• You can also define a border color and style to use at the edge of most transi-
tions and PIPs. Press
BORDER COLOR and the color around the background color
sample shows you the new choice. Press
BORDER STYLE to select from different
styles for the border.
See “Color Selector” on page 48 for more information.
Setting up a Transition
To set up a transition you need to select the sources you want to use and the transi-
tion you want to use when switching between them. Here’s how to transition from
source A to source B using a horizontal wipe.
• Press CUT/A to set A as the CURRENT source. MXProDV shows a steadily glowing
light below the
CUT button you press.
• Press
NEXT/B to set B as the NEXT source (the one you want to see after the tran-
sition finishes running). The LED light above the button you press flashes to indi-
cate it is the NEXT source.
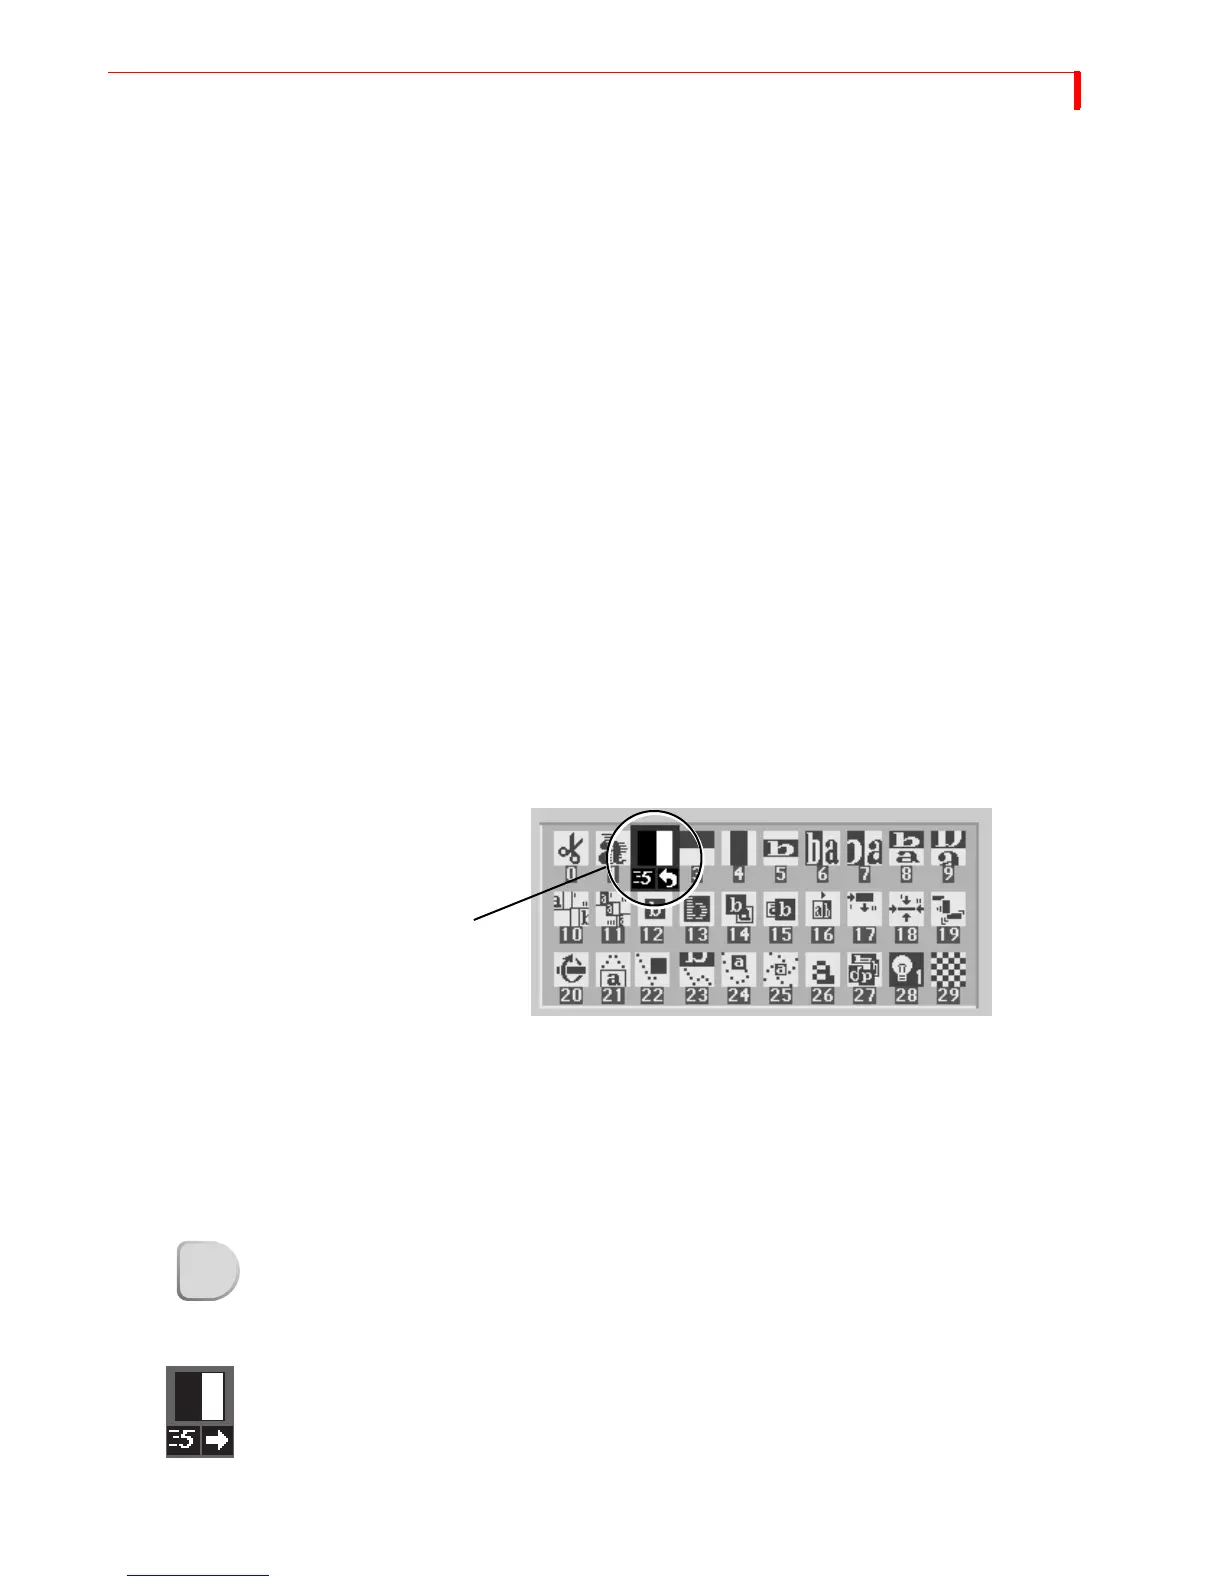
• Use the ARROW keys to highlight the wipe transition in the transitions menu, as
shown in the following example.
Use
LEFT and RIGHT ARROWS to move the selection horizontally. Use UP and DOWN
ARROWS to move the selection vertically: or, press 2 then OK to select the transi-
tion by number.
The screen shows the desired effect—the horizontal wipe.
Running Transitions
You can run transitions automatically or manually.
Automatic
Transitions
• Press PLAY. MXProDV runs the transition at a pre-determined speed.
MXProDV transitions between the two sources using the horizontal wipe transi-
tion. Both the Preview and Output screens show the results.
At the end of the wipe, B is on the OUTPUT monitor — it has become the CURRENT
source. The yellow highlight above the preview images has changed to reflect that.
Furthermore, A is now the NEXT source and the green highlight has been changed to
A.
• To wipe back and forth between sources A and B, press
PLAY repeatedly.
• To change the speed at which a transition runs, press the
SPEED button. The
Speed indicator under the transition icon changes.
Selected Transition
PLAY
Speed