FRESH
WATER
COOLING
SERVICE
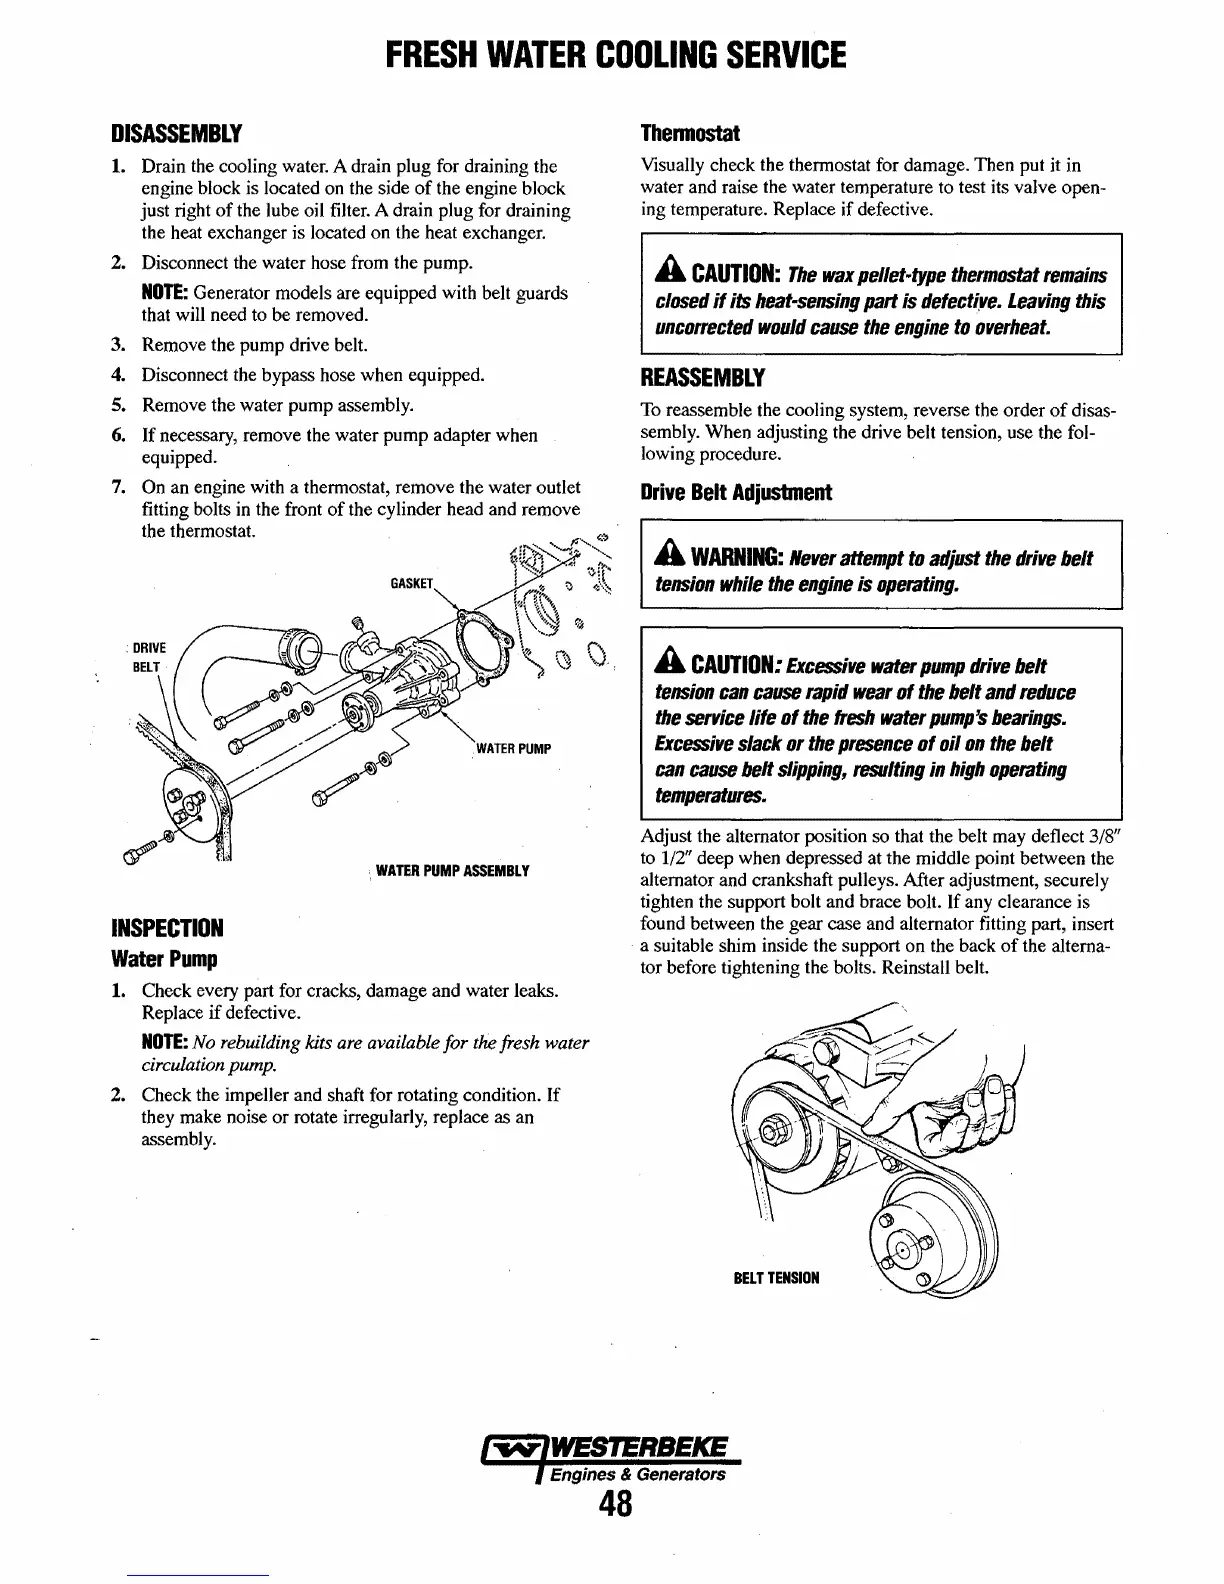
DISASSEMBLY
1.
Drain the cooling water. A drain plug for draining the
engine block is located on the side
of
the engine block
just right
of
the lube oil
fi1ter.
A drain plug for draining
the heat exchanger is located on the heat exchanger.
2. Disconnect the water hose from the pump.
NOTE:
Generator models are equipped with belt guards
that will need to be removed.
3. Remove the pump drive belt.
4. Disconnect the bypass hose when equipped.
5. Remove the water pump assembly.
6.
If necessary, remove the water pump adapter when
equipped.
7.
On an engine with a thermostat, remove the water outlet
fitting bolts
in
the front
of
the cylinder head and remove
the thermostat.
INSPECTION
Water
Pump
WATER
PUMP
ASSEMBLY
1. Check every part for cracks, damage and water leaks.
Replace
if
defective.
NOTE:
No rebuilding kits are available for the fresh water
circulation pump.
2. Check the impeller and shaft for rotating condition. If
they make noise or rotate irregularly, replace as an
assembly.
Thermostat
Visually check the thermostat for damage. Then put it in
water and raise the water temperature to test its valve open-
ing temperature. Replace if defective.
A
CAUTION:
The
wax
pellet-type
thermostat
remains
closed
if
its
heat-sensing
part
is
defect(ve.
Leaving
this
uncorrected
would
cause
the
engine
to
overheat.
REASSEMBLY
To
reassemble the cooling system, reverse the order
of
disas-
sembly. When adjusting the drive belt tension, use the fol-
lowing procedure.
Drive
Belt
Adjusbnent
A
WARNING:
Never
attempt
to
adjust
the
drive
belt
tension
while
the
engine
is
operating.
A
CAUTION:
Excessive
water
pump
drive
belt
tension
can
cause
rapid
wear
of
the
belt
and
reduce
the
service
life of
the
fresh
water
pump's
bearings.
Excessive
slack
or
the
presence
of oil
on
the
belt
can
cause
belt
slipping,
resulting
in
high
operating
temperatures.
Adjust the alternator position so that the belt may deflect 3/8"
to 1/2" deep when depressed at the middle point between the
alternator and crankshaft pulleys. After adjustment, securely
tighten the support bolt and brace bolt. If any clearance is
found between the gear case and alternator fitting part, insert
a suitable shim inside the support on the back
of
the alterna-
tor before tightening the bolts. Reinstall belt.
BELT
TENSION
Engines & Generators
48
 Loading...


