PROCEDURE
1 Make sure that the sealing faces of the pilot injection valve have the conditions that
follow:
•
Clean and dry
•
Satisfactory condition
•
No lubricant.
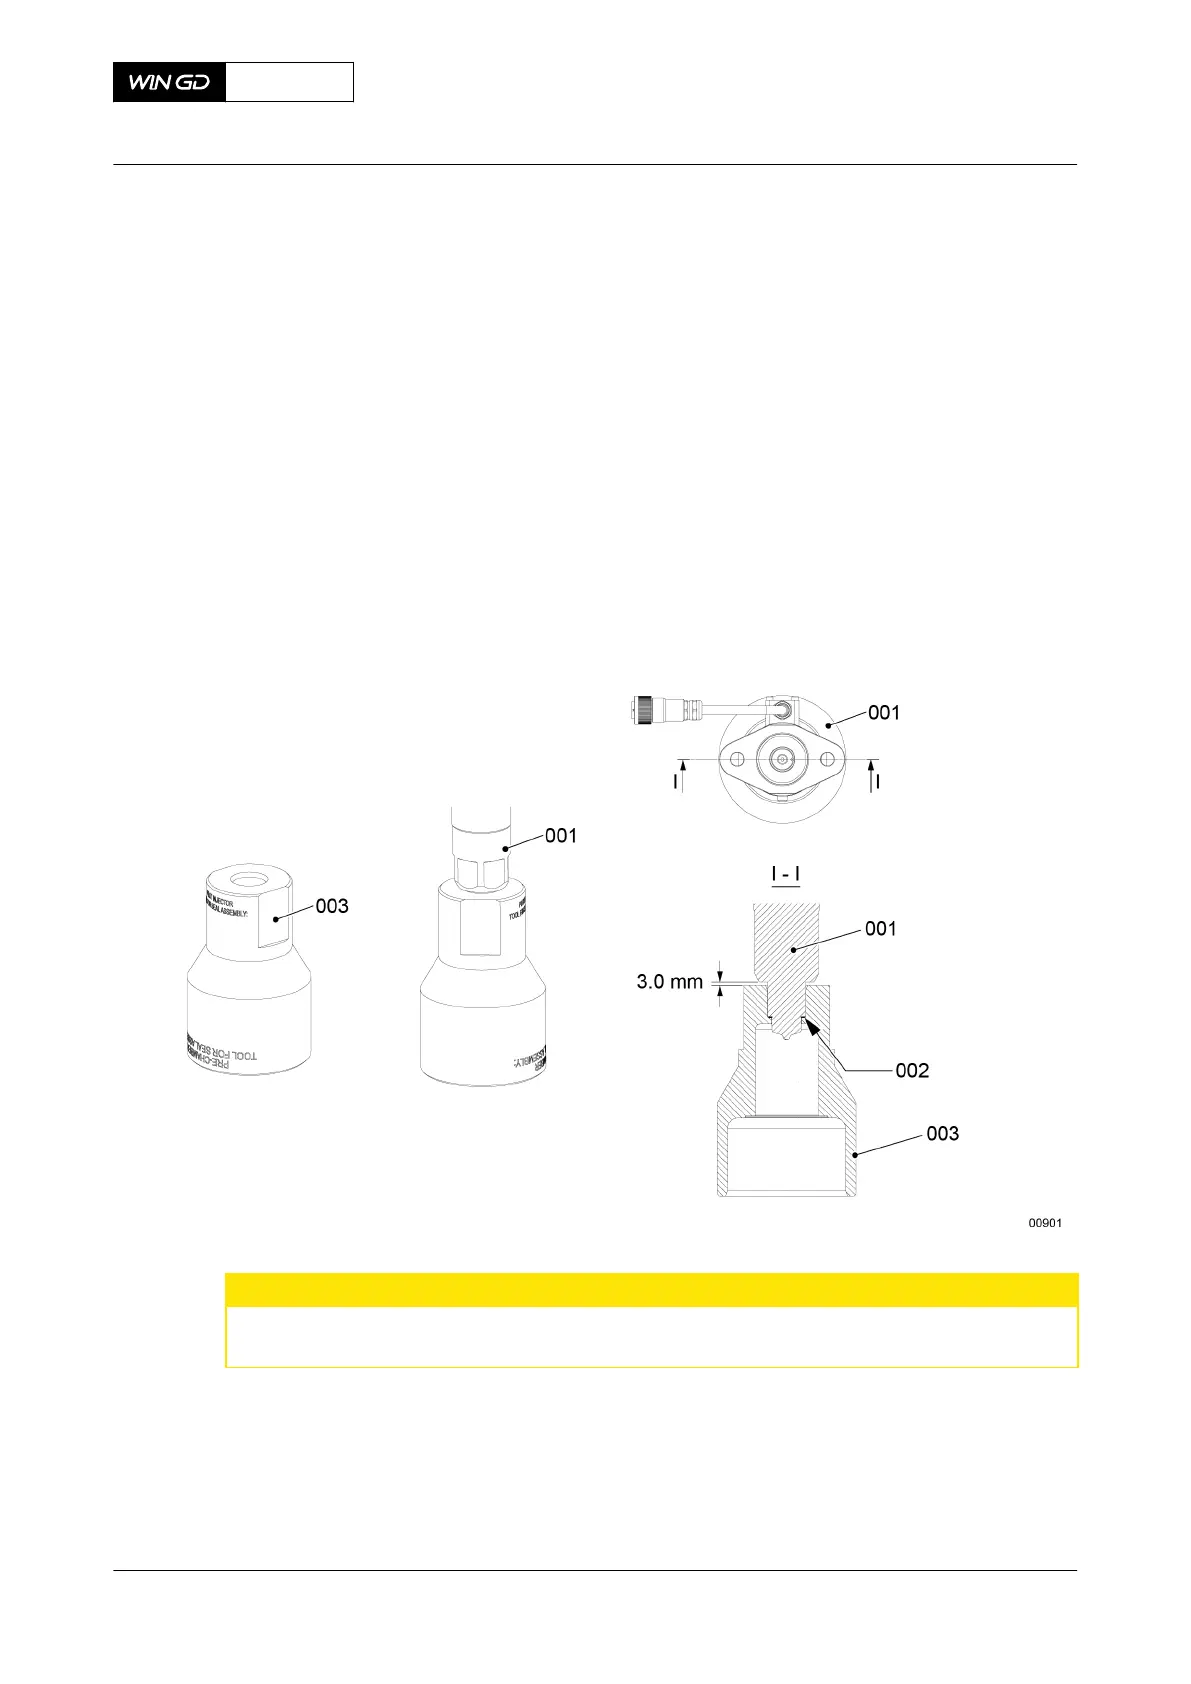
2 Put a new seal (002, Figure 7-80) on the pilot injection valve (001).
3 Use the assembly tool (003) to install the seal (002) on to the pilot injection valve (001).
4 Make sure that there is a distance of 3.0 mm between the pilot injection valve (001) and
the tool (003).
5 Remove the tool (003).
Fig 7-80 Seal - install
CAUTION
Injury Hazard: Always put on gloves and safety goggles that have a closed side frame
when you do work with white spirit. White spirit can cause damage to your skin and eyes.
6 Clean the pilot injection valve (003, Figure 7-81) with white spirit (for example Shellsol
TD, Shellsol T or Solvent FP68).
7 Apply oil to the new O-rings (005).
NOTE: The O-rings are part of the spare parts set for the pilot injection valve.
8 Put the pilot injection valve (003) into the valve holder (004).
9 Put the stud bolts (001) into the valve holder (004) as shown.
X72DF
AA00-2790-00AAA-720A-A
Maintenance Manual Pilot injection valve - install
Winterthur Gas & Diesel Ltd.
- 345 - Issue 002 2020-10