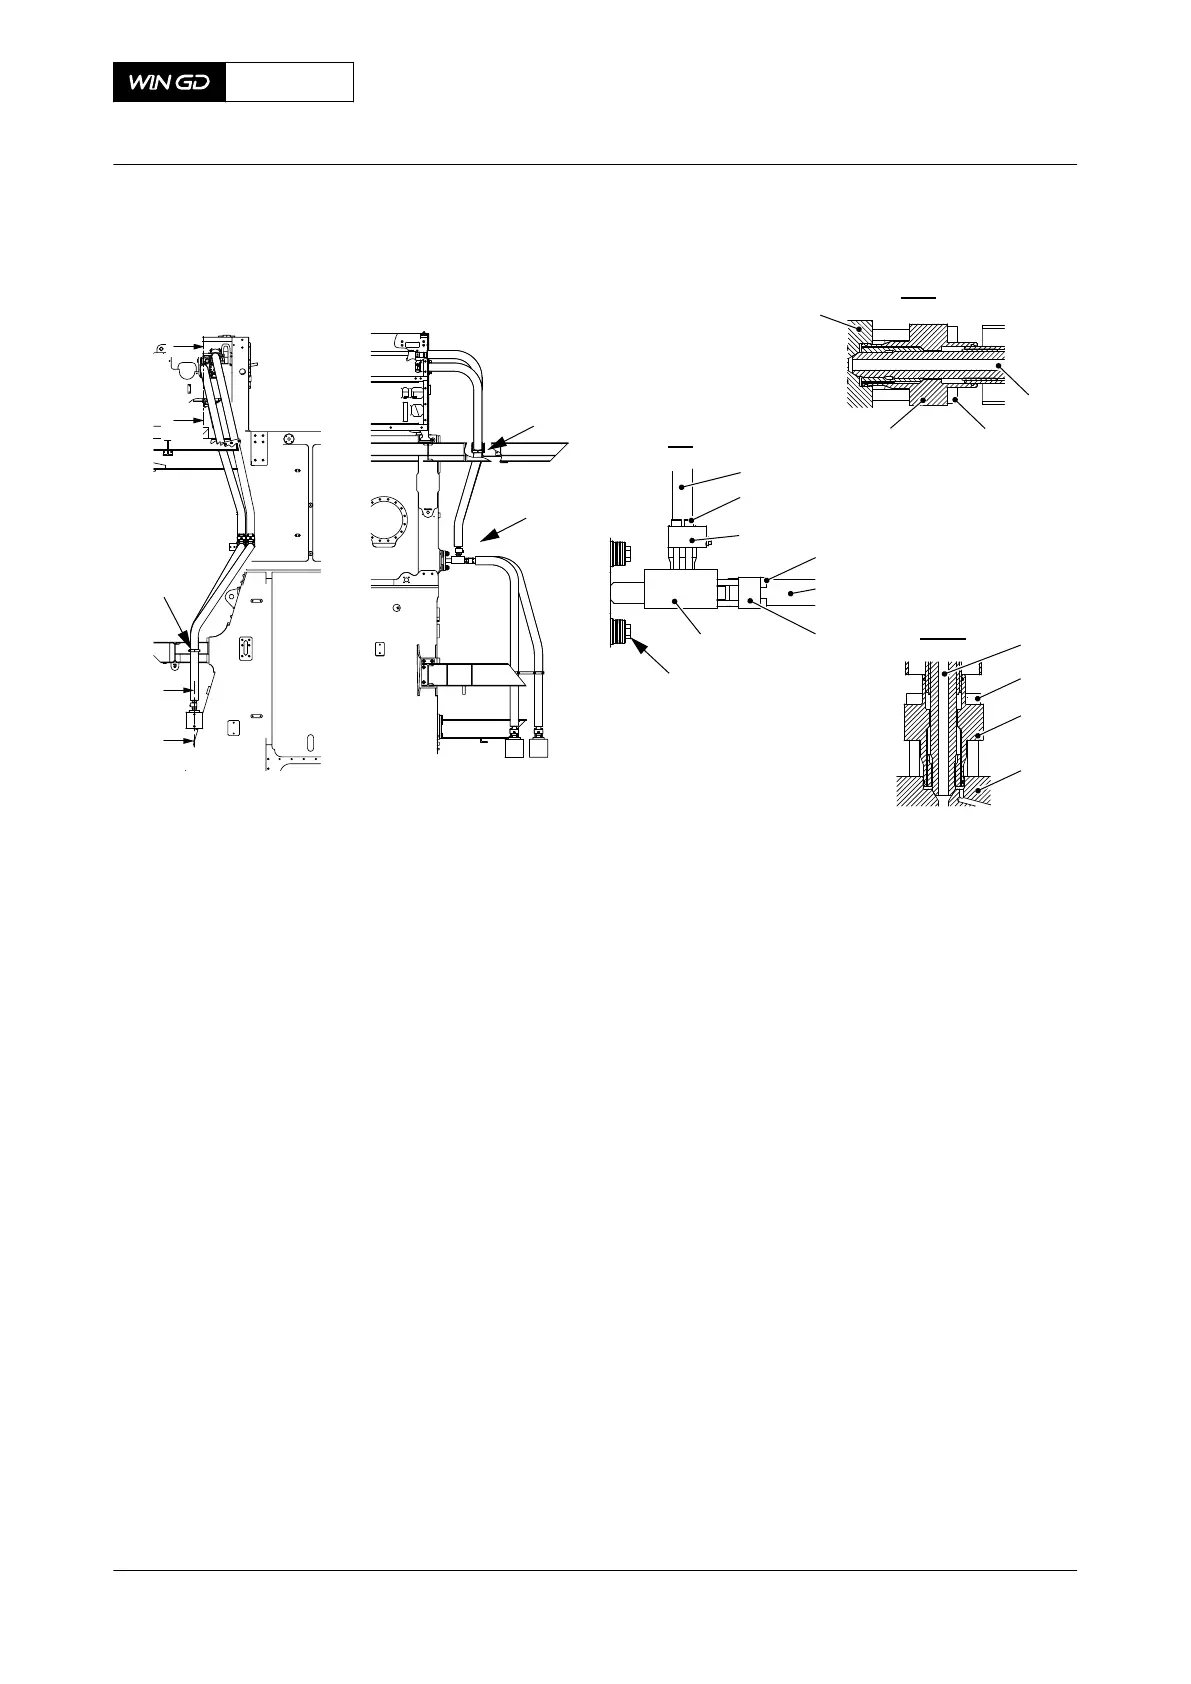
Fig 13-16 HP fuel pipes - remove and install
00565
FUEL SIDEDRIVING END
III
I - I
I
I
III
II
II
002
005
007
003
015
016
001
012
013
014
II - II
006
009
004
010
001
008
008
011
6 Carefully put the HP fuel pipe (008) in position in the fuel pump cover (014) and the
intermediate piece (010).
7 Torque symmetrically the four screws (012) to the correct value, refer to section 16.1
Tightening instructions.
8 Torque symmetrically the four screws (007) to the correct value, refer to section 16.1
Tightening instructions.
9 Carefully put the HP fuel pipe (001) in position in the intermediate piece (010) and the
valve housing (004).
10 Torque symmetrically the four screws (005) to the correct value, refer to section 16.1
Tightening instructions.
11 Torque symmetrically the four screws (002) to the correct value, refer to section 16.1
Tightening instructions.
12 Torque the screws (011).
13 Install the pipe clamps (015, 006).
CLOSE UP
• None
X72DF
AA00-8752-00AAA-720A-A
Maintenance Manual HP fuel pipe (fuel pump to fuel rail) - install
Winterthur Gas & Diesel Ltd.
- 767 - Issue 002 2020-10