7 Scanner Environment Settings
58
Creating a Mailbox
The following procedure explains how to create a mailbox for storing scanned
documents.
Scanned documents in mailboxes can be imported to computers via Network Scanner
Utility 3 or CentreWare Internet Services. For information on how to import the scanned
documents to a computer, refer to the User Guide.
You can create up to 99 mailboxes.
1.
Click the [Scan] tab on the Header Panel of the CentreWare Internet Services
home page.
The [Mailbox] page is displayed.
2.
Select an unassigned mailbox number from the displayed list, and click [Create].
The [Mailbox Setup] page is displayed.
3.
Configure the required settings.
Mailbox Number
Displays the number of the selected mailbox.
Mailbox Name
Specify the mailbox name. Enter a name (up to 20 characters) to be assigned to the
mailbox. Leave the text box blank if not setting a mailbox name.
Mailbox Passcode
Specify the passcode to the mailbox. Enter a passcode with up to 20 numerical
characters. Leave the text box blank if not setting a passcode.
NOTE: The passcode set here is specific to each mailbox, and differs from the user
information set under the [User Account Settings] page for the Account Administration
feature. For information about the Account Administration feature, refer to
Accounting
and Securities on page 65
.
Retype Passcode
Re-type the passcode for verification.
Check Mailbox Passcode
Select whether and when the passcode for the mailbox is required. Select from [Off],
[Always], [At Scan Time], and [At Delete Time], referring to the table below.
4.
Click [Apply].
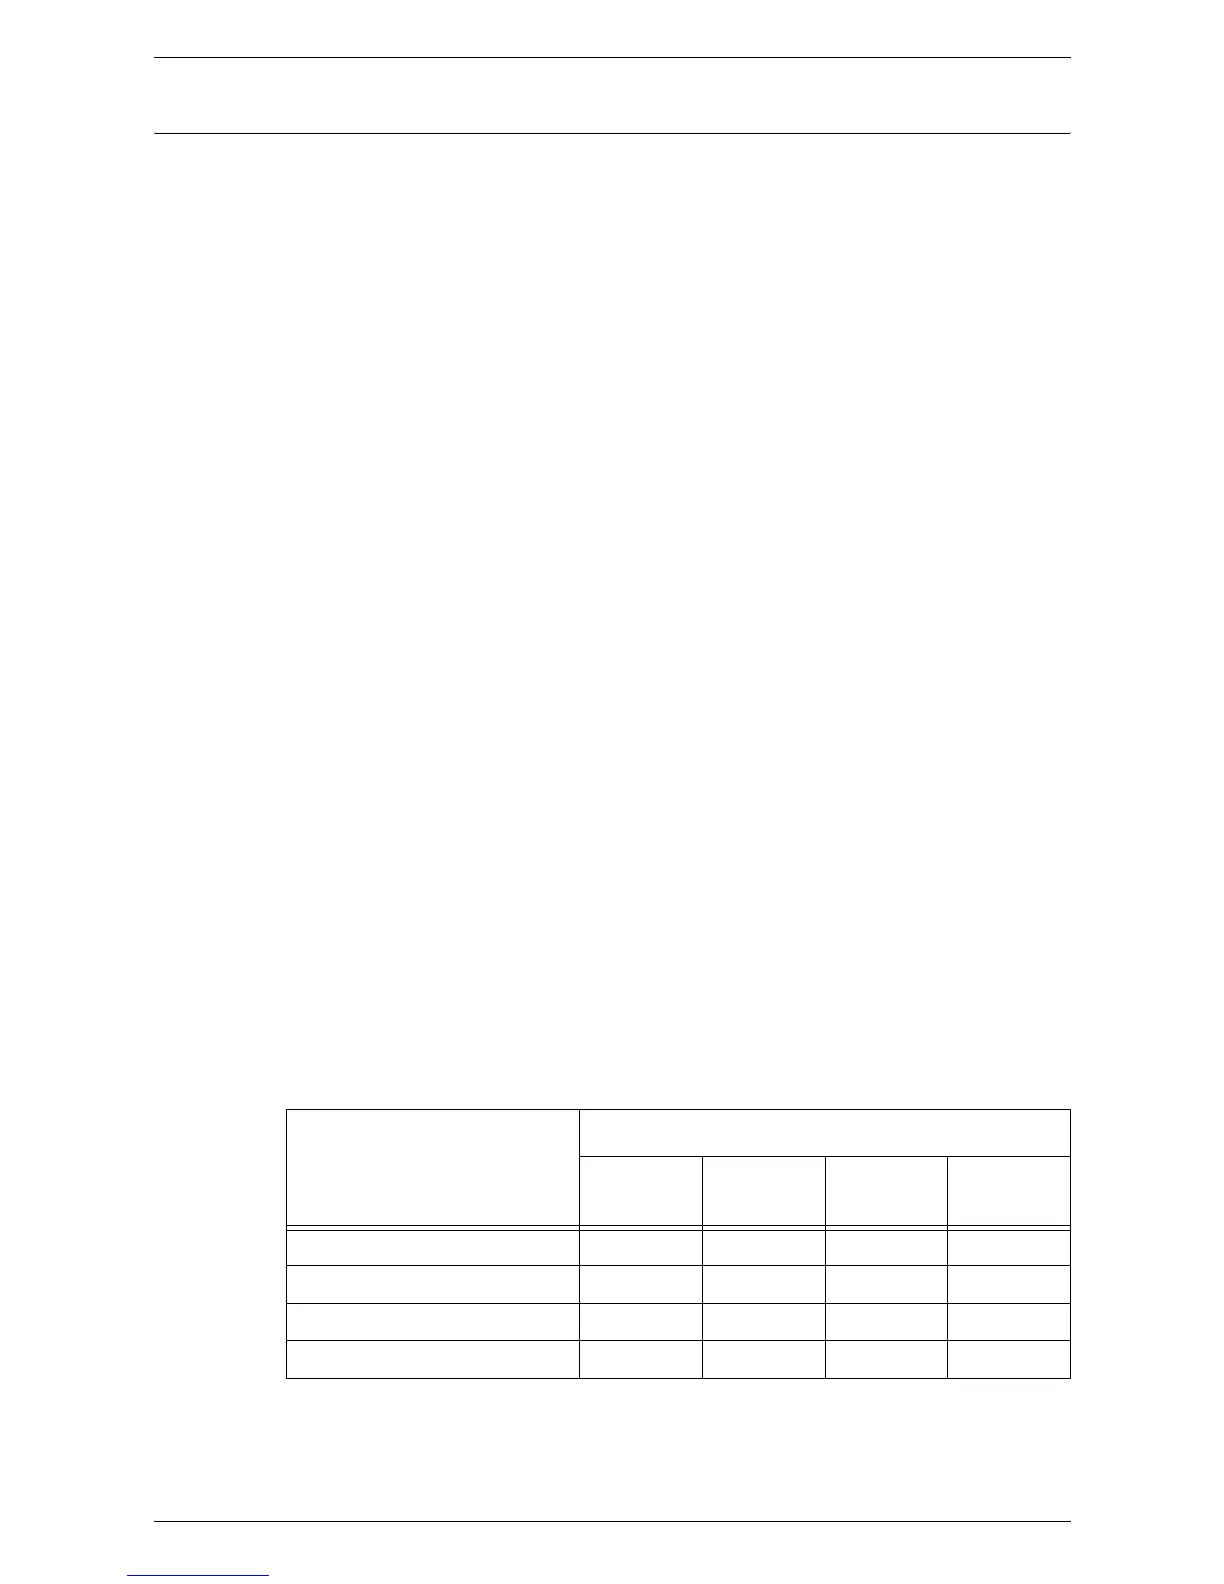
Mailbox Operations
Passcode Required
Off Always
At Scan
Time
At Delete
Time
Change Settings No Yes Yes Yes
Store Document No Yes Yes No
Delete Document No Yes No Yes
Display Document No Yes No Yes

 Loading...


