ADPRO Presidium by Xtralis Installation and User Manual
Doc. 12384_05 47
4.4 Configure Presidium
Once the Presidium Setup Utility has been installed and the PC’s network connection has been
configured, use the following procedure to configure the Presidium.
4.4.1 Connect to an Presidium
4.4.1.1 Local Connection
1. Ensure the fan cover is fitted to the front of the Presidium (standard Presidium only)
2. Use the supplied crossover Category 5 Ethernet cable to connect the PC’s network port to
the Setup port on the front panel of the Presidium (Ethernet port on Presidium Mini).
3. Power on the Presidium.
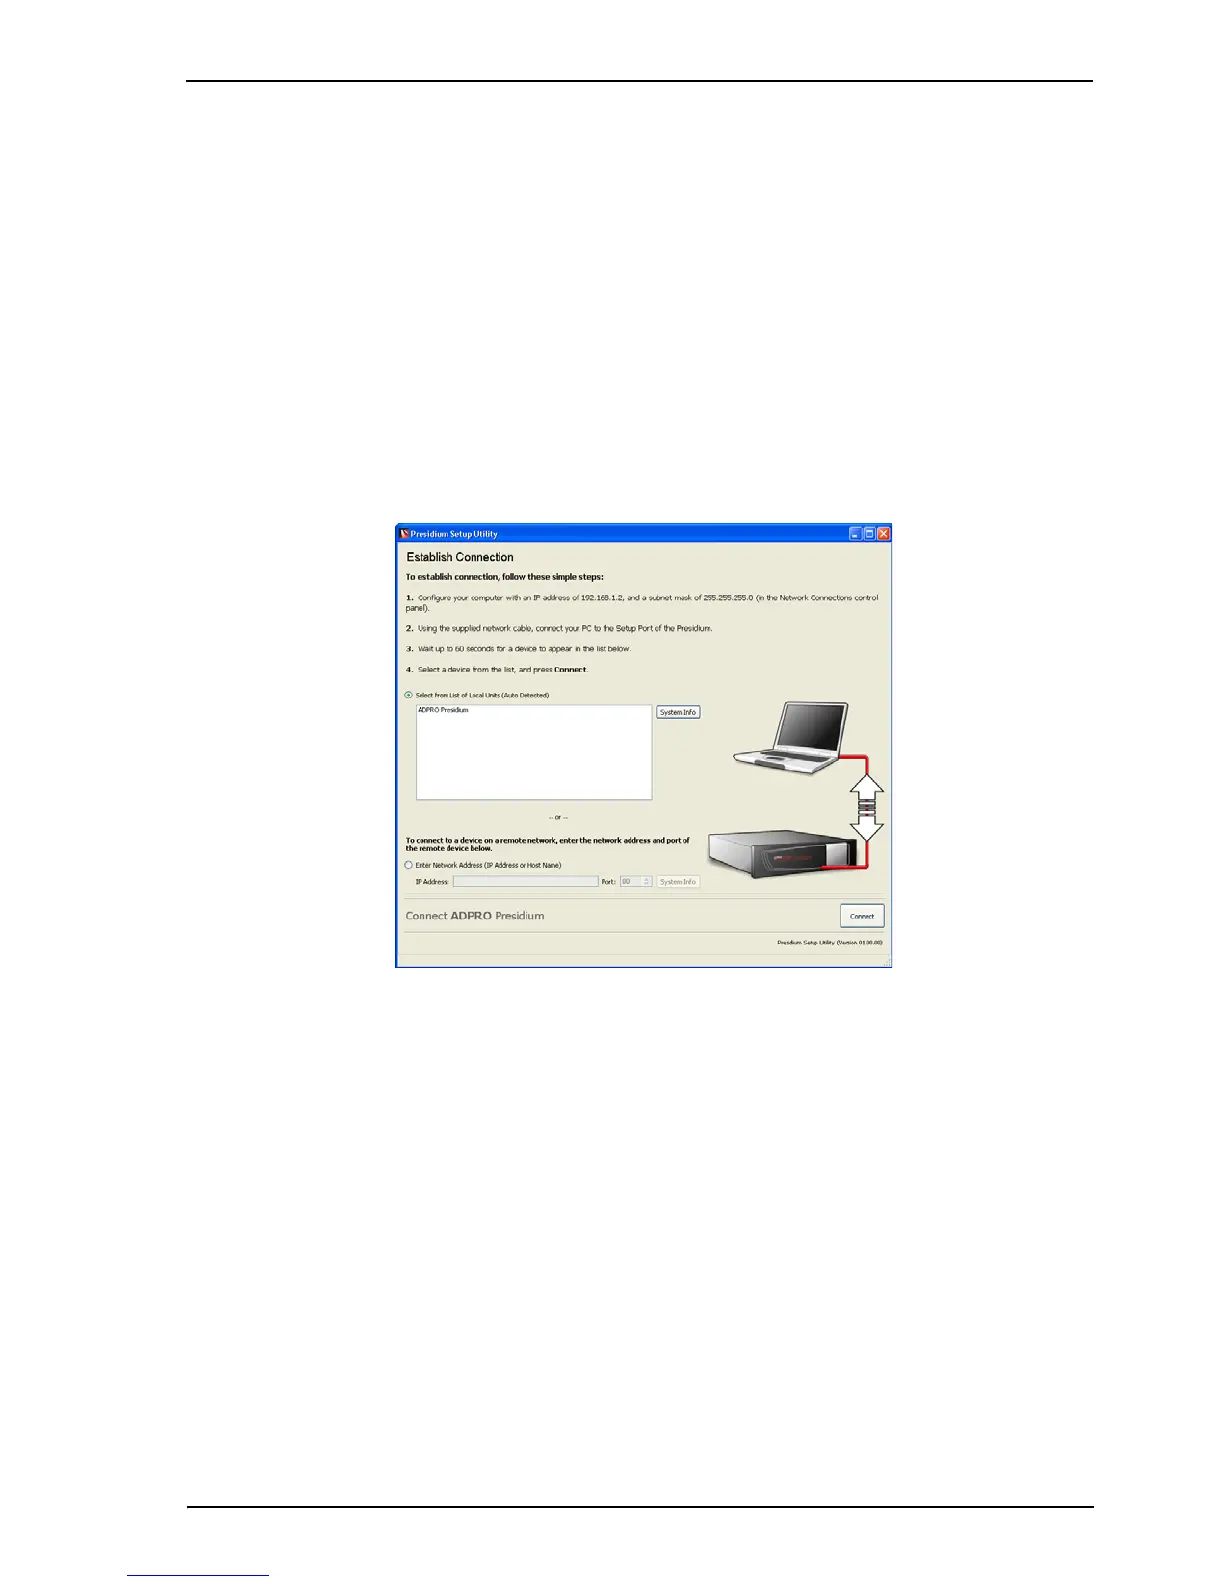
4. Double click on the Presidium Setup Utility icon on the PC desktop. The following screen is
displayed.
Figure 37: Establish Connection to the Presidium
5. Wait for approximately 60 seconds for the connected device to appear in the List of Local
Units (if the Presidium is connected locally).
The default Presidium IP address is 192.168.1.3 and the subnet mask is 255.255.255.0.
6. Highlight the required device and select Connect.
If the connected device does not appear in the list, check the following:
• Check the ethernet connection by ensuring the LEDs on the Setup port connector are
illuminated (refer to Table 4 on page 41).
If the connected device appears in the list, but will not connect:
• Ensure the PC and Presidium subnets match. If the PC has a static IP address on a
different subnet to the Presidium, they won’t be able to connect (refer to Configure the PC
Network Connections on page 45). Select the System Info button to display the
Presidium’s IP address and subnet.
7. Once the connection to the Presidium is established, the Password screen is displayed
(refer to Section 4.4.3)



 To Next Page