Installation and User Manual ADPRO Presidium by Xtralis
78 Doc. 12384_05
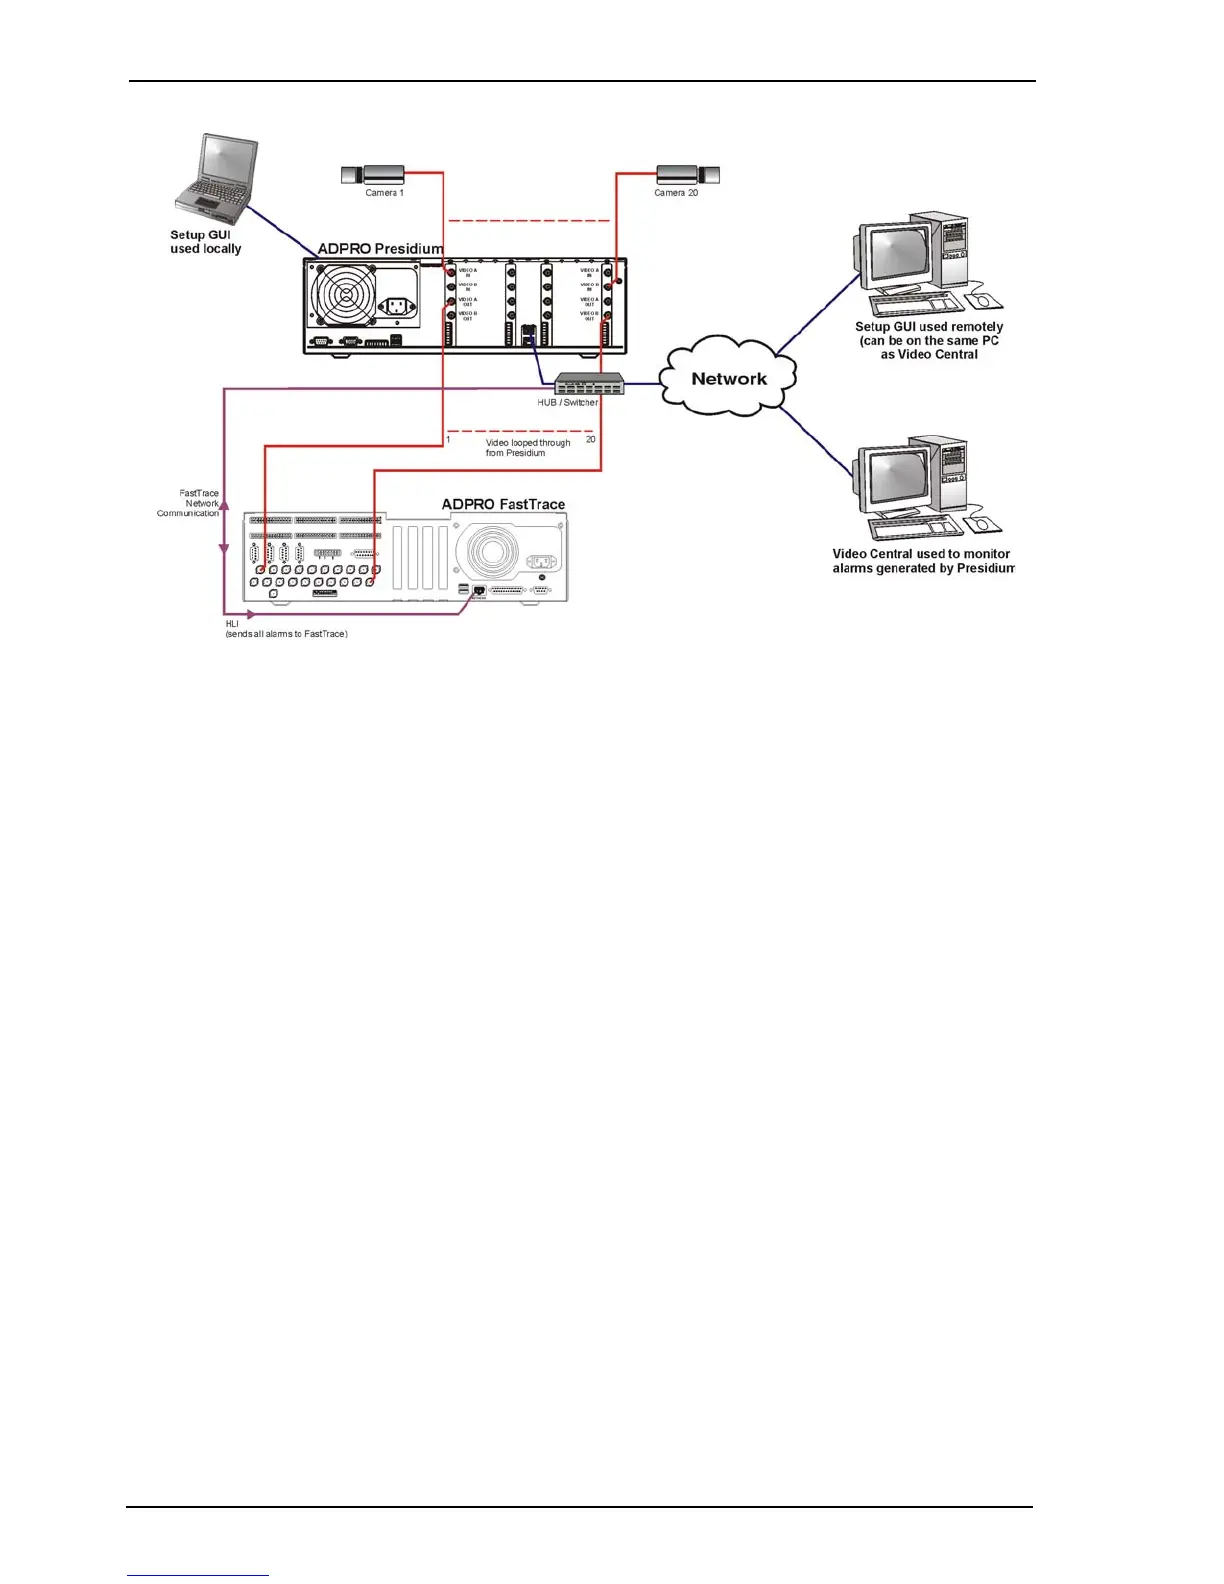
Figure 69: Typical Connections to a standard Presidium
Note: Before connecting the FastTrace / FastTx / FastTrace-R to the Presidium, ensure
the Presidium setup has been completed, refer to Configure Presidium on page 47.
Note: Ensure the Access/Secure input is set in the default state of Normally Open and
that nothing is connected to this input. This ensures the Presidium is in the Secure
state at all times and access is controlled at the FastTrace / FastTx / FastTrace-R
(refer to Access/Secure Input Type on page 68).
Note: When connecting a FastTrace / FastTx / FastTrace-R to a Presidium, each
FastTrace / FastTx / FastTrace-R video input must be directly connected to a
Presidium video output. Hence, if the Presidium has 20 channels, a 20 channel
FastTrace / FastTx / FastTrace-R is required to operate all 20 channels.
If the FastTrace / FastTx / FastTrace-R has not been previously configured, refer to the unit’s
Installation and User Manual for the complete configuration procedure.
If the FastTrace / FastTx / FastTrace-R has been previously configured, refer to the procedure
below to add the Presidium.
1. Connect the FastTrace / FastTx / FastTrace-R to the Presidium as shown in Figure 69.
2. Connect the PC to the FastTrace / FastTx / FastTrace-R, via the Presidium Setup port on
the front panel of the Presidium.
Note: The PC must have VideoCentral installed, refer to the FastTrace / FastTx /
FastTrace-R Manual for details.
3. Access the FastTrace / FastTx / FastTrace-R Installer Menu, as detailed in the following
section.