5-35
Measurement steps:
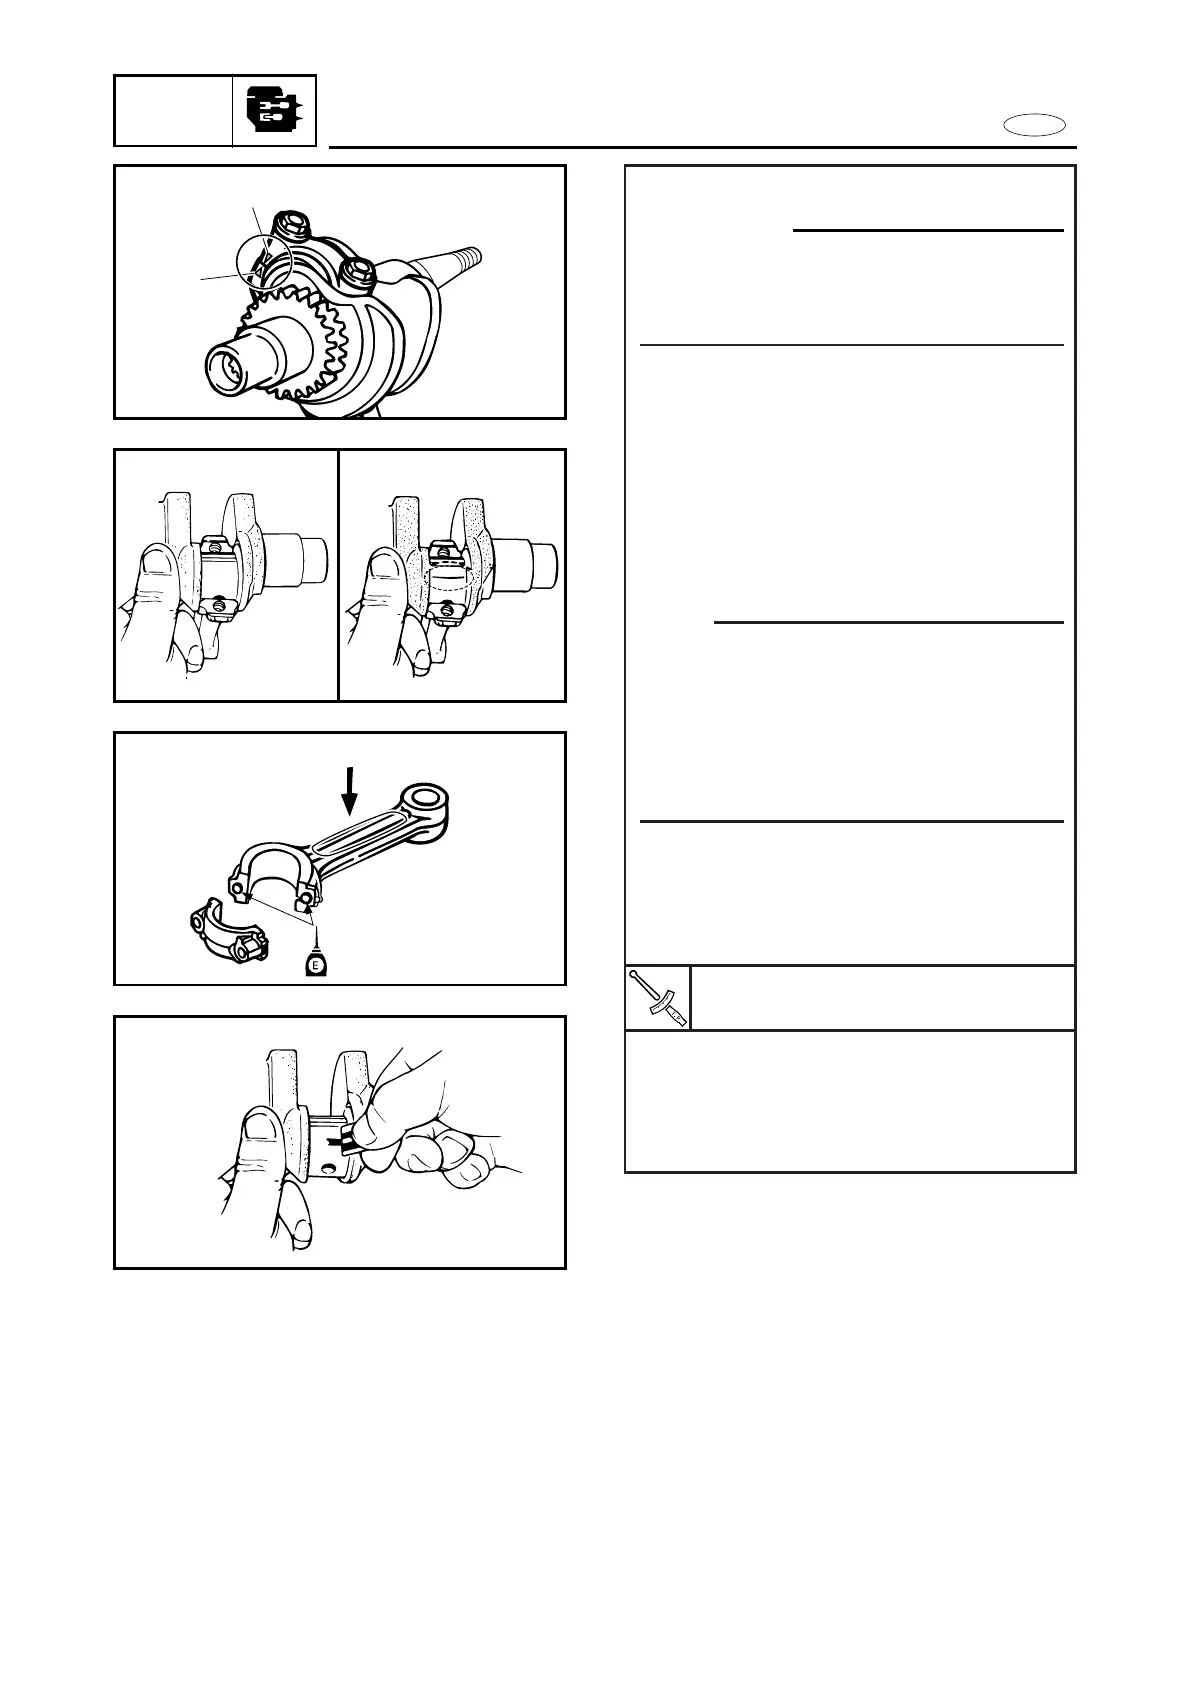
cC
Make sure that the “Ñ” connecting rod
mark
11
is aligned with the “D” cap
mark
22
.
8 Clean the cap and big end contact
surface of the connecting rod.
8 Fit the connecting rod to the crank-
shaft.
8 Put a piece of Plastigauge
®
on to the
crank pin.
8 Assemble the connecting rod cap on
to the crank pin.
NOTE:
9Make sure that the “YAMAHA” mark a
on the connecting rod faces upwards
on the flywheel rotor ass’y.
9Do not move the crankshaft until big-
end oil clearance measurement has
been completed.
8 Apply motor oil to the bolts and the
bolt seat.
8 Tighten the bolts to the specified
torque.
8 Remove the connecting rod cap.
8 Measure the width of the com-
pressed Plastigauge
®
on the crank
pin.
Bolt: (connecting rod cap)
12 Nm (1.2 m•kg, 8.7ft•lb)