5-21
8 Apply the fine lapping compound to
the valve face and repeat the above
steps.
NOTE:
Be sure to clean off all compound to the
valve face and valve seat after every
lapping operation.
8 Apply the Mechanic’s bluing dye to
the valve face.
8 Install the valve into the cylinder
head.
8 Press the valve through the valve
guide and onto the valve seat to mark
a clear pattern.
8 Measure the valve seat width again.
If the valve seat width is out of speci-
fication, reface and lap the valve seat.
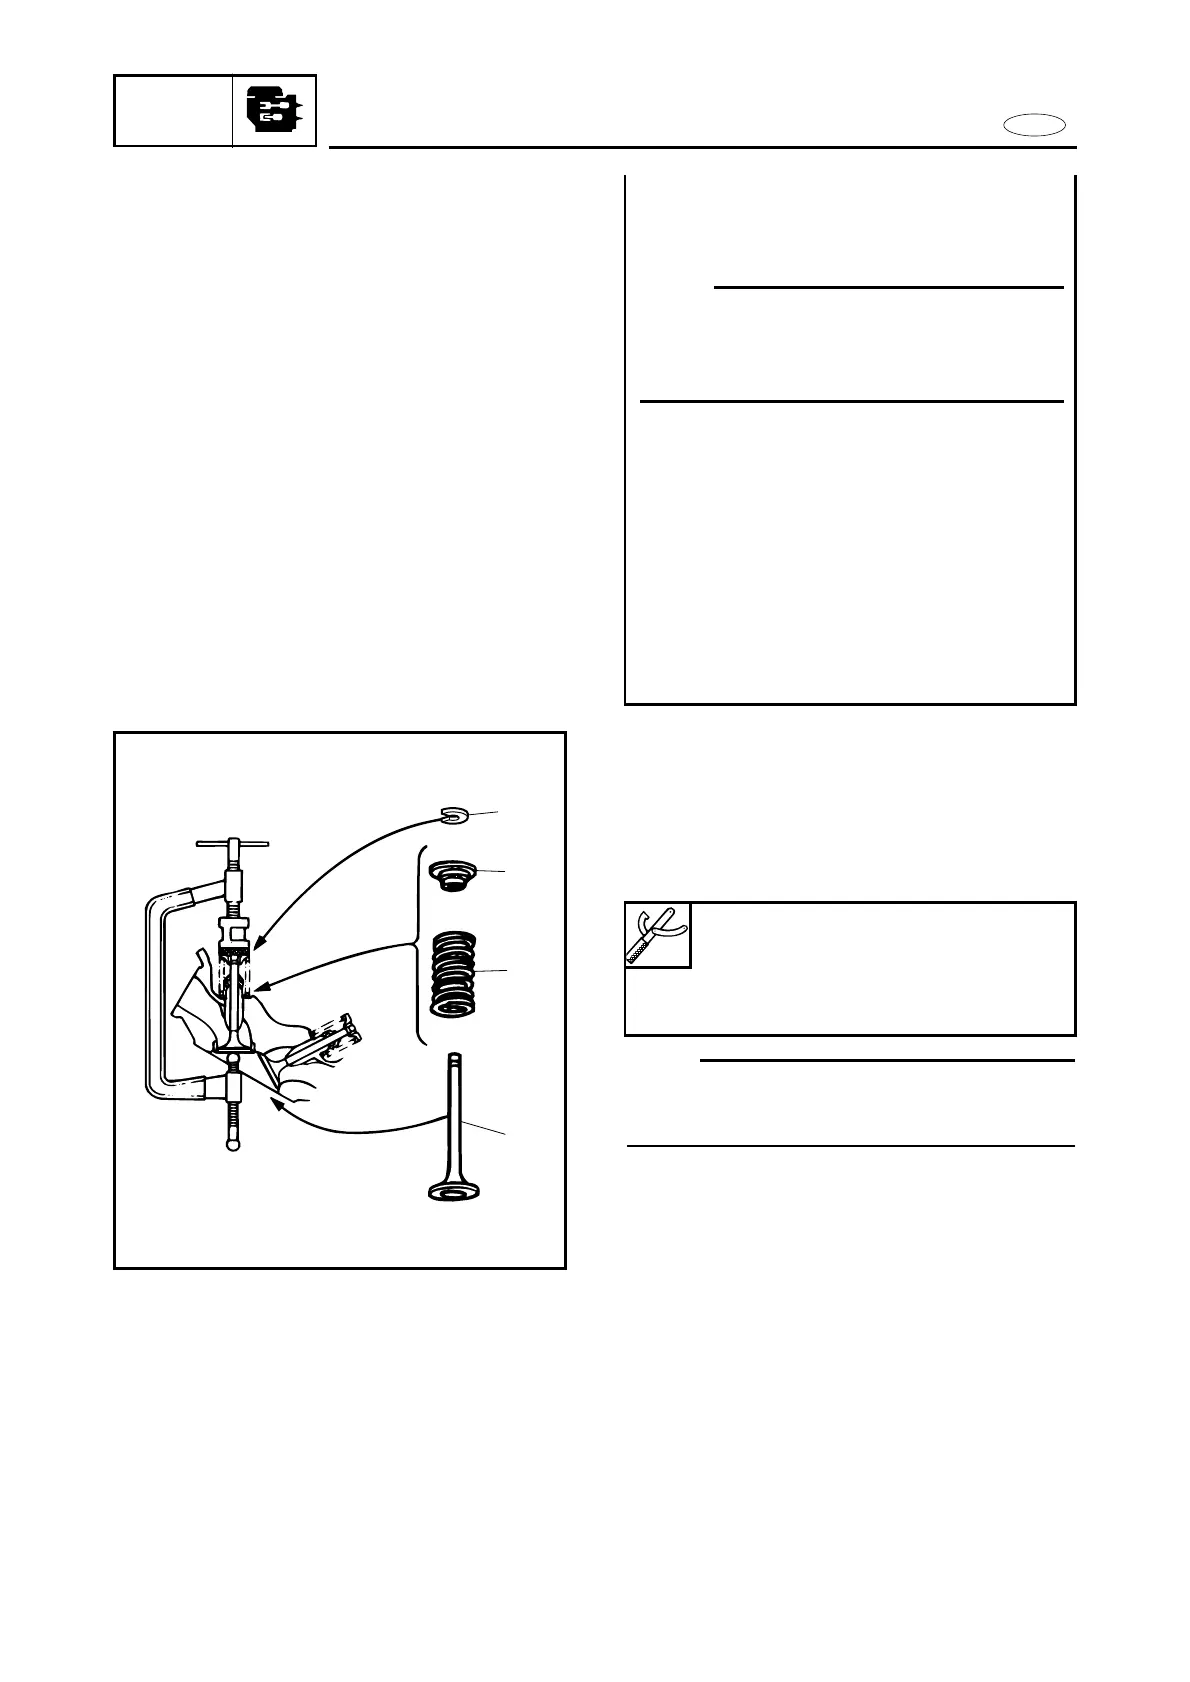
Valve installation
1. Install:
9Valve 1
9Valve spring 2
9Spring retainer 3
9Valve cotter 4
Valve spring compressor:
YM-01253/90890-04019
Attachment:
YM-04114/90890-04018
NOTE:
Set the attachment on the center of spring
retainer.