MOTIF XS6/MOTIF XS7/MOTIF XS8
54
White key hammer
(白鍵ハンマー)
Frame(フレーム)
Stopper (L88_W)
(ストッパー)
Spring
(スプリング)
Frame(フレーム)
Hook(フック)
Up(上側)
[D]
White Key
[E]
Key Guide
Key Spring
(スプリング)
(キーガイド)
(白鍵)
HEDaf M
GHD EBUS L
△
Mark
Hook
(△マーク)
(フック)
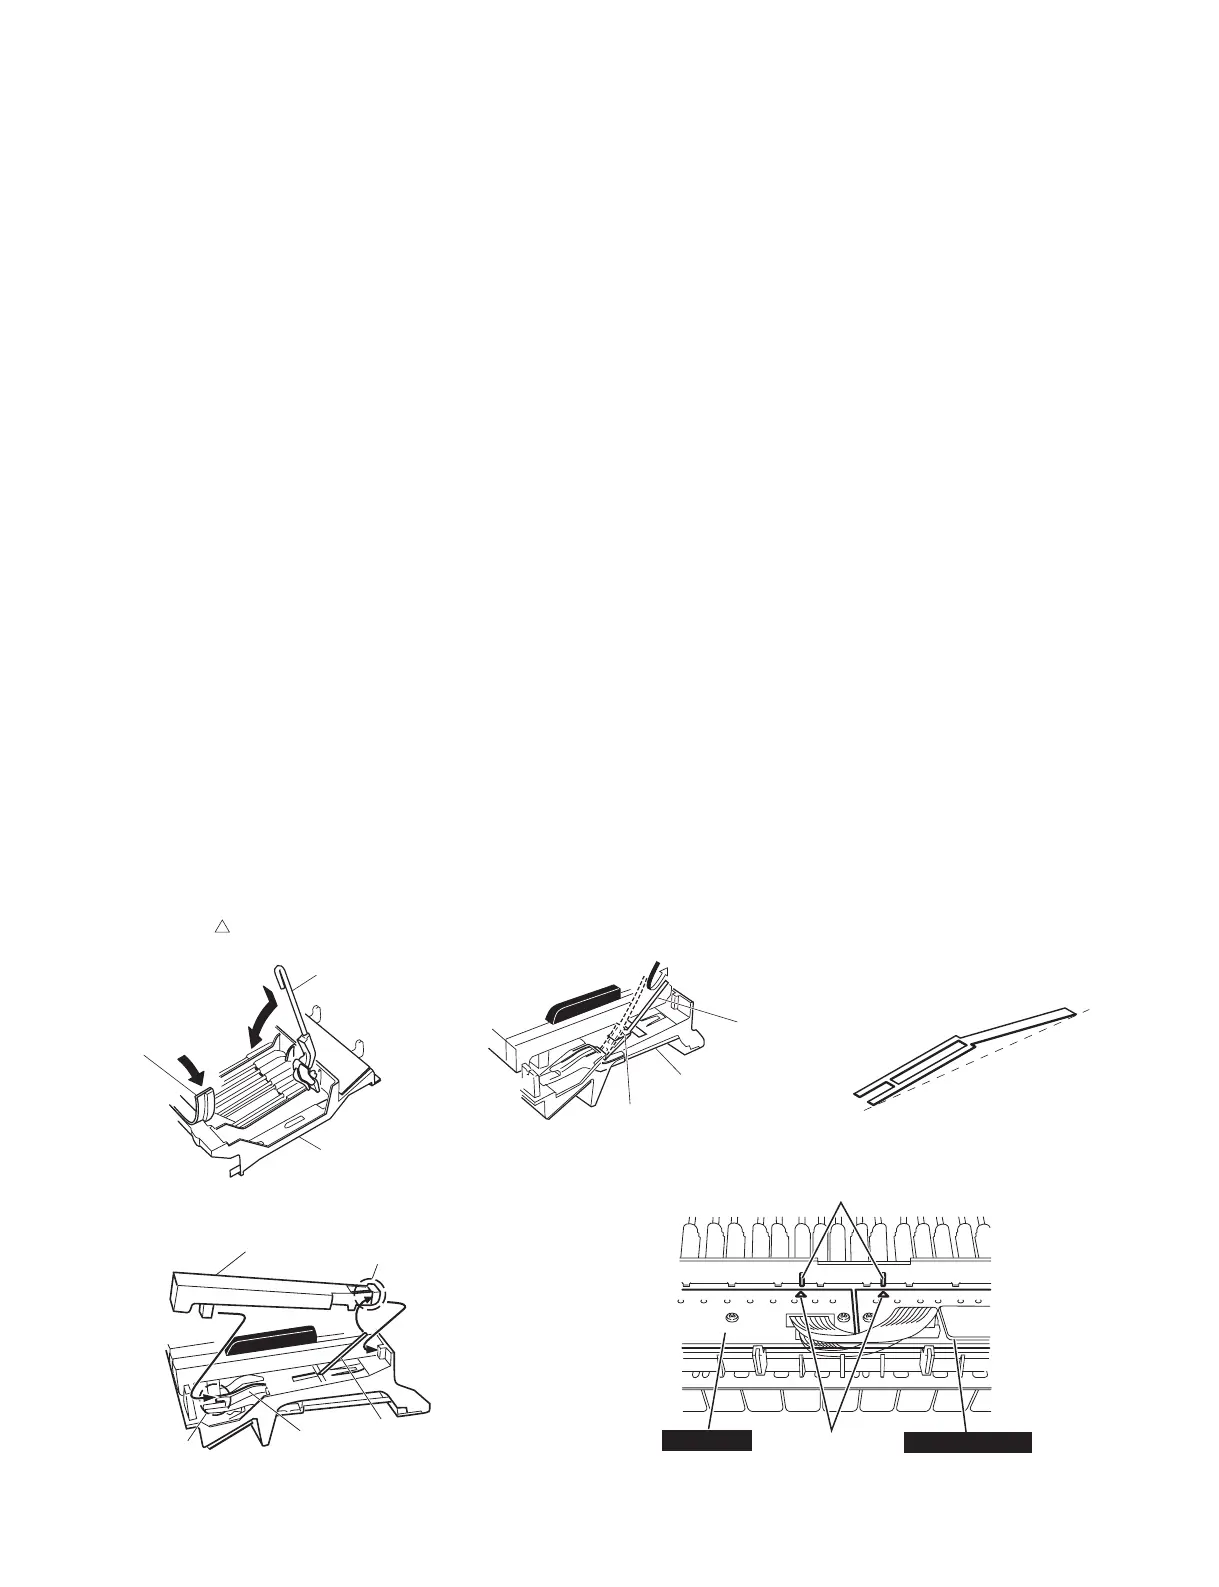
24-2 Spring
Direct the keyboard assembly facing upward and
push down the two-forked end of the spring into
the slit of the white key (black key) hammer to in-
stall to the hooks on the frame. (Fig. 32)
* Be careful of the direction of the spring.
24-3 White Keys (Black Keys)
Make a white (black) key in engagement with the
portion marked [E] and key guide, make sure that
the spring is securely inserted into the spring sup-
porting portion inside of the supporting point of the
key. Then, press down the top portion marked [D]
slowly to install. (Fig. 33)
24-4 Rubber Contact
When installing the rubber contacts, check that the
slit mark on the rear side of the frame is aligned
with the slits on the rubber contacts.
Also, take care not to let any dirt attached to the
contact surface when servicing.
24-5
GHD EBUS L Circuit Board, MK SUB Circuit Board
Install the seven (7) screws marked [260C] and
install the GHD EBUS L circuit board. (Fig. 26)
24-6 HEDaf M Circuit Board
Tighten the five (5) screws marked [260D] and
the screw marked [262] to fi x the HEDaf M circuit
board. (Fig. 26)
24-7 HEDaf H Circuit Board
Tighten the four (4) screws marked [260E] and
the screw marked [262] to fi x the HEDaf H circuit
board. (Fig. 26)
* When installing the GHD EBUS L and HEDaf M
circuit boards, check that the positions of the
hooks on the rear side of the frame are aligned
with the marks of the circuit board. (Fig. 34)
24-2 スプリング
HEDafEBUS 鍵盤を表側にして、端が二本に分か
れているスプリングの先をハンマー白鍵(黒鍵)
の切り込みに合わせて、一度下に押し込んでフ
レームのフックに取り付けます。(図 32)
※ スプリングの向きに注意してください。
24-3 白鍵(黒鍵)
[E]部とキーガイドに白鍵(黒鍵)をくわえさせ、鍵
盤の支点内側のばね受け部に、スプリングが確実
に入っていることを確認したら、[D] 部の上を下
方向にゆっくり押し込んで取り付けます。(図 33)
24-4 接点ゴム
接点ゴムを取り付ける際は、フレーム裏側にある
スリットマークとゴム接点のスリットがあってい
ることを確認してください。
また、接点面にゴミが付着しないように注意して
作業してください。
24-5 GHDEBUSL,MKSUB シート
[260C] のネジ 7 本を取り付け、GHDEBUSL シー
トを取り付けます。(図 26)
24-6 HEDafM シート
[260D] のネジ 5 本と [262] のネジ 1 本を取り付け、
HEDafM シートを取り付けます。(図 26)
24-7 HEDafH シート
[260E] のネジ 4 本と [262] のネジ 1 本を取り付け、
HEDafH シートを取り付けます。(図 26)
※ GHDEBUSL シートと HEDafM シートを取り付
ける際は、フレーム裏側にあるフック位置と基板
の△マークが一致していることを確認してくださ
い。(図 34)
Fig.31( 図 31)
Fig.32( 図 32)
Fig.33( 図 33)
Fig.32-1( 図 32-1)
Fig.34( 図 34)

 Loading...


