MOTIF XS6/MOTIF XS7/MOTIF XS8
32
1. Side Cover R, Side Cover L(腕木 R,腕木 L) .......33
2. Control Panel Assembly(コンパネ Assy) ..........34
3. JKAN-JA Circuit Board(JKAN-JA シート) ..........35
4. DM Circuit Board(DM シート) .............................35
5. JKAN-ML Circuit Board, MLAN Circuit Board
(JKAN-ML シート、MLAN シート) .........................37
6.
Power Supply Unit, AC-IN Connector, Power Switch
(電源ユニット、AC インレット、電源スイッチ) ...........37
7. Display Assembly(ディスプレイ Assy) .............38
8. JKAN-LC Circuit Board, LCD
(JKAN-LC シート、液晶ディスプレイ) ..................38
9. PNA Circuit Board(PNA シート) ..........................39
10. PNB-PN Circuit Board(PNB-PN シート) .............40
11. PNC Circuit Board(PNC シート) ..........................41
12. Arm Assembly R(腕木(R)Assy) .....................42
13. End Block R, Side Angle R
(拍子木 R、サイドアングル R)................................42
14. Arm Assembly L(腕木(L)Assy) ......................42
15.
Side Angle L, PNB-RB Circuit Board, Wheel Assembly
(サイドアングル L、PNB-RB シート、ホイール Assy)
...44
16. End Block L, Touch Volume
(拍子木 L、タッチボリューム) ................................44
17. Front Rail Assembly(口棒 Assy) ........................45
18. Rear Panel(リアパネル) ........................................46
19. Keyboard Assembly(HEDafEBUS 鍵盤) ............47
20. GHDPC Circuit Board(GHDPC シート) ...............47
21.
Exchanging the PC sensor(PC センサーの交換)
....47
21a. Preparing the replacement PC sensor
(交換用 PC センサーの準備) ...................................47
21b. Removing the PC sensor
(PC センサーの取り外し) ........................................48
21c. Installing the PC sensor
(PC センサーの取付け) ...........................................49
22. Exchanging the Strings Set
(ストリングセットの交換) ......................................50
22a. Removing the Strings Set
(ストリングセットの取り外し) ...............................50
22b. Installing the Strings Set
(ストリングセットの取り付け) ...............................50
23. Disassembling the HEDaf EBUS Keyboard
(HEDafEBUS 鍵盤の分解) ......................................52
24. Assembling the HEDaf EBUS Keyboard
(HEDafEBUS 鍵盤の組立) ......................................53
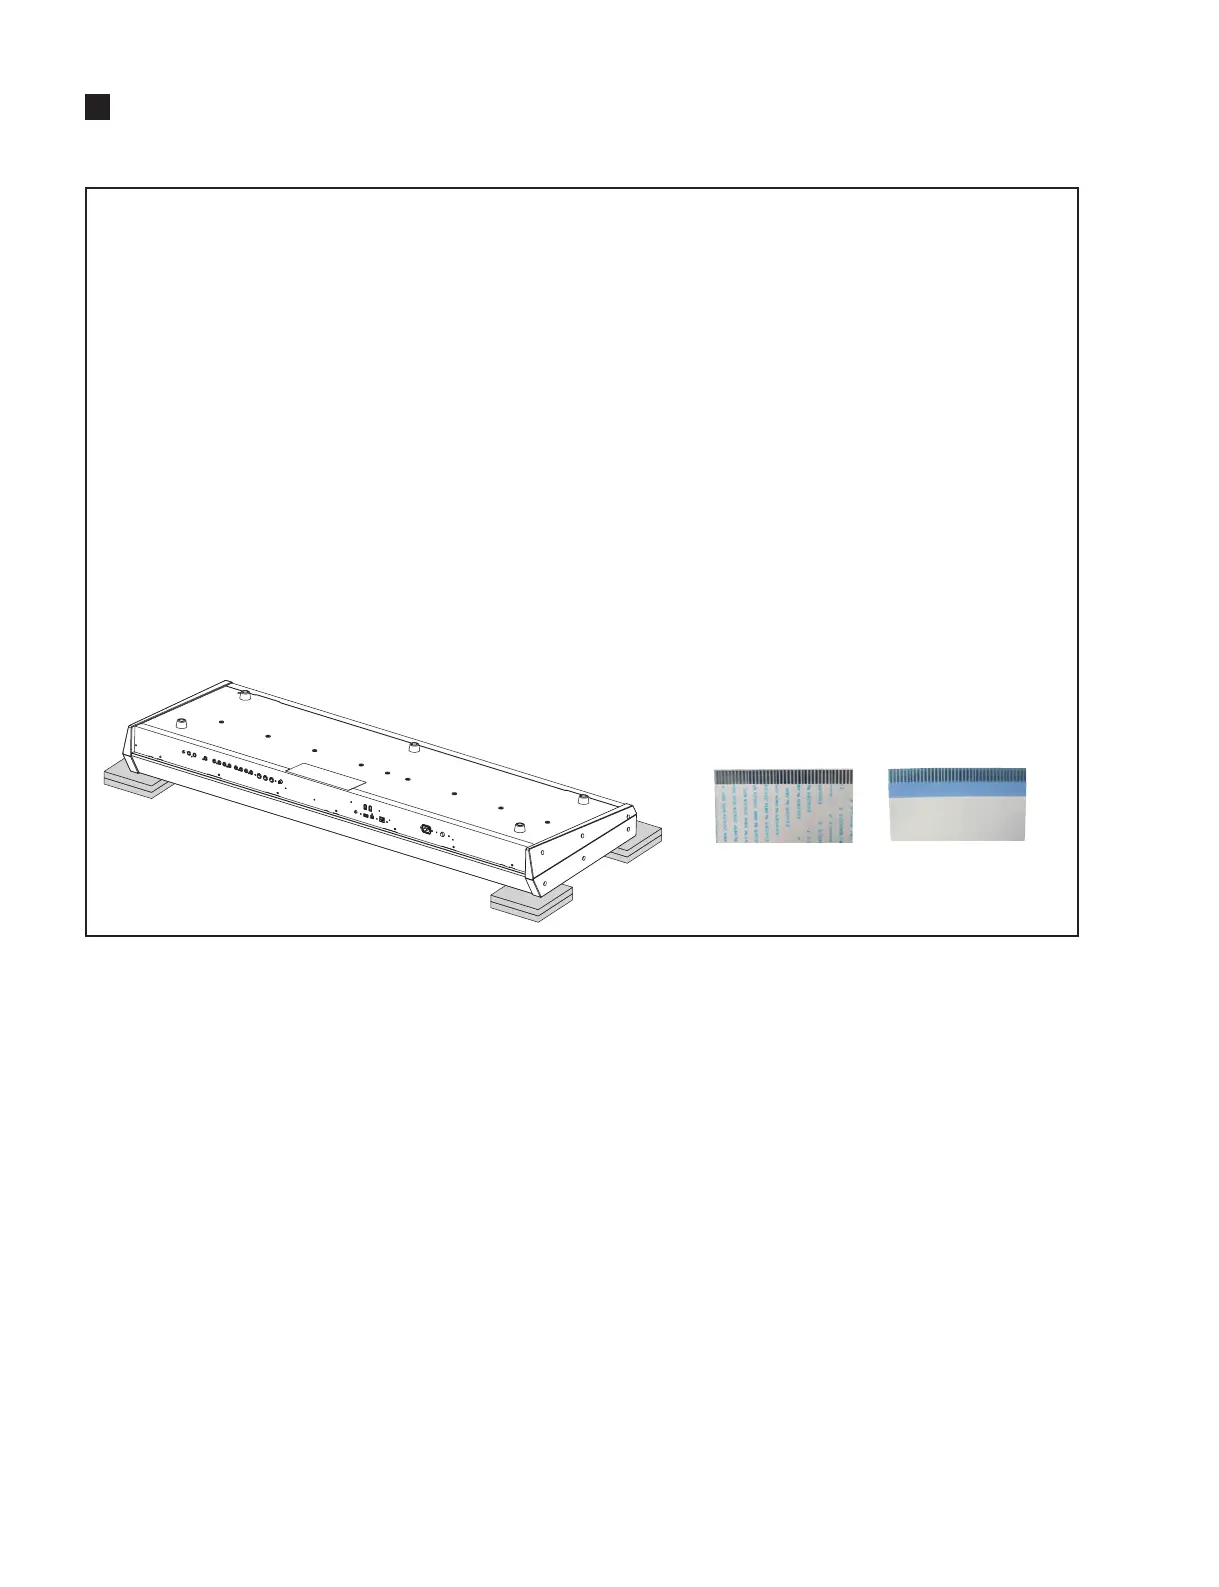
DISASSEMBLY PROCEDURE (MOTIF XS8)(分解手順)
The unit is heavy. Treat the unit with enough care
when lifting it up.
If you want to turn the unit or control panel assem-
bly upside down, prepare supporting materials and
put the unit or control panel on them with the end
portions of the unit or control panel placed on the
supporting materials. (Fig. A)
Attach the filament tapes in the same way as they
were before removal.
When removing buttons attached to the PNA circuit
board, PNB-PN circuit board or PNC circuit board,
be careful not to damage the buttons. Hold side
faces of a button to handle it with relative safety.
Notes on Flat Cable
Contacts are visible through the back side. When
connecting to the connector, pay attention not to
insert the cable inversely. (Photo A)
During assembly, pay attention that connectors,
cables or the like are not pinched by circuit boards,
frames, etc.
•
•
•
•
•
•
本体の重量が大きいため、持ち上げるときは十分注意
してください。
本体またはコンパネ Assy を裏向きにして作業する
ときは、両端に枕木を敷いてください。(図 A)
フィラメントテープは、取り外す前と同じように取り
付けてください。
PNA シート、PNB-PN シート、PNC シートそれぞれ
から付属のボタンを外すときは、ボタンを損傷しない
ように十分注意してください。ボタンの側面を持つと
比較的安全です。
フラットケーブルの注意
接点が裏面から透けて見えます。コネクタにケーブル
の表・裏を逆に差し込まないように注意して取り付け
てください。(写真 A)
組み立てるときは、基板やフレームなどでコード類を
はさまないように注意してください。
•
•
•
•
•
•
Precautions(注意事項)
Fig.A( 図 A) PhotoA( 写真 A)

 Loading...


