53
MOTIF XS6/MOTIF XS7/MOTIF XS8
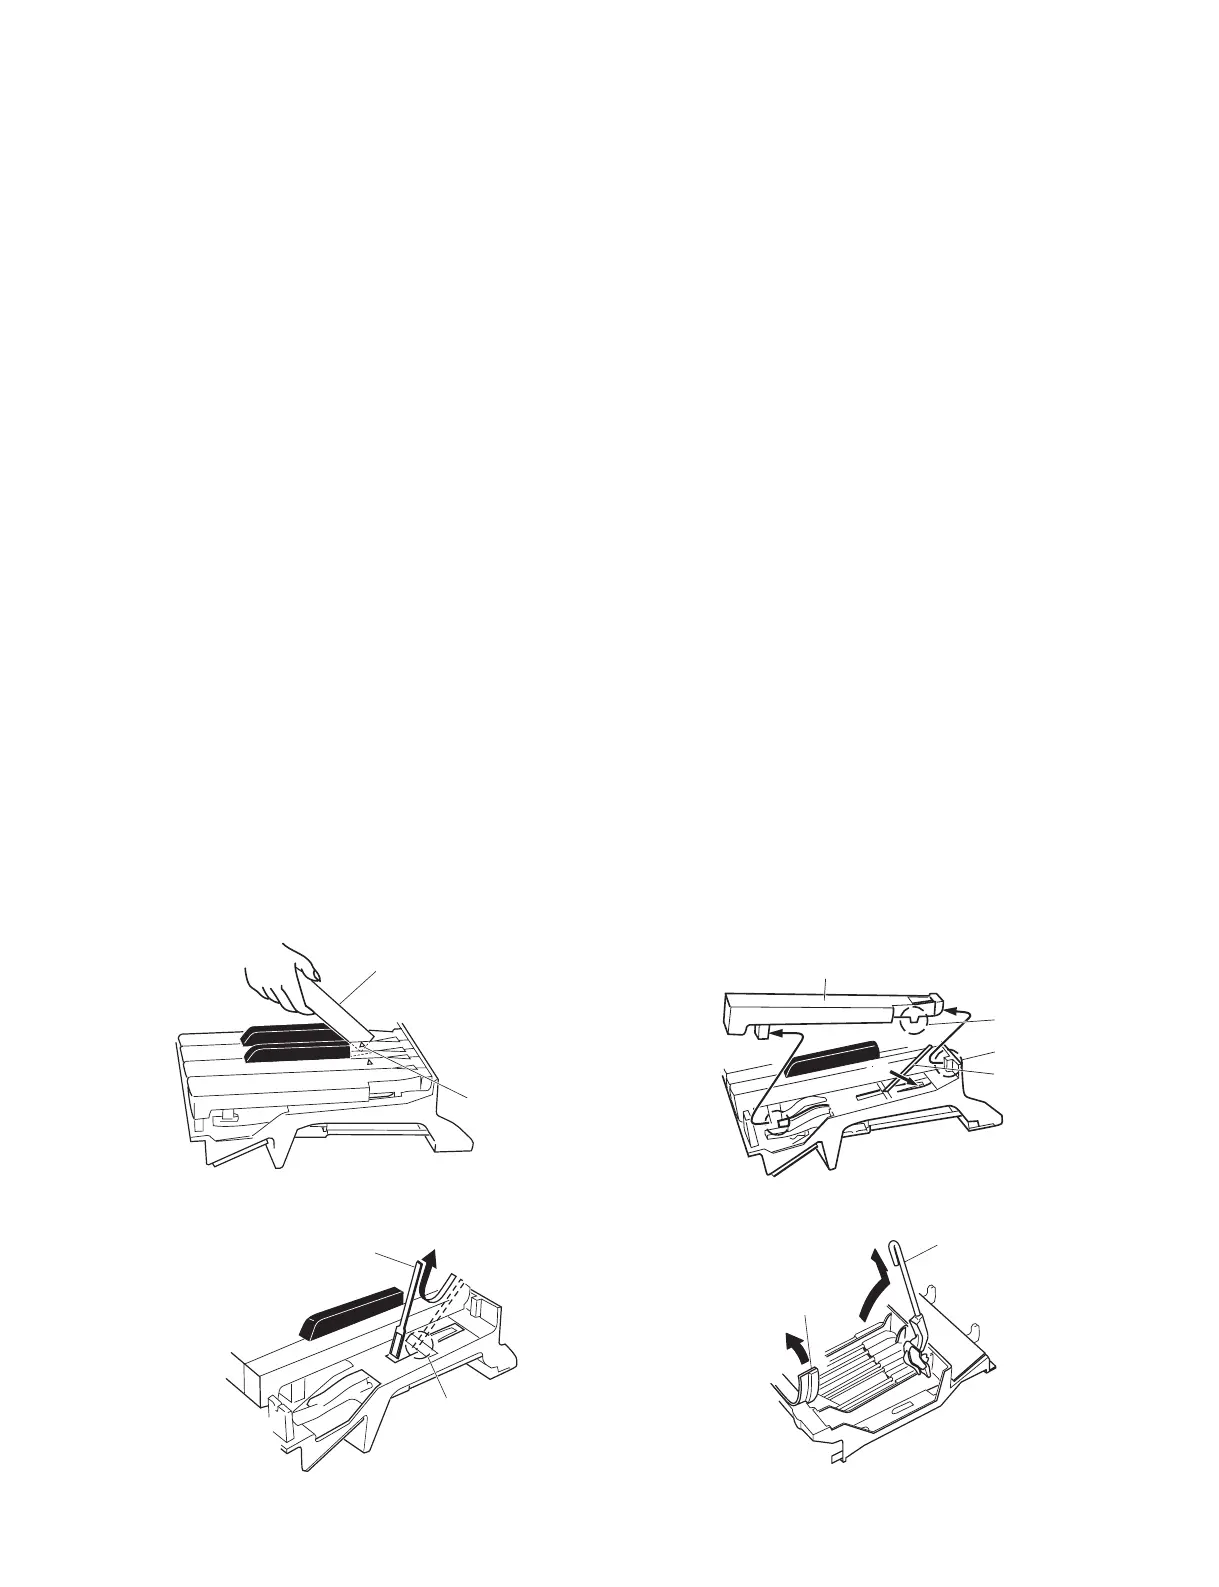
Thin metal plate etc
(薄い金尺等)
Triangle mark
(三角マーク)
[A][A]
White Key
(白鍵)
Spring
(スプリング)
[B]
[C]
Spring
(スプリング)
Hook
(フック)
White key hammer
(白鍵ハンマー)
Stopper (L88_W)
(ストッパー)
23-4 Rubber Contact
Remove the corresponding circuit board. The rubber
contacts can then be removed. (Photo 19, Photo 20)
23-5 White key
Insert a thin metal plate, etc. into a clearance be-
tween keys (clearance in the direction of a triangle
mark close to a supporting point of a white key) and
lower the stopper marked [A], slide the white key
forward until the hooks marked [B] and [C] for the
white key are unhooked, and remove the white key
by lifting it up. (Fig. 27, 28)
* Use special care not to move the white key for-
ward too much or the spring may be bent.
* The black key can be removed after the white
keys on both sides have been removed.
23-6 White Key Hammer
Remove a white key and push a spring down once
to take it out of the hook. (Fig. 29)
Place the keyboard assembly upside-down and
peel the stopper (L88_W) away. The white key
hammer can then be removed. (Fig. 30)
* The black key hammer can be removed in the
same manner.
24. Disassembling the Keyboard Assembly
24-1 White Key Hammer (Black Key Hammer)
24-1-1 From the rear side of the keyboard assembly,
insert a white key (black key) hammer into the
frame, and put the stopper (L88_W) on. (Fig. 31)
* There are four (4) kinds of hammers that differ
in weight. When reinstalling a hammer, take care
not to install a wrong hammer. (See page 20 of
“Parts List”)
23-4 接点ゴム
該当する鍵盤のシートを外して、接点ゴムを外し
ます。(写真 19、写真 20)
23-5 白鍵
薄い金尺状のものを鍵盤の間に挿入して(白鍵盤
支点付近の三角マークの示す方向側の隙間)[A]
のストッパーを下げ、[B]、[C] の白鍵フックが外
れるまで白鍵を前方にずらして、持ち上げて外し
ます。(図 27、図 28)
※ このとき、白鍵を前方にずらしすぎてスプリングを
曲げないように十分注意して作業をしてください。
※ 黒鍵は、両隣の白鍵を外すと、外すことができます。
23-6 ハンマー白鍵
白鍵を外し、スプリングを一度下に押し込み、フッ
クから取り外します。(図 29)
HEDafEBUS 鍵盤を裏側にし、ストッパー L88 を
はがしてハンマー白鍵を外します。(図 30)
※ ハンマー黒鍵もハンマー白鍵と同じようにして外
すことができます。
24. HEDafEBUS 鍵盤の組立
24-1 ハンマー白鍵(ハンマー黒鍵)
24-1-1 HEDafEBUS 鍵盤の裏側より、ハンマー白鍵(黒
鍵)をフレームに差し込み、ストッパー L88 を取
り付けます。(図 31)
※ 重りの違いにより四種類のハンマーがあります。
取り付けの際に気をつけてください。
(パーツリスト P.20 参照)
Fig.27( 図 27) Fig.28( 図 28)
Fig.29( 図 29) Fig.30( 図 30)

 Loading...


