MOTIF XS6/MOTIF XS7/MOTIF XS8
48
V-Spring assembly
Service tool(サービス用ツール)VB299400 3X25 Screw(ネジ)
Keyboard assembly
(HEDafEBUS鍵盤)
(マスターストリング)
(スレーブストリング)
(VバネAssy)
Master string
Slave string
Push
Keyboard assembly
(HEDafEBUS鍵盤)
Master strings
(マスターストリング)
Cloth cover
(布カバー)
V-spring assembly
(VバネAssy)
Slave strings
(スレーブストリング)
Master strings
(マスターストリング)
V-spring assembly
(VバネAssy)
Slave strings
(スレーブストリング)
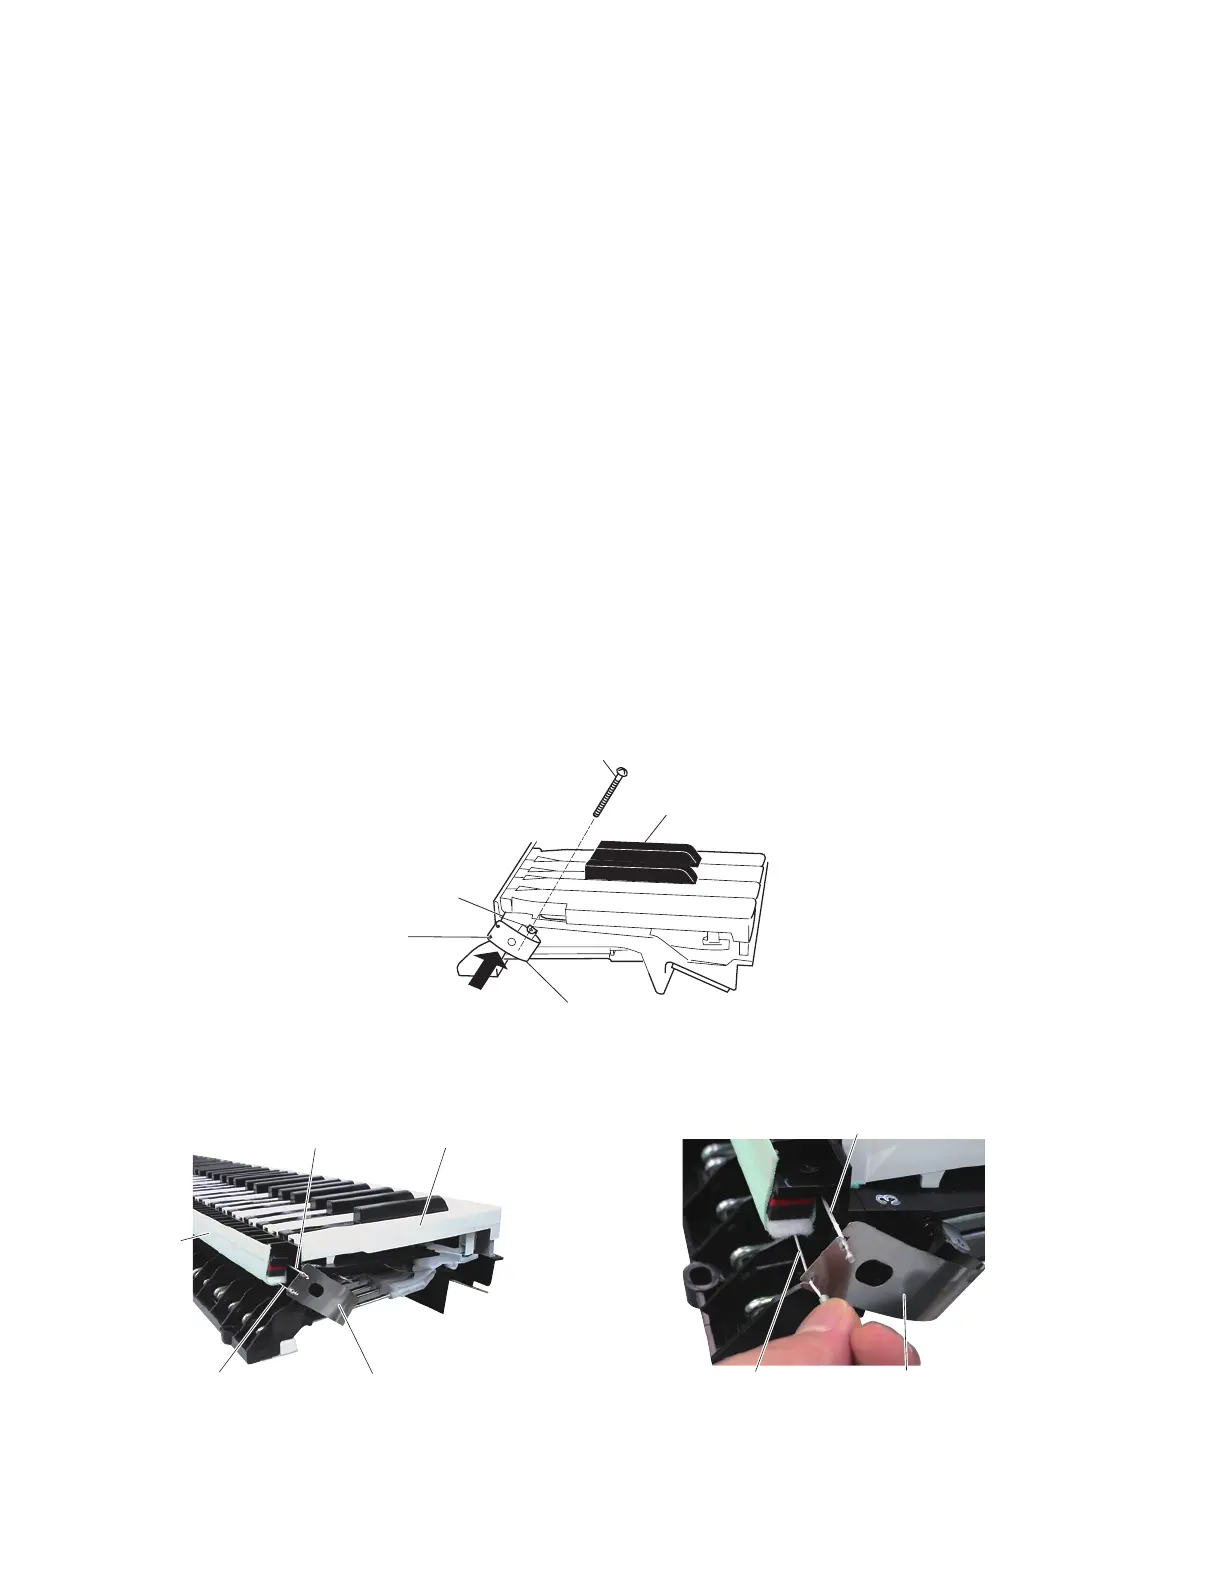
21b Removing the PC Sensor
21b-1 Remove the keyboard assembly.
(See procedure 19.)
21b-2 While pressing the V-spring assembly lightly with
your fi ngers, insert the jig (screw: VB299400) until
it is stopped as shown in the fi gure. (Fig. 21)
21b-3 Remove the slave strings from the V-spring as-
sembly. (Photo 8, Photo 9)
21b-4 Remove the slave strings from the PC sensor
spring. (Photo 10, Photo 11)
21b-5 Remove the 3PIN connector assembly from the
GHDPC circuit board. (Fig. 22)
21b-6 Remove the GHDPC circuit board.
(See procedure 20.)
21b-7 Remove the PC sensor spring from the sensor
sheet holder. (Fig. 22)
* When removing the PC sensor spring and GH-
DPC circuit board, hold the notch portion of the
sensor sheet holder. (Fig. 22)
21b PCセンサーの取り外し
21b-1 HEDafEBUS 鍵盤を外します。(19項参照)
21b-2 V バネ Assyを指で軽く押さえ、図に示すとおり治
具(ネジ:V B 2 9 9 4 0 0 )を止まるまで挿入します。(図 21)
21b-3 V バネ Assy からスレーブストリングを外します。
(写真 8、写真 9)
21b-4 PC センサーバネからスレーブストリングを外し
ます。( 写真 10、写真 11)
21b-5 GHDPC シートから中継束線 3PIN を外します。
(図 22)
21b-6 GHDPC シートを外します。(20 項参照)
21b-7 センサーシートホルダーから PC センサーバネを
外します。(図 22)
※ PC センサーバネと GHDPC シートを外すときは、
センサーシートホルダーの切り欠き部分を持って
ください。(図 22)
Fig.21( 図 21)
Photo8( 写真 8) Photo9( 写真 9)

 Loading...


