MOTIF XS6/MOTIF XS7/MOTIF XS8
50
String Set (V784300) ストリングセット
(マスターストリング)X1
(スレーブストリング)X1
(両面テープ)X1
Master String
Slave String
Adhesive Tape
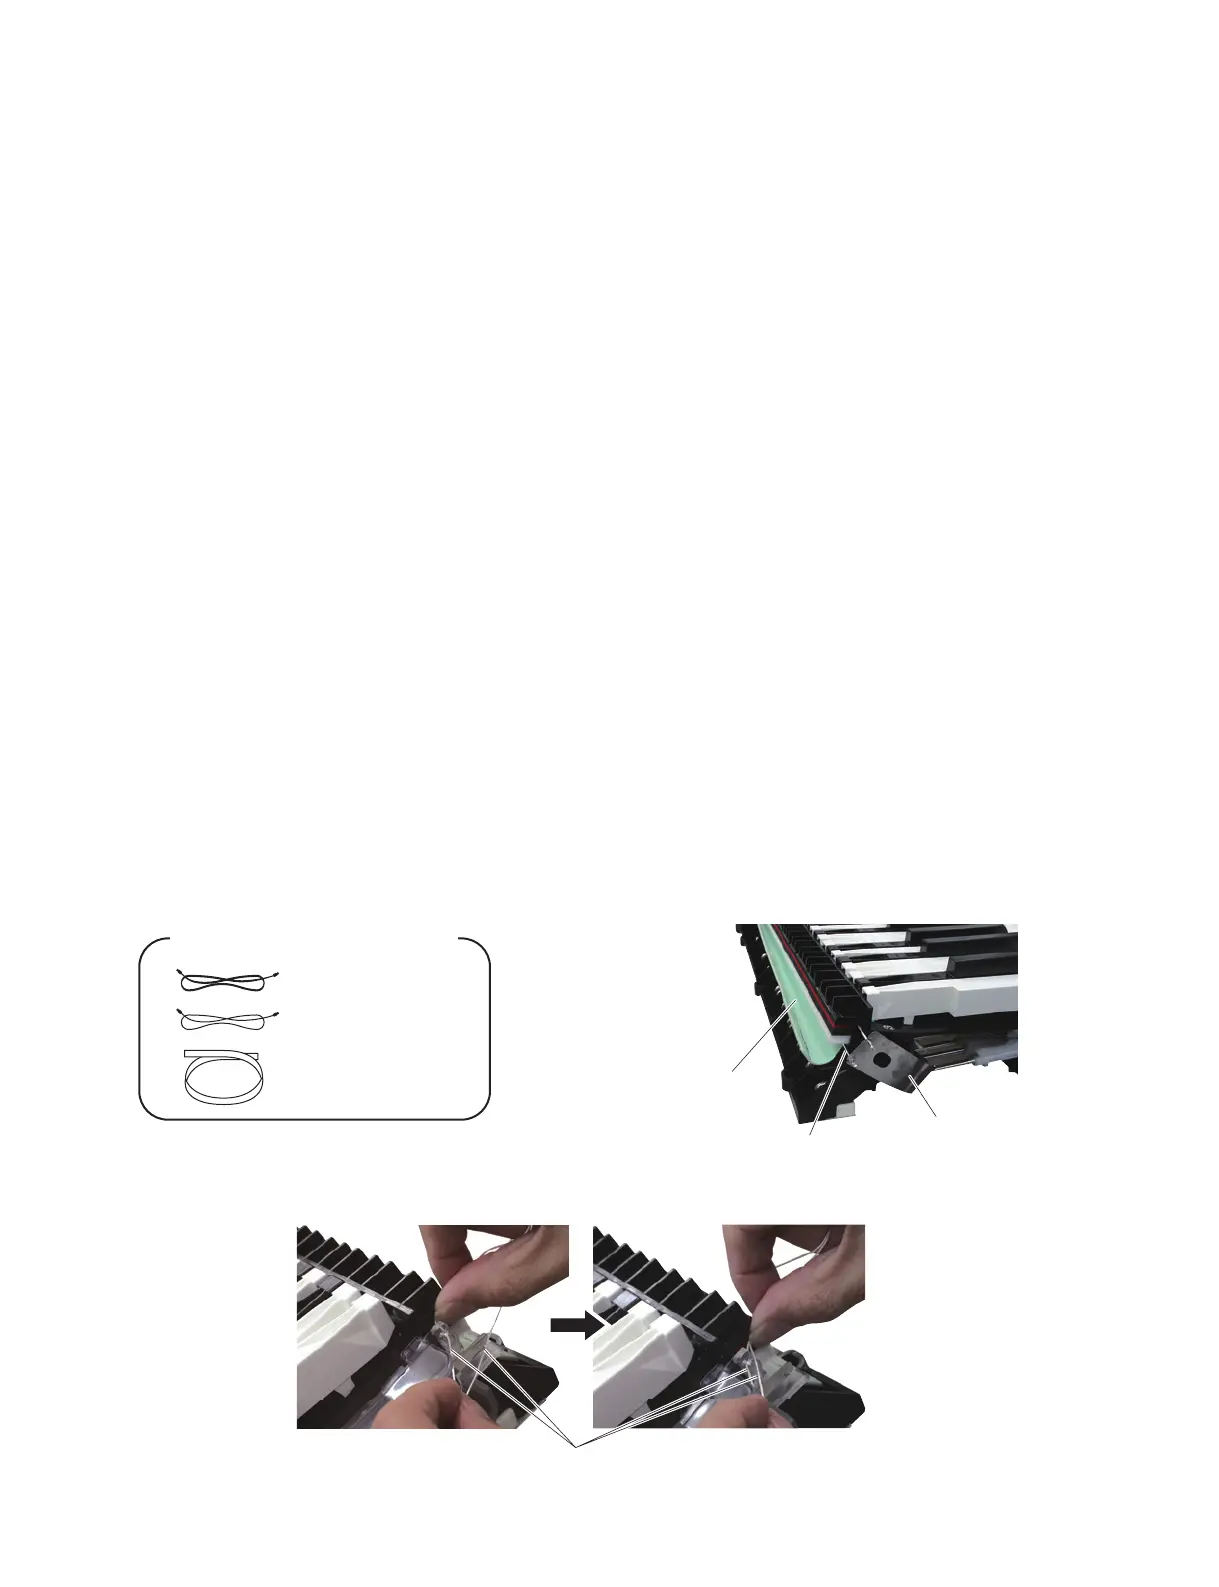
Slave strings
(スレーブストリング)
V-spring assembly
(VバネAssy)
Cloth cover
(布カバー)
Master strings
(マスターストリング)
22. Exchanging the String Set
(Time required: About 12 minutes)
* This procedure is necessary only when the
strings are cut.
* Be sure to replace as a set even if only either
the master or slave spring is cut.
* Insert a rod (TX000670) to the frame so that the
string may not be pressed by the key hammer.
* The string set (V7843000) is consisted of the
following parts. (Fig. 24)
• Master string x 1
• Slave string x 1
• Two-sided tape x 1
22a Removing the String Set
22a-1 Remove the keyboard assembly.
(See procedure 19.)
22a-2 Remove the cloth cover from the both ends of the
keyboard frame slowly. (Photo 12)
22a-3 Remove the master strings and slave strings from
the V-spring assembly. (Photo 8, Photo 9)
22a-4 Remove the master strings from the sensor sheet
holder. (Photo 10)
22a-5 Remove the slave strings from the PC sensor
spring. (Photo 10, Photo 11)
22b Installing the String Set
22b-1 Insert the master string one by one securely into
the slit of the sensor sheet holder. (Photo 13)
22. ストリングセットの交換(所要時間:約 12 分)
※ この作業は、ストリングが切れた場合にのみ行っ
てください。
※ マスター、スレーブのどちらか一方が切れた場合
でも、必ずセットで交換してください。
※ 鍵盤ハンマーがストリングを押さえないよう、フ
レームにロッド(TX000670)を挿入して作業を
行ってください。
※ ストリングセット(V7843000)は以下の部品で
構成されています。(図 24)
•マスターストリングx1
•スレーブストリングx1
•両面テープx1
22a ストリングセットの取り外し
22a-1 HEDafEBUS 鍵盤を取り外します(19項参照)
22a-2 布カバーを鍵盤フレームの両端からゆっくり外し
ます。(写真 12)
22a-3 V バネ Assy からマスターストリングとスレーブ
ストリングを外します。(写真 8、写真 9)
22a-4 センサーシートホルダーからマスターストリング
を外します。(写真 10)
22a-5 PCセンサーバネからスレーブストリングを外し
ます。(写真 10、写真 11)
22b ストリングセットの取り付け
22b-1 マスターストリングを、1 本ずつ確実にセンサー
シートホルダーのスリットに挿入します。(写真 13)
Fig.24( 図 24)
Photo12( 写真 12)
Photo13( 写真 13)

 Loading...


