ZEISS 5 First Operating Steps | 5.4 Acquiring an Image
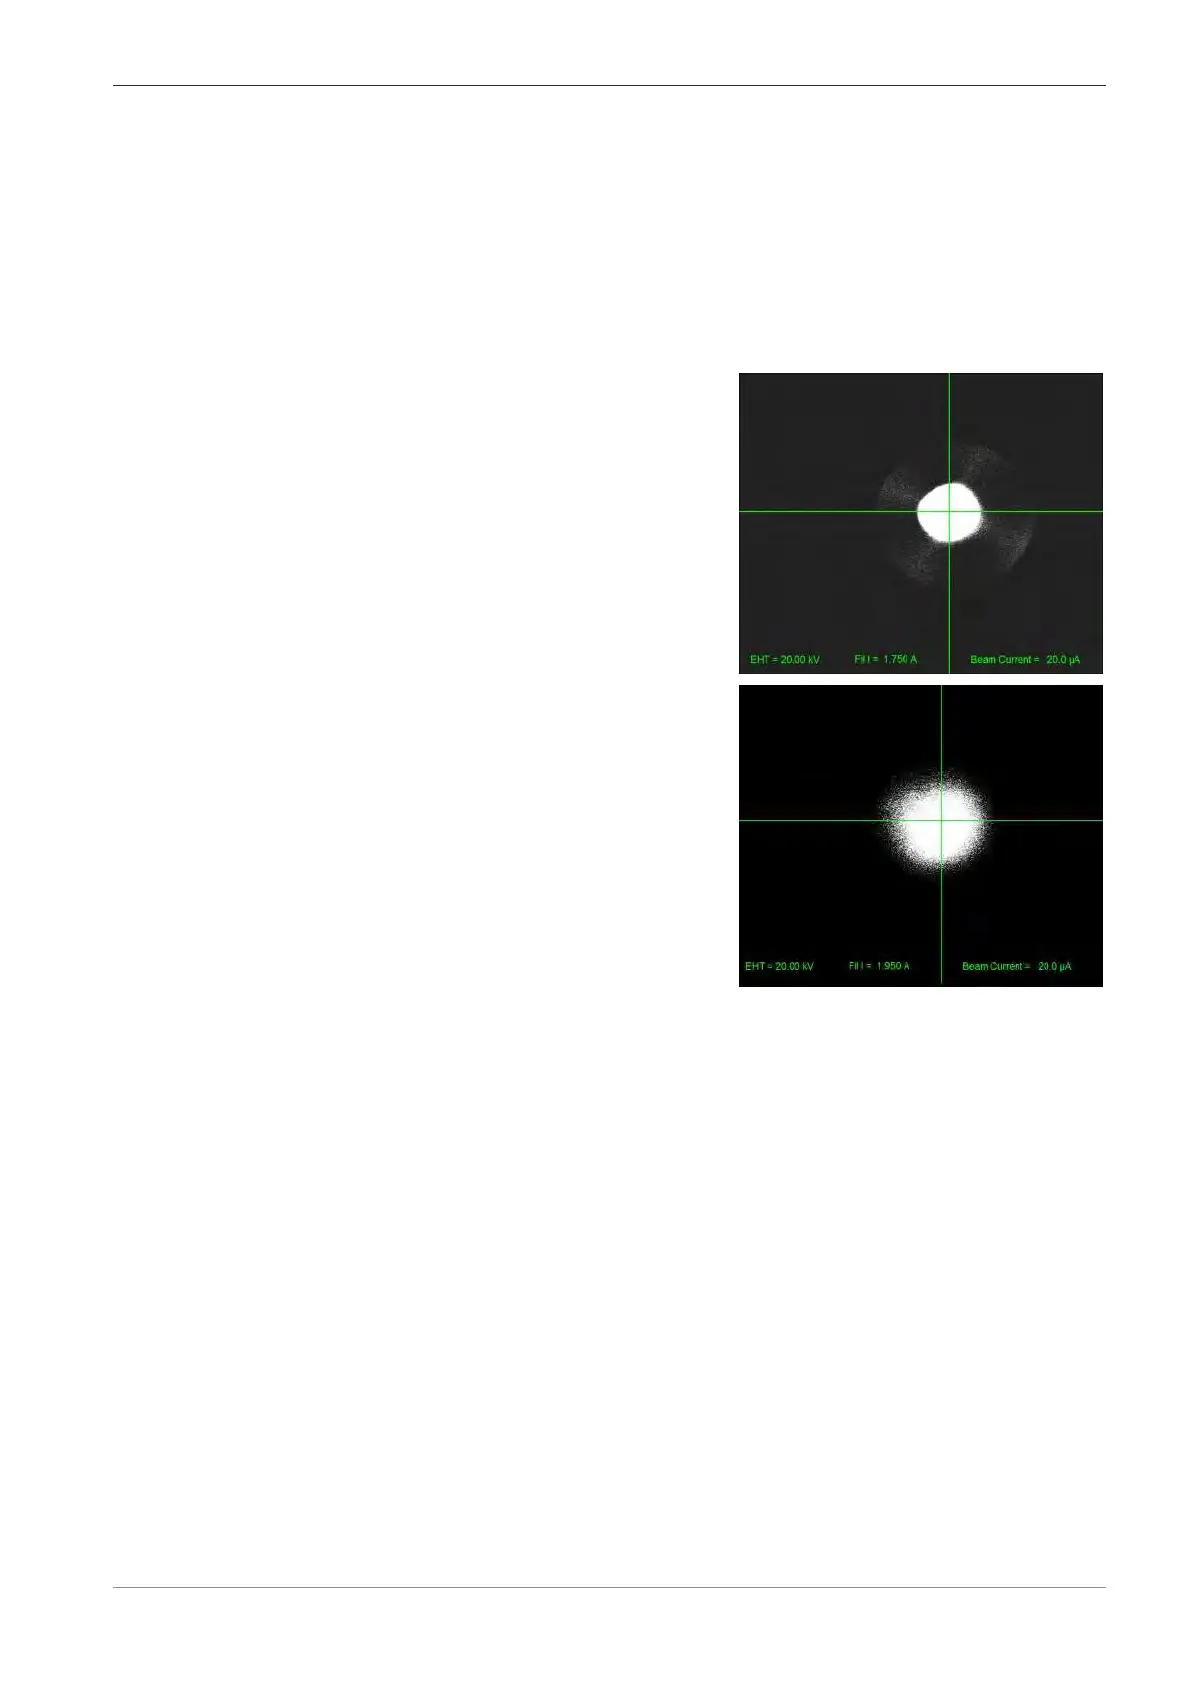
15. Adjust the Filament I target by increasing or decreasing the value using the fine adjust op-
tions, i.e. small arrows: Increase the Filament I target in small steps and check the emission
image until close to the second peak. The signal increases and the emission image becomes
brighter. At first five regions can be seen on the emission image, i.e. the electron emission
from all the five crystal planes of the LaB₆ (pyramid shape filament). As the current is in-
creased the four symmetrical off axis emission areas collapse into a central spot, i.e. the
emission will be mainly from the tip of the filament and not from the other four planes of
the LaB₆ filament. The best performance of the LaB₆ can be achieved when the tip is fully
saturated and at the second peak. For a new LaB₆ filament the filament current value will
be between 1.95A to 2.0A. The Filament I target should never be higher than 2.050A.
a LaB6 is saturated at first peak
The spot is very well defined and bright but
there is clearly some emission from the side
planes. At first peak, does not provide the
means for obtaining the optimal resolution
and the beam intensity decreases quite dra-
matically, as the filament ages.
b Fully saturated at second peak
Filament is fully saturated because there is
a little bit of emission on the sides of the
central spot. This is the emission image for
best performance providing optimal resolu-
tion.
16. Adjust the Gun Shift and Gun Tilt: Center the emission image, obtain a symmetrical shape
with the brightest point at the middle of the crosshairs (shift for adjusting and checking the
edges and tilt for moving the brightest point of the emission image to the middle.
17. Set the WD=8.5 mm.
18. On the Apertures tab, activate Focus Wobble and Wobble Fast. Find a feature which is
outstanding (preferably round shape). Change the wobbling amplitude to appropriate val-
ues, adjust the contrast, and set to an appropriate magnification.
19. Adjust the Mid-column aperture by fine-adjusting knobs X and Y. Work with both X and
Y knobs, finding the crossovers, until the image is just wobbling in and out of the screen.
When finished with the adjustments, deactivate Focus Wobble.
20. Do a Hysteresis correction by using Shift + F2 keys on the keyboard.
21. Adjust the Mag and Focus. Increase the magnification to the desired values and adjust the
focus (in several steps).
22. Adjust Stigmation in both X and Y directions in several steps.
23. Re-adjust the Focus, when necessary.
à The beam is now aligned and further adjustments of the mid-column apertures or the
fine-adjustment knobs is no longer required (use only the Auto Aperture Align from
now on).
24. Start imaging different specimens and if necessary change/adjust the EHT, I Probe, WD
and repeat with the Mag, Focus, and Stigmation adjustments.
Instruction Manual ZEISS EVO | en-US | Rev. 10 | 354706-0780-006 71