5 First Operating Steps | 5.5 Modifying Gun Parameters and Optibeam Mode ZEISS
§ Standard Align uses the normal imaging mode to align the gun.
§ Advanced Align uses the emission image to align the gun.
Procedure
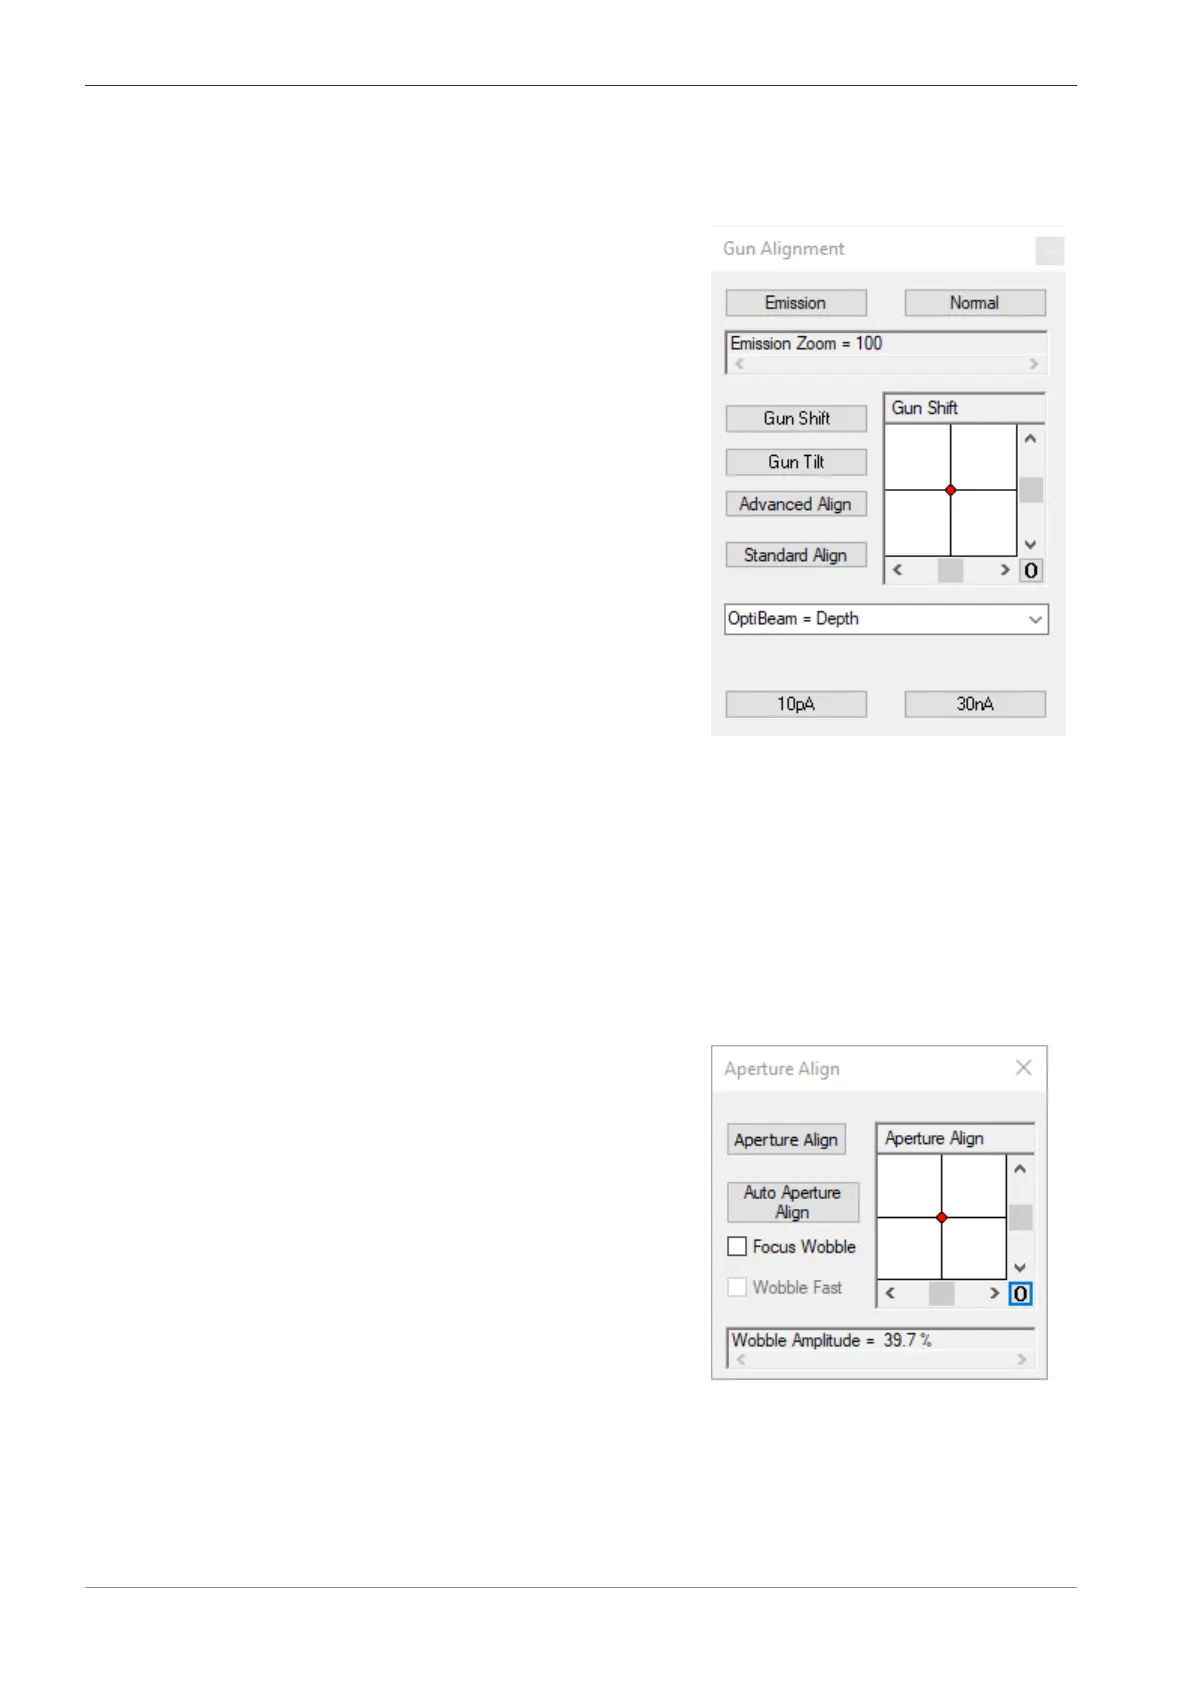
1. From the Panel Configuration Bar, select Gun Alignment.
à
The Gun Alignment dialog is displayed.
2. To automatically align the gun with the help of the emission image, click Advanced Align.
3. To automatically align the gun with the help of the normal imaging mode, click Standard
Align.
5.5.2 Using the Auto Aperture Alignment Function
Auto aperture align is used to improve the quality of the images. When the aperture align is se-
lected the software automatically aligns the beam with respect to the EasyVP aperture.
Prerequisite
ü
The EasyVP aperture is fitted.
Procedure
1. From the Panel Configuration Bar, select Aperture Align.
à
The Aperture Align dialog is displayed.
2. Set the preferred imaging conditions (example EHT=10kV, WD=8.5mm, and
Iprobe=300pA) and obtain an image.
3. Click Auto Aperture Align button.
à The software starts aligning the beam and the progress bar is displayed on the panel. A
full size image is displayed when the alignment is completed.
80 Instruction Manual ZEISS EVO | en-US | Rev. 10 | 354706-0780-006