You can change to the previous or next Outmap by turning the Left Crown.
i. Name
Each Outmaps can be named (max: 12 characters).
Press the Shift+OK buttons to modify it.
ii. Inputs
Any Input can be sent to Line Output. Scroll through the grid with the direction
buttons or the Jog wheel and press the OK button to enable or disable an input.
iii. Talk
Compared to Headphone Outmap, you can choose Tlk1 and Tlk2.
It corresponds to the Talk buttons.
Pressing those buttons, enables the Slate Mic and the 3,5mm jack Mic and will
send the stream to the Headphones and to any Outmap (Line, AES, Dante) where
the corresponding Talk function is routed.
Example: if Talk1 is routed to LineOut 3 and Talk2 to LineOut 4.
Pressing Talk 1 will send the Slate Mic to LineOut 3 but not to LineOut 4.
Pressing Talk 2 will send the Slate Mic to LineOut 4 but not to LineOut 3.
NB: Pressing the Shift + Talk buttons, routes the audio to the Outputs and to
the Tracks.
NB: Quick Modification > Each parameter once selected may be quickly modified by rotating
the Jog wheel while holding the Shift button pressed.
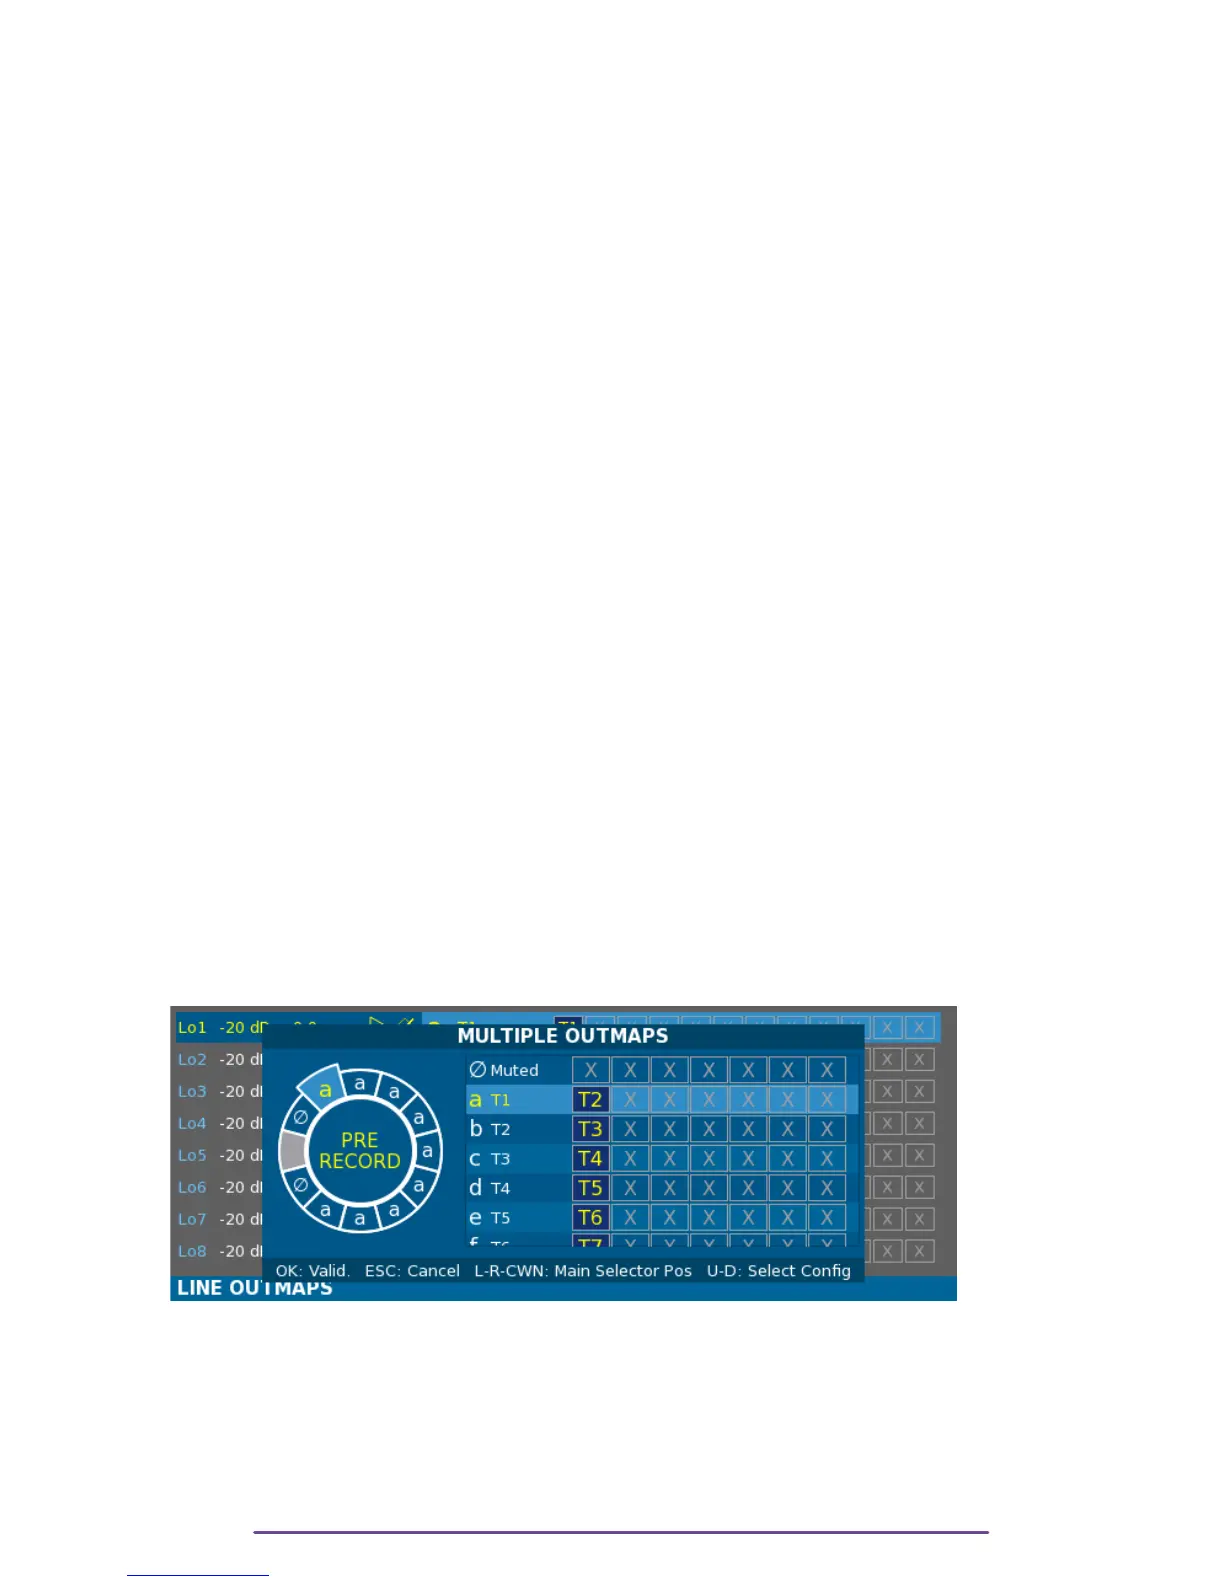
7. Multiple Outmap
It is possible to apply a different Outmap according to the Main Selector position.
Press the Shift + OK buttons to display the Multiple Outmap window.
Pict. 16
A Main Selector is represented with an Outmap letter on each position, except the Stop position
where nothing is routed to the outputs.
Using the Left and Right buttons, loop throught the eleven available Main Selector position.
Using the Up and Down buttons, scroll through the 26 available Outmaps (plus the Muted
special outmap).
Save the modifications by pressing the Ok button or Cancel by pressing the Escape button.
Cantar X3
13