NB: Copy and Paste.
By pressing the F1 button, the current Digital Filters setup is copied to the clipboard.
Paste it over any Digital Filters setup by pressing the F2 button.
2. Line
The solo of a Line input is obtained by pressing the Solo button of the actuator assigned to the
input, or it has no actuator assigned, by pressing the Solo button on the Right side of the Cantar.
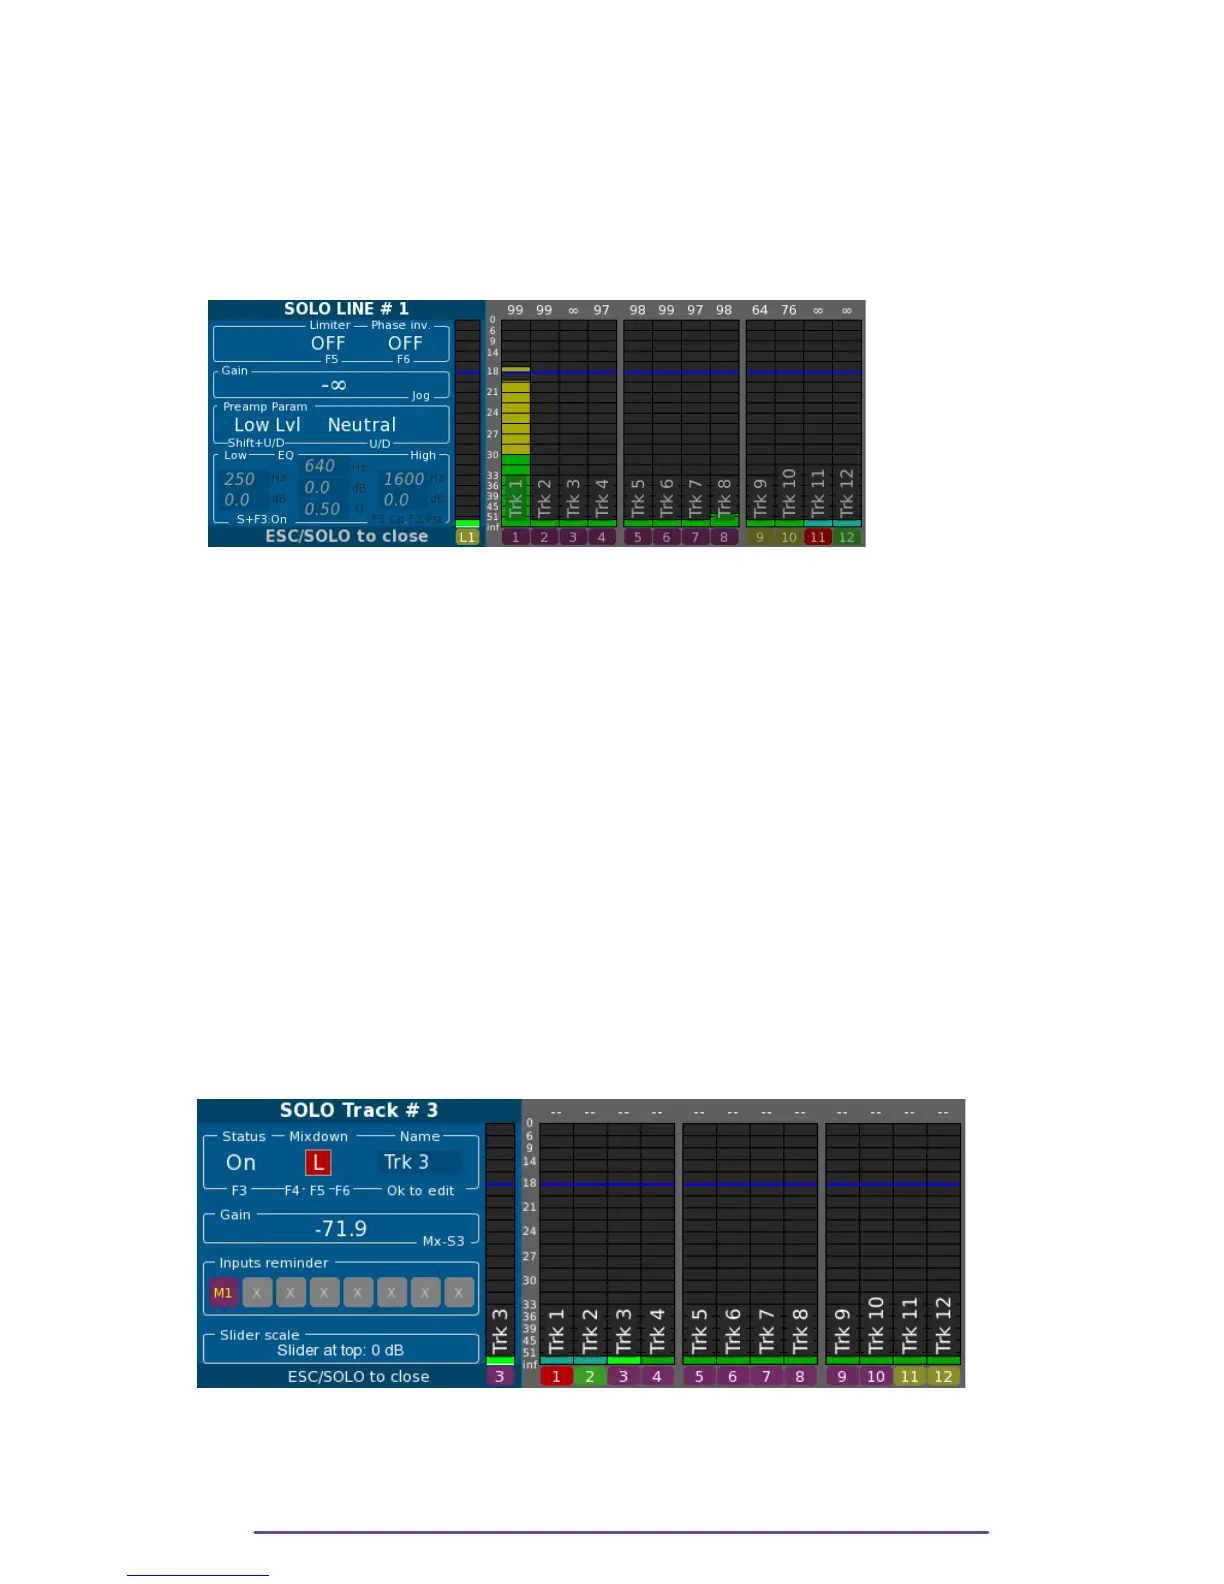
Pict. 37
i. Attenuation
If a Line input is not assigned to an actuator (Mixer or Cantarem or Cantarem2 slider), its
attenuation can be changed during Solo by rotating the Jog wheel.
ii. Attenuator
Toggle between High Level & Low Level with the Shift + Up or Down buttons.
Low Level: default for all line inputs.
High Level: a 20dBu attenuator is applied.
iii. Filter
Change Filter with the Up or Down buttons between Neutral, 60Hz/–6dB and 60Hz/–12dB.
iv. Other parameters
Please refer to the Solo-Mic section.
3. Track
The solo of a Track is obtained by pressing the Solo button of the actuator assigned to the track,
or if the input has no actuator assigned, by opening the Track-Solo panel for any Track and then
rotating the Left Crown to get to the desired Track Number.
Pict. 38
i. Status (Arm/Disarm Track)
While being in Solo-Track, pressing the F3 button arms or dis-arms a Track.
Monophonic multi-track file recording doesn't waste disk space by recording empty Tracks as it is
Cantar X3
28