Pict. 42
6. Outputs
The solo of an Ouput is obtained by pressing the Solo button of the actuator assigned to the
output. If the output has no actuator assigned, open the Solo panel of any input and then rotate
the Left Crown while holding the Shift button pressed until the LineOut-Solo panel appears.
Cycle through Lineout 1 to 8 and then to DigiOut 1 to 8 by rotating the Left Crown.
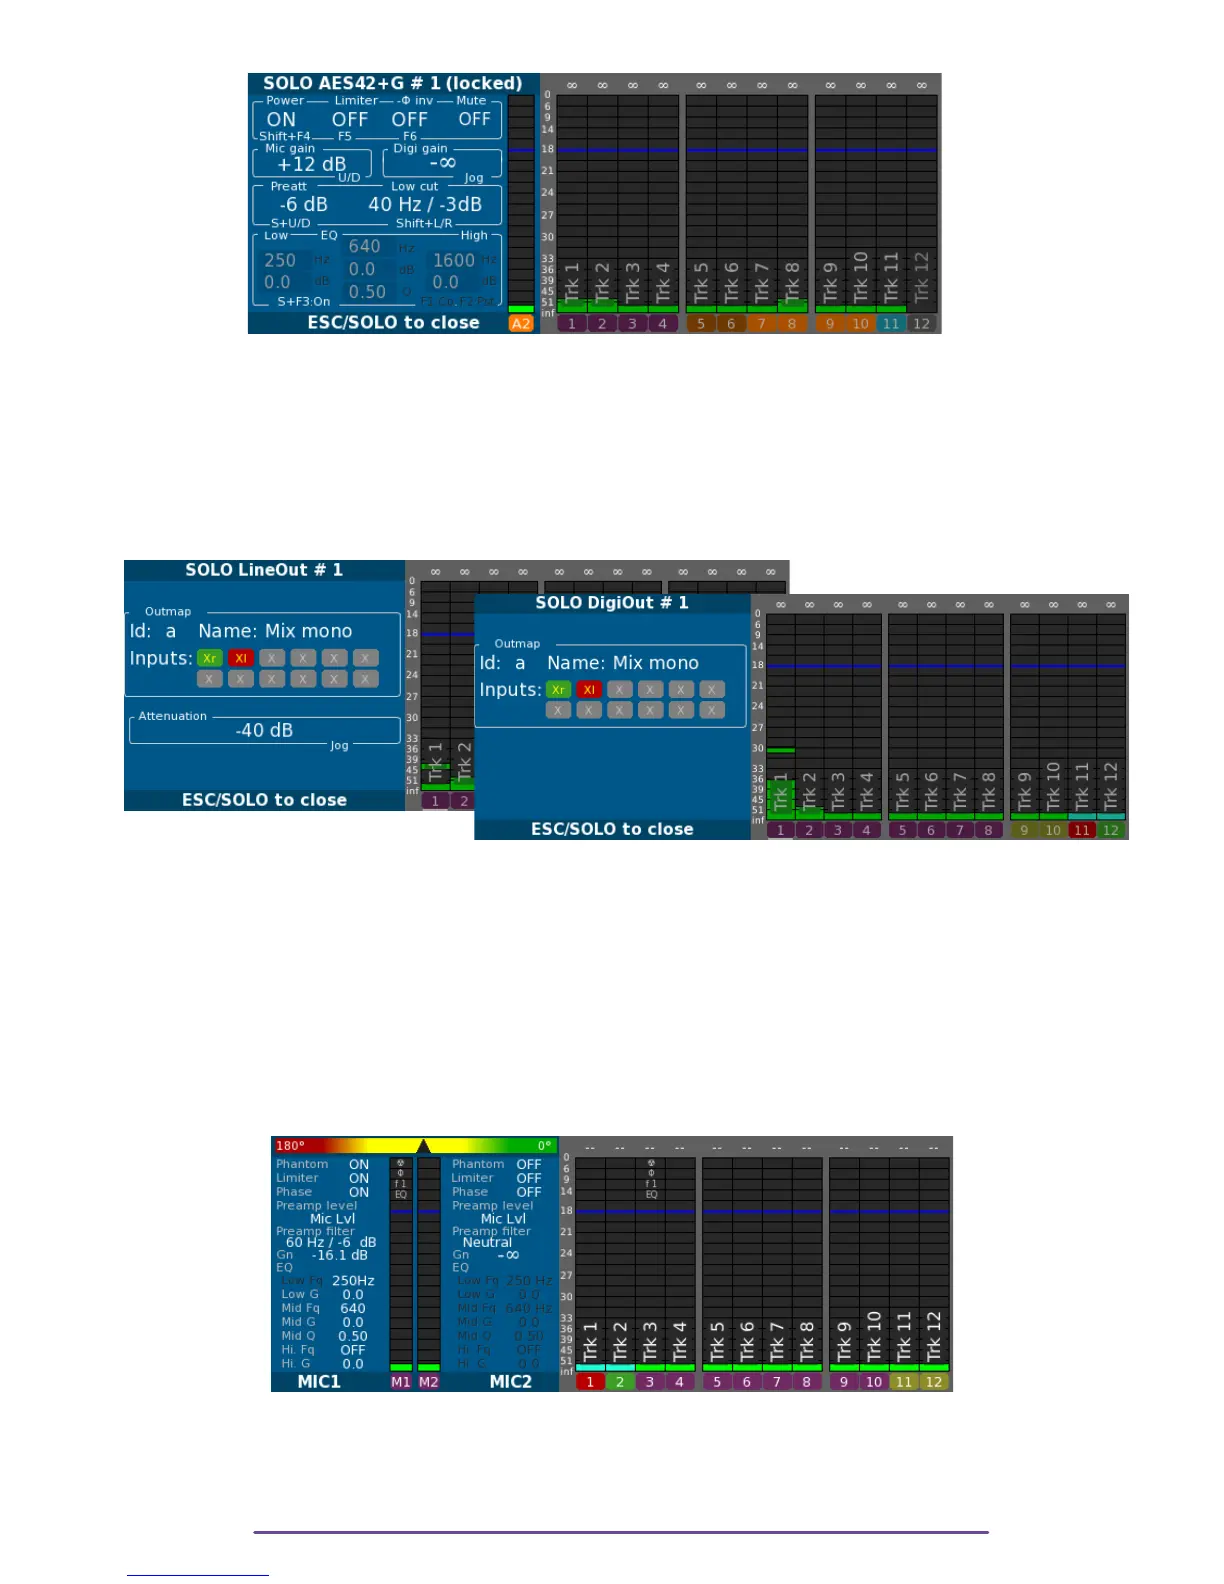
In this panel, is reminded the current Outmap applied on the Output and its attenuation.
←Pict. 43
Pict. 44 →
VII. Double Solo & Phase-meter
1. Mics
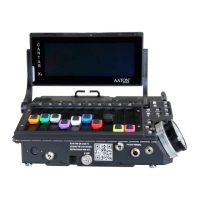
In order to compare 2 Mic inputs, it is possible to have a double Solo.
It is obtained by pressing and holding both Solo buttons of the Mic inputs desired. The firstly
pressed button will determine which input is monitored in the left ear, the second will be
monitored in the right ear. (Another way of triggering a double Solo is to engage the first Mic
Solo by a quick press on the Solo button and then once the Solo panel displayed to add a Solo
by pressing the other desired Solo while holding the Shift button.)
Pict. 45
At the top of the Solo panel is displayed is phase-meter representing the phase between the 2
inputs. The left side represents a phase of 180° and the right 0°.
2. Tracks
Cantar X3
31