Disassembly/Assembly
Guidelines
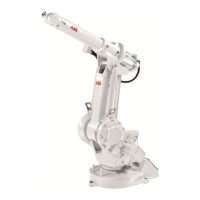
IRB 6400
Page 6 - 18
Axes 2 & 3 Guidelines
LOWER ARM (L17) & PARALLEL ARM (L58) Installatio n
WARNING! BE SURE ELECTRICAL DISCONNECT SWITCH IS
OFF AND LOCKED IN OFF POSITION!
1. MOUNT PARALLEL ARM (L58) TO LOWER ARM (L17):
a. Set lower arm (L58) and parallel arm (L17) on a working surface.
Move arms to engage each other.
b. Press parallel arm (L58) into lower arm (L17). Use the threaded
holes in the arms and a combination of threaded rod, washers,
and nuts to help in forcing the arms together.
2. ATTACH HOIST TO LOWER ARM AND LIFT LOWER ARM (L17) AND
PARALLEL ARM (L58) ASSEMBLY. Set in place in frame housing
(S21). Leave hoist attached to support and position assembly during
installation.
3. INSTALL AXIS 2 & 3 GEAR REDUCTION UNIT (S35) as outlined on
page 6 - 6.
4. INSTALL UPPER ARM as outlined on page 7 - 17
5. COMPLETE INSTALLATION OF PARALLEL BAR (L42) as outlined
on page 6 - 13.
6. SECURE AXIS 2 WITH LOCKING SCREW INTO LOWER ARM (L17).
SECURE AXIS 3 WITH EXTRA MECHANICAL STOPS.
7. INSTALL COUNTERBALANCE WEIGHT (L68):
a. Lift weight (L68) into position for mounting.
b. Insert screws (L76) and washers (L75). Torque to 224 ft-lb.
8. CALIBRATE AXES 2 & 3 as outlined in Section 11.
E
E
REFERENCE DRAWINGS
Exploded Views:
“S” (pg 6-23, 12-2)
Assemblies:
3HAA 0001-EP (pg 13-10)
Hand Tools
REQUIRED TOOLS
3HAA 0001-RB (pg 13-6)
3HAA 0001-RB (pg 13-7)
3HAA 0001-RB (pg 13-4)
3HAB 4162-2 (pg 13-9)
3HAB 4162-2 (pg 13-8)
3HAB 4167-2 (pg 13-11)
“L” (pg 6-24, 12-3)
Torque Wrench (224 ft-lb)
LOWER ARM &
PARALLEL ARM WEIGH
APPROX. 300 LB.
COUNTERBALANCE
WEIGHT WEIGHS
APPROX. 700 TO
900 LB.

 Loading...