Hardware Setup, Continued
BIOS
After you have established a physical connection from your host system’s serial port to
you ARMC/2 card, you must enable Remote Access in your BIOS.
Step Description
1 From the host system’s terminal, enter the BIOS setup.
2 Confirm that your Onboard Serial Port you are using is enabled.
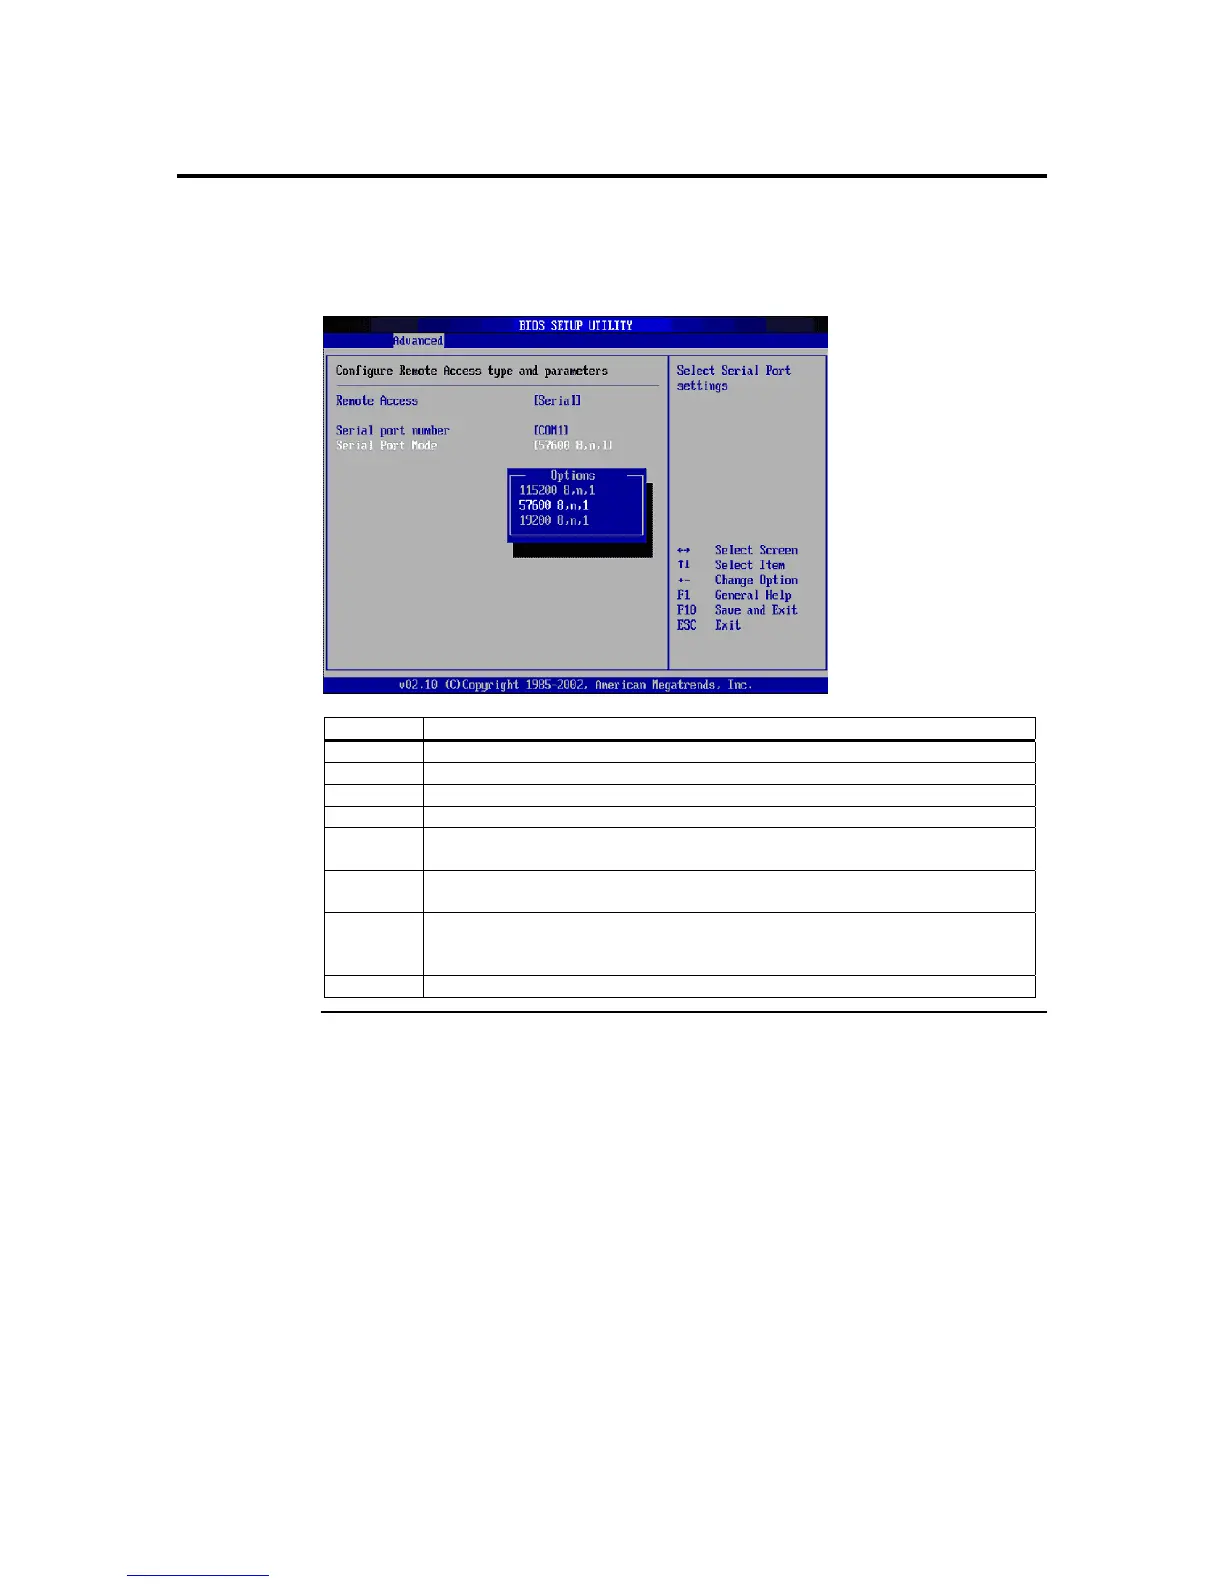
3 Enter the Remote Access Configurations menu.
4 Set the Remote Access setting to [Serial].
5 Set the Serial Port Number to [COM1] or [COM2] depending on the serial
(COM) port you are using.
6 Set the Serial Port Mode baud rate you desire. By default, it is set to [19200
8,n,1].
7 If available, you can set the Post-Boot Support option. When enabled, the
ARMC/2 attempts to output the DOS screens or the initial windows text
screens. This is really handy when you want to see the OS Boot Menu.
8 Save and Exit the BIOS.
ARMC/2 User’s Guide
138