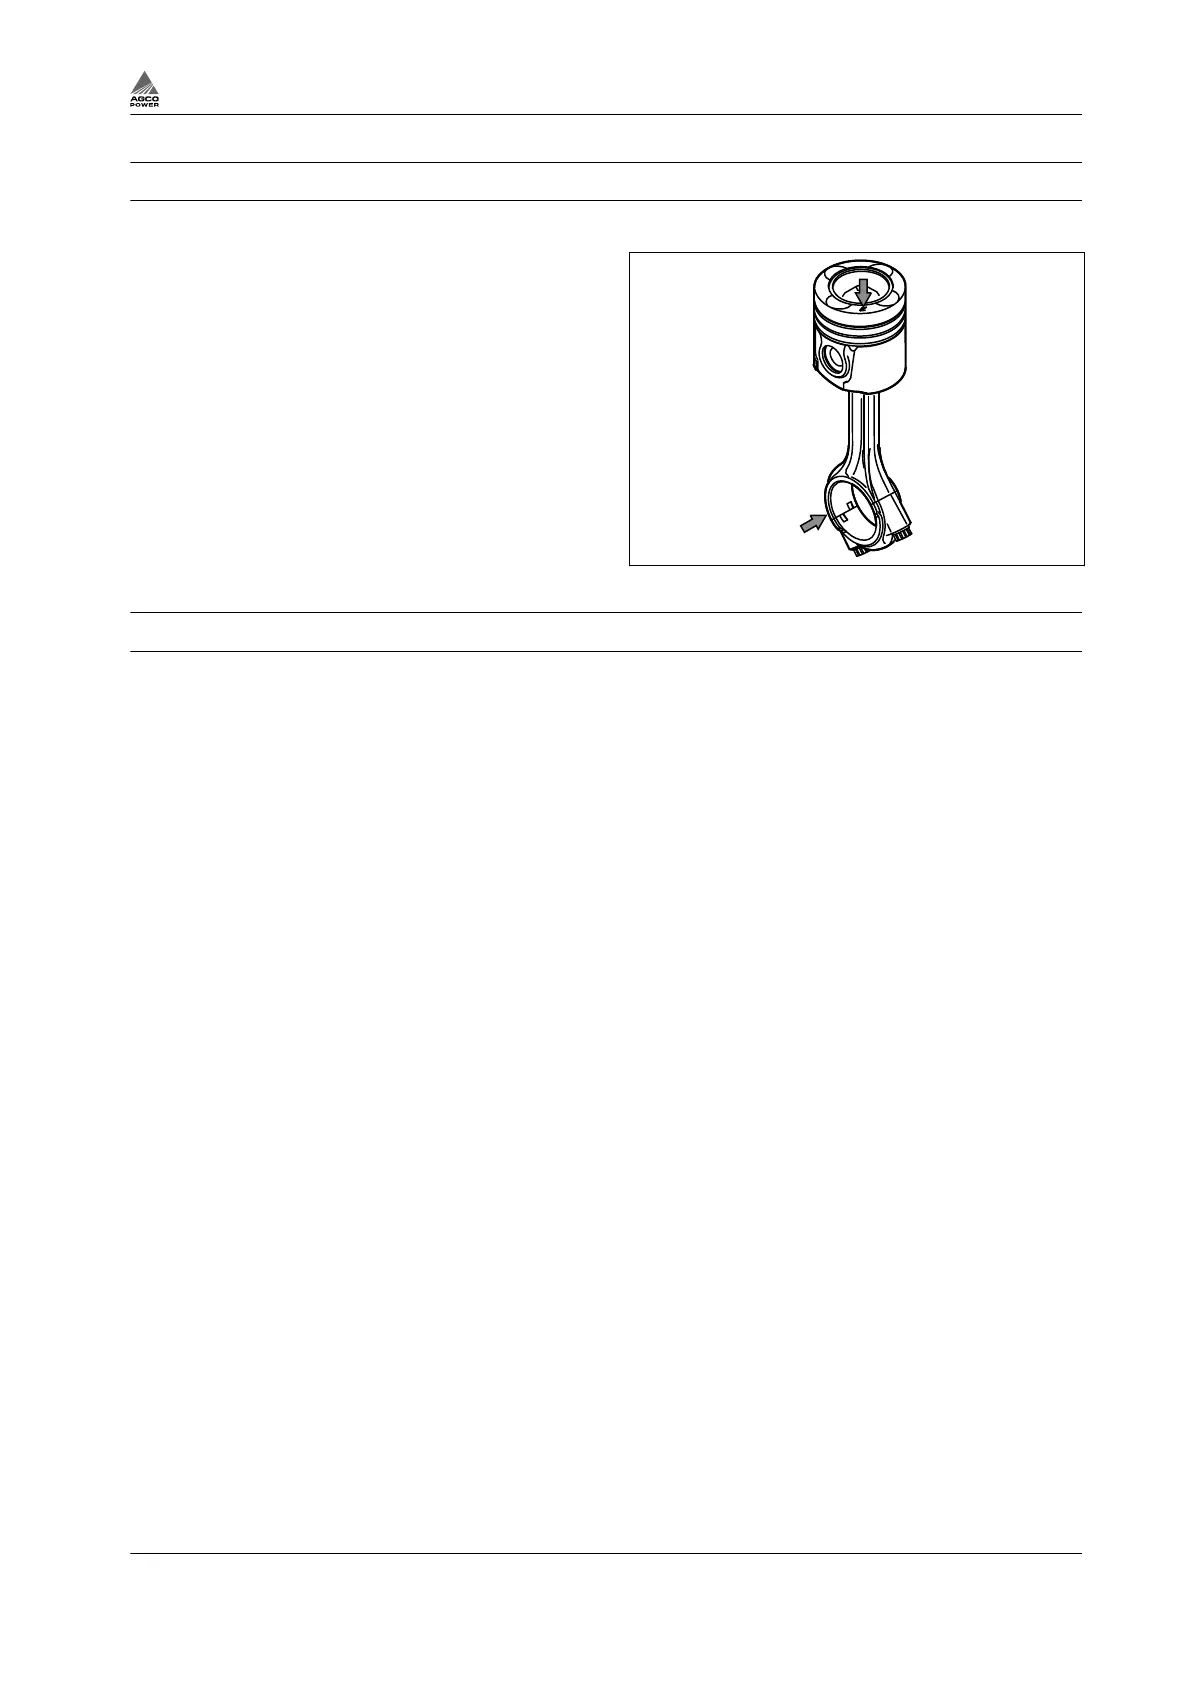
3.6.6 Fitting piston pin
Procedure
1.
Fit the connecting rod inside the piston and
push the piston pin into position.
33-74 engines: The weight class letter must
be on the fuel equipment side.
84-98 engines: The weight class letter must
be on the side of the camshaft.
The arrow on the piston points toward the
front end of the engine.
2.
Fit the piston pin circlips.
a) Make sure the circlips are pressed
correctly into the grooves.
b) The circlip ends must point up.
Fig. 56
3.6.7 Fitting piston together with connecting rod
Procedure
1.
Check that the bearing locations are clean.
2.
Put the bearing shells in the connecting rod and bearing cap.
Note the position of the bearing shells.
3.
Lubricate the piston, the piston rings and the cylinder bore.
4.
Make sure that the piston ring gaps are spread around the piston.
a) Turn the gap of the 1st piston ring forward (toward coolant pump) .
b) Turn the gap of the 2nd piston ring back (toward flywheel).
c) Turn the gap of the oil ring on the side of the exhaust manifold.
5.
Fit the piston with the connecting rod.
a)
Make sure that the direction of the arrow on the piston shows forward.
b) 33-74 engines: Use a piston ring strap or fitting tool 9201 85840.
c) 84-98 engines: Use a piston ring strap or fitting tool 9231 06340.
6.
Lubricate the big-end bearing journal and bearing shells.
7.
Push the piston down.
8.
Fit the bearing cap.
Make sure that the notches for the guide lugs are in the same side.
9.
Tighten the connecting rod screws.
NOTE: See the information for the correct tightening torques.
10.
Check that the connecting rod has enough end float on the big-end bearing journal.
3. Maintenance
4th Generation Engines 3-35
8370 79492