4.
Loosen the fastening screw holding the injector in place and the fastening nut holding the feeding
pipe in place.
a) Unscrew and remove the injector and the feeding pipe.
b) Plug plastic covers into all the connection points.
NOTE: The injector and the feeding pipe are calibrated as couple. Do not mix them up.
5.
Remove the injector seal ring from the cylinder head if it has not been removed with the injector.
6.
Blow the injector and feeding pipe locations dry.
3.13.3.2 Fitting the injectors (CRIN3)
Before starting the procedure
NOTE: See the information for the correct tightening torques.
Procedure
1.
Ensure the injector seat on the cylinder head
is clean.
2.
Replace the old seal ring and the O-rings
with new ones.
3.
Lubricate the O-rings.
4.
Install the injector and feeding pipe on the
cylinder head.
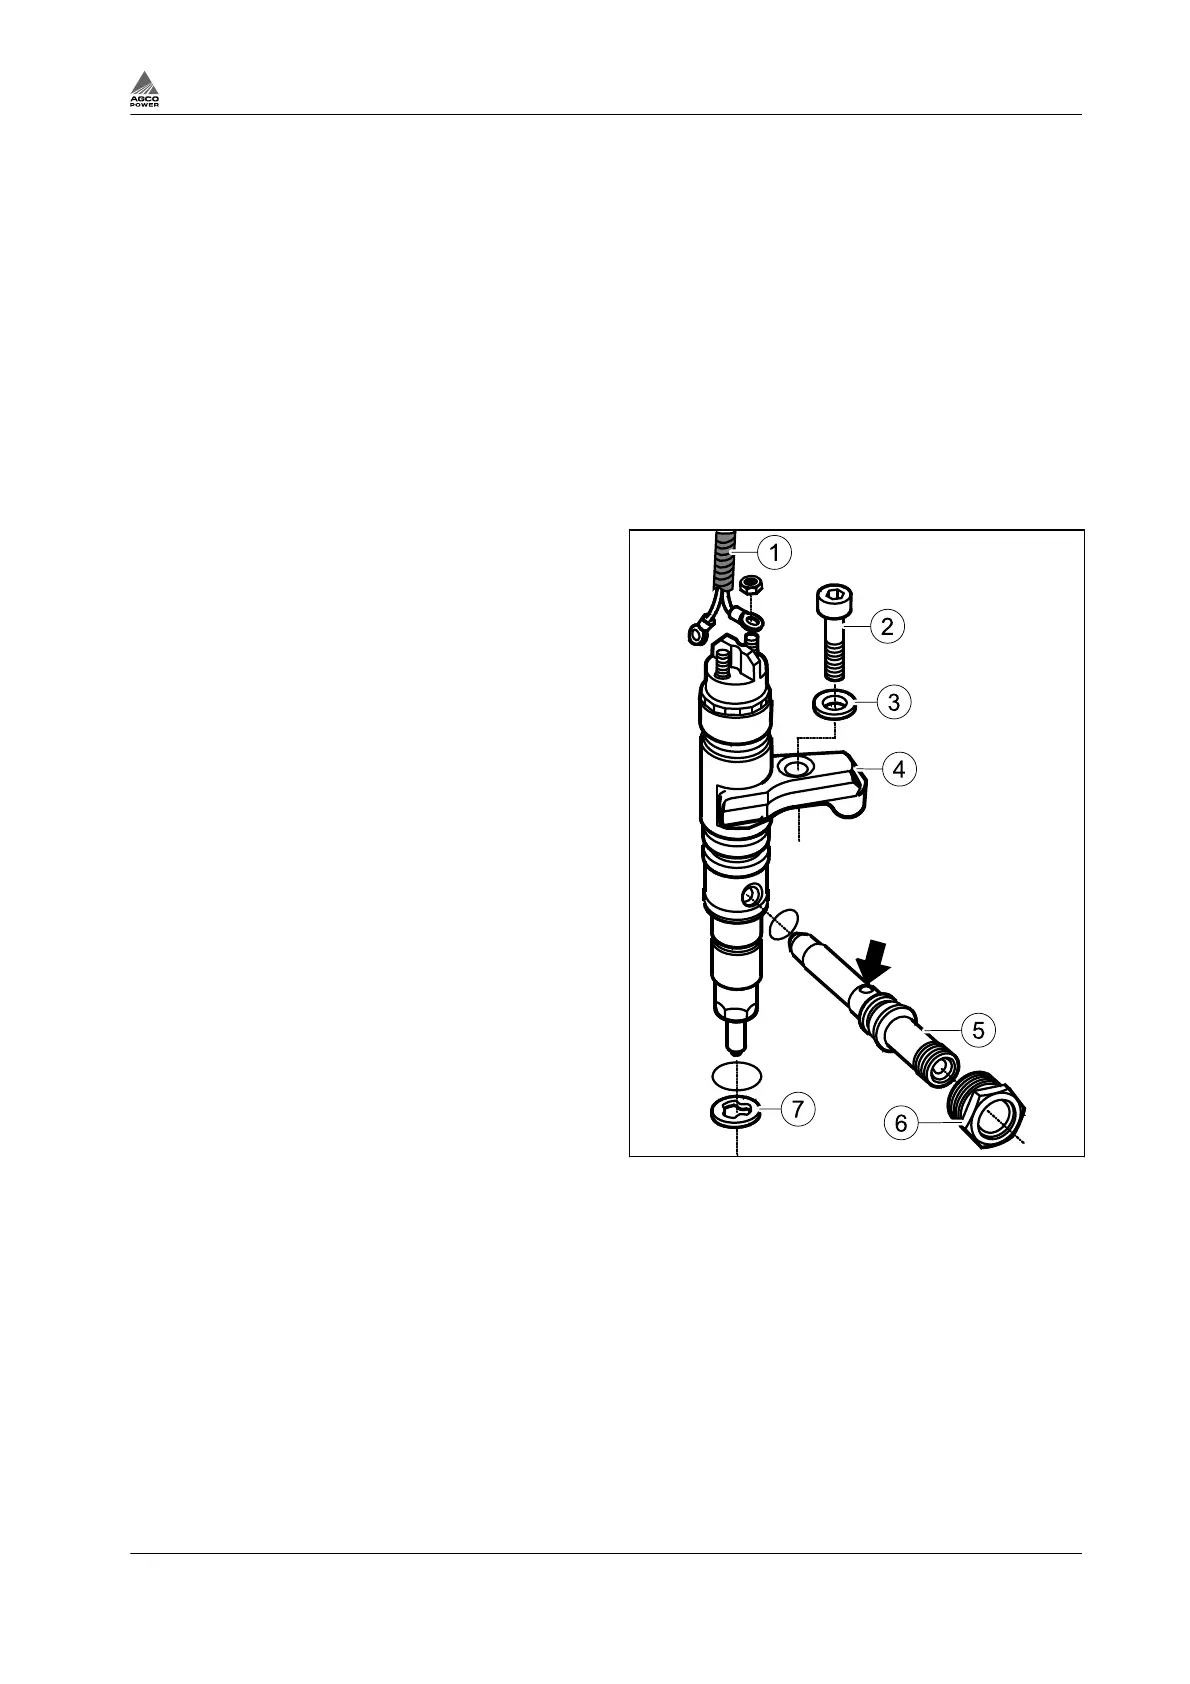
Pay attention to the position of the feeding
pipe. Adjust the feeding pipe’s control balls
(shown with an arrow on the figure) so that
they line up with the grooves in the cylinder
head.
5.
Tighten the fastening screw and nut
progressively.
a) Pre-tighten the fastening screw (2) to 15
Nm
b) Undo the fastening screw
c) Pre-tighten the fastening nut (6) to 15 Nm
d) Tighten the fastening screw (2) to 40 Nm
e) Tighten the fastening nut (6) to 50 Nm
Fig. 105
(1) Injector wiring
(2) Fastening screw
(3) Washer
(4) Fastener
(5) Feeding pipe
(6) Fastening nut
(7) Seal ring
6.
Install the high-pressure pipe.
7.
Tighten the high-pressure pipe to correct torque value.
8.
Install the injector wire.
9.
Tighten the injector wire to correct torque value (nut M4).
10.
Replace the valve cover seals.
11.
Fit the valve cover.
3. Maintenance
4th Generation Engines 3-63
8370 79492