Appendix C External Tanks144
USG-CUS-059 Rev05MassARRAY® Nanodispenser RS1000 v2.1 User Guide
For Research Use Only. Not for use in diagnostic procedures.
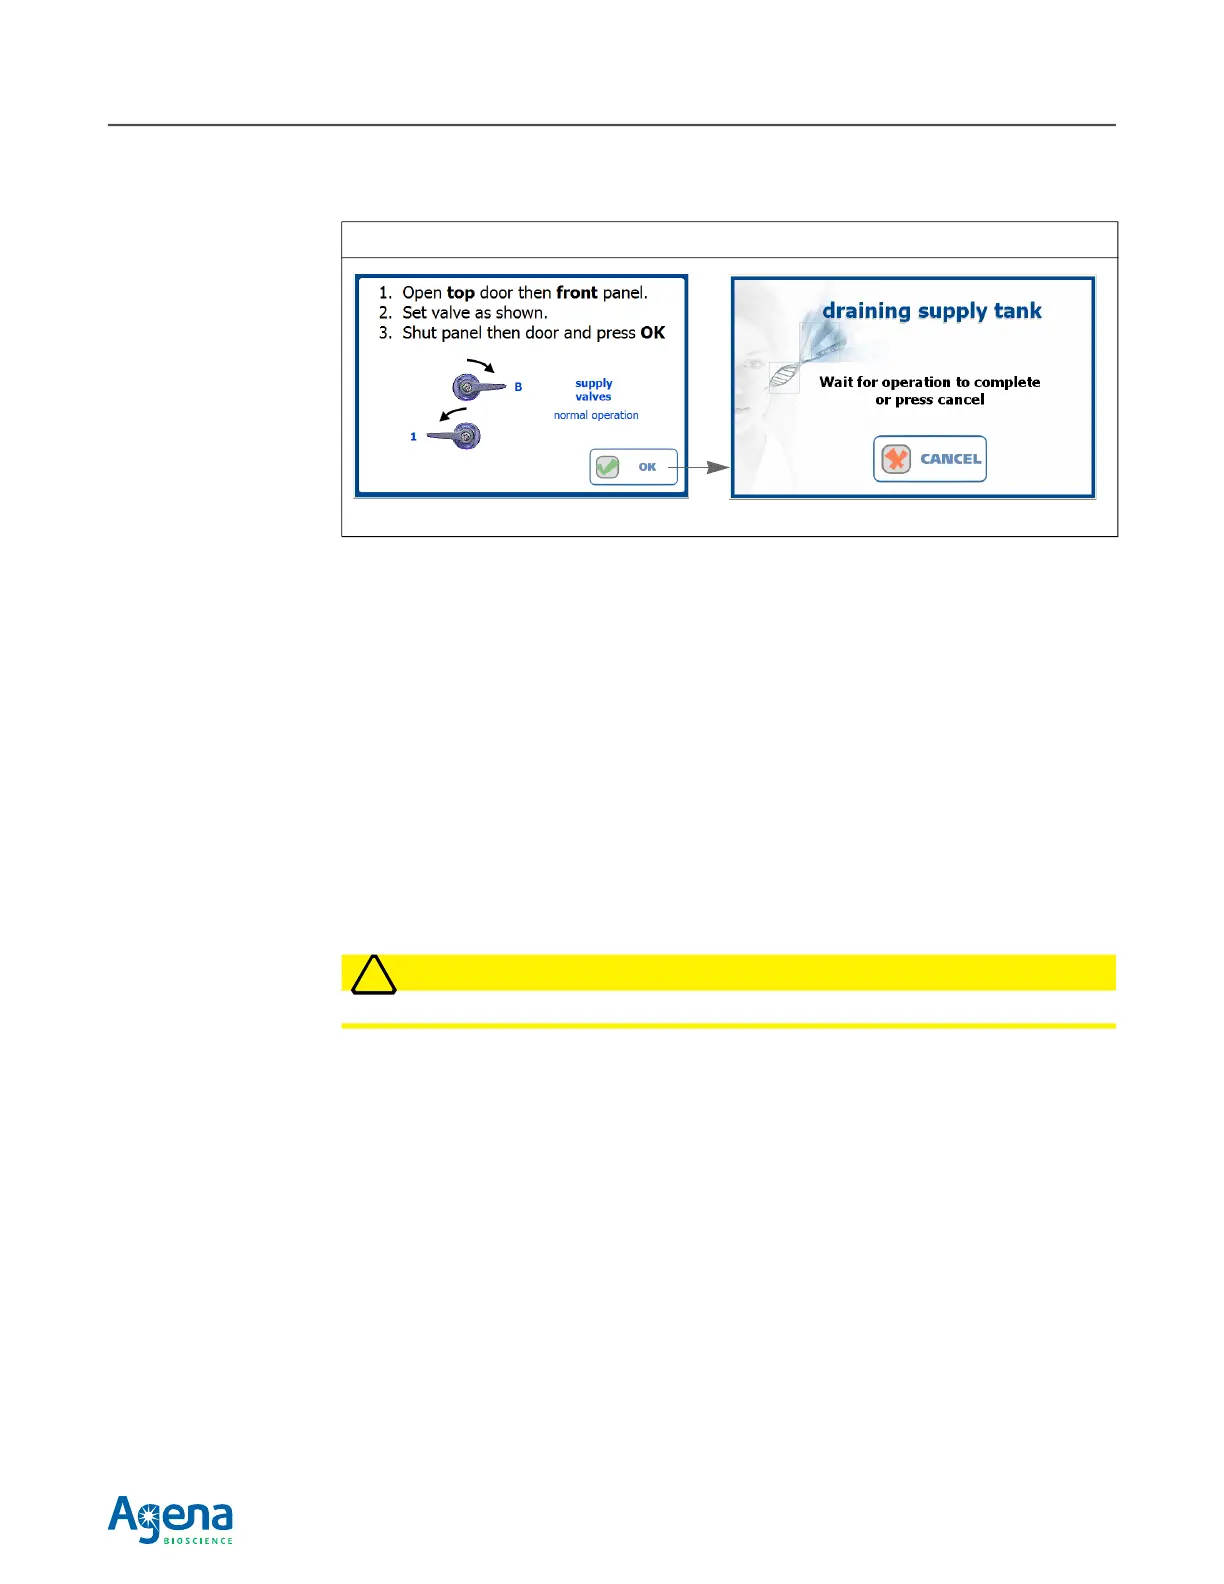
4. Turn the supply valves—the upper two valves—to match the settings shown in Figure
C.10.
5. Close the front access panel (see page 11 for instructions).
6. Close the main door.
7. Tap OK in the on-screen message (Figure C.10).
The internal supply tank empties into the internal waste tank which then empties into
the external waste tank. It may take a few minutes for water to start draining out the
waste tubing into the external waste tank. This is normal.
Wait for the tank to finish draining.
Clean the external
tanks
1. Empty the external supply and waste tanks.
2. Using lint-free tissues (for example, chem wipes), wipe down the interior surface of
the tanks and the lids with ethanol. Wipe down the exterior surfaces of the supply and
waste tubing.
WARNING
!
WARNING! Tissue wipes saturated with ethanol are flammable. Dispose of them properly.
3. Wait 15 minutes to allow the ethanol to evaporate.
4. Rinse the external waste and supply tanks with clean, Type 1, > 18.2
MΩ water.
5. Place the external waste and supply tanks back into normal position for use, reinsert
the tubing, and replace the lids.
Make sure that the tubing is placed securely in the external waste tank so that it does
not accidentally pull out of the tank.
Clean the internal
tanks
1. Open the main door. Remove the access panel by removing the five screws of the tank
access panel using an 1/8” Allen key (Figure 4.26, page 107).
Set the screws aside in a safe location. Do not lose them.
2. Remove the waste and supply tank lids (turn them counter-clockwise) (Figure 4.27,
page 107).
Figure C.10 Valve Settings for Draining the Internal Supply Tank
This message disappears when draining is done.