EasyManuals Logo

Allen-Bradley PowerFlex 40 User Manual

Allen-Bradley PowerFlex 40
218 pages
To Next Page IconTo Next Page
To Previous Page IconTo Previous Page
Page #198 background imageLoading...
Page #198 background image
198 Publication IASIMP-QS001C-EN-P - October 2009
Chapter 14 Create a PanelView Plus Application
1769-L31 controller
(to complete this step on the 1769-L32E or 1769-L35E controllers, see page 194
;
to complete this step on the 1769-L32C or 1769-L35CR controllers, see page 196
)
IMPORTANT
Before you add the Serial driver in the following steps, you must stop and delete the
Serial driver in RSLinx Classic.
Depending on the messages that display, you might have to take all programming
and configuration software offline by selecting File > Exit and Shutdown in
RSLinx Classic.
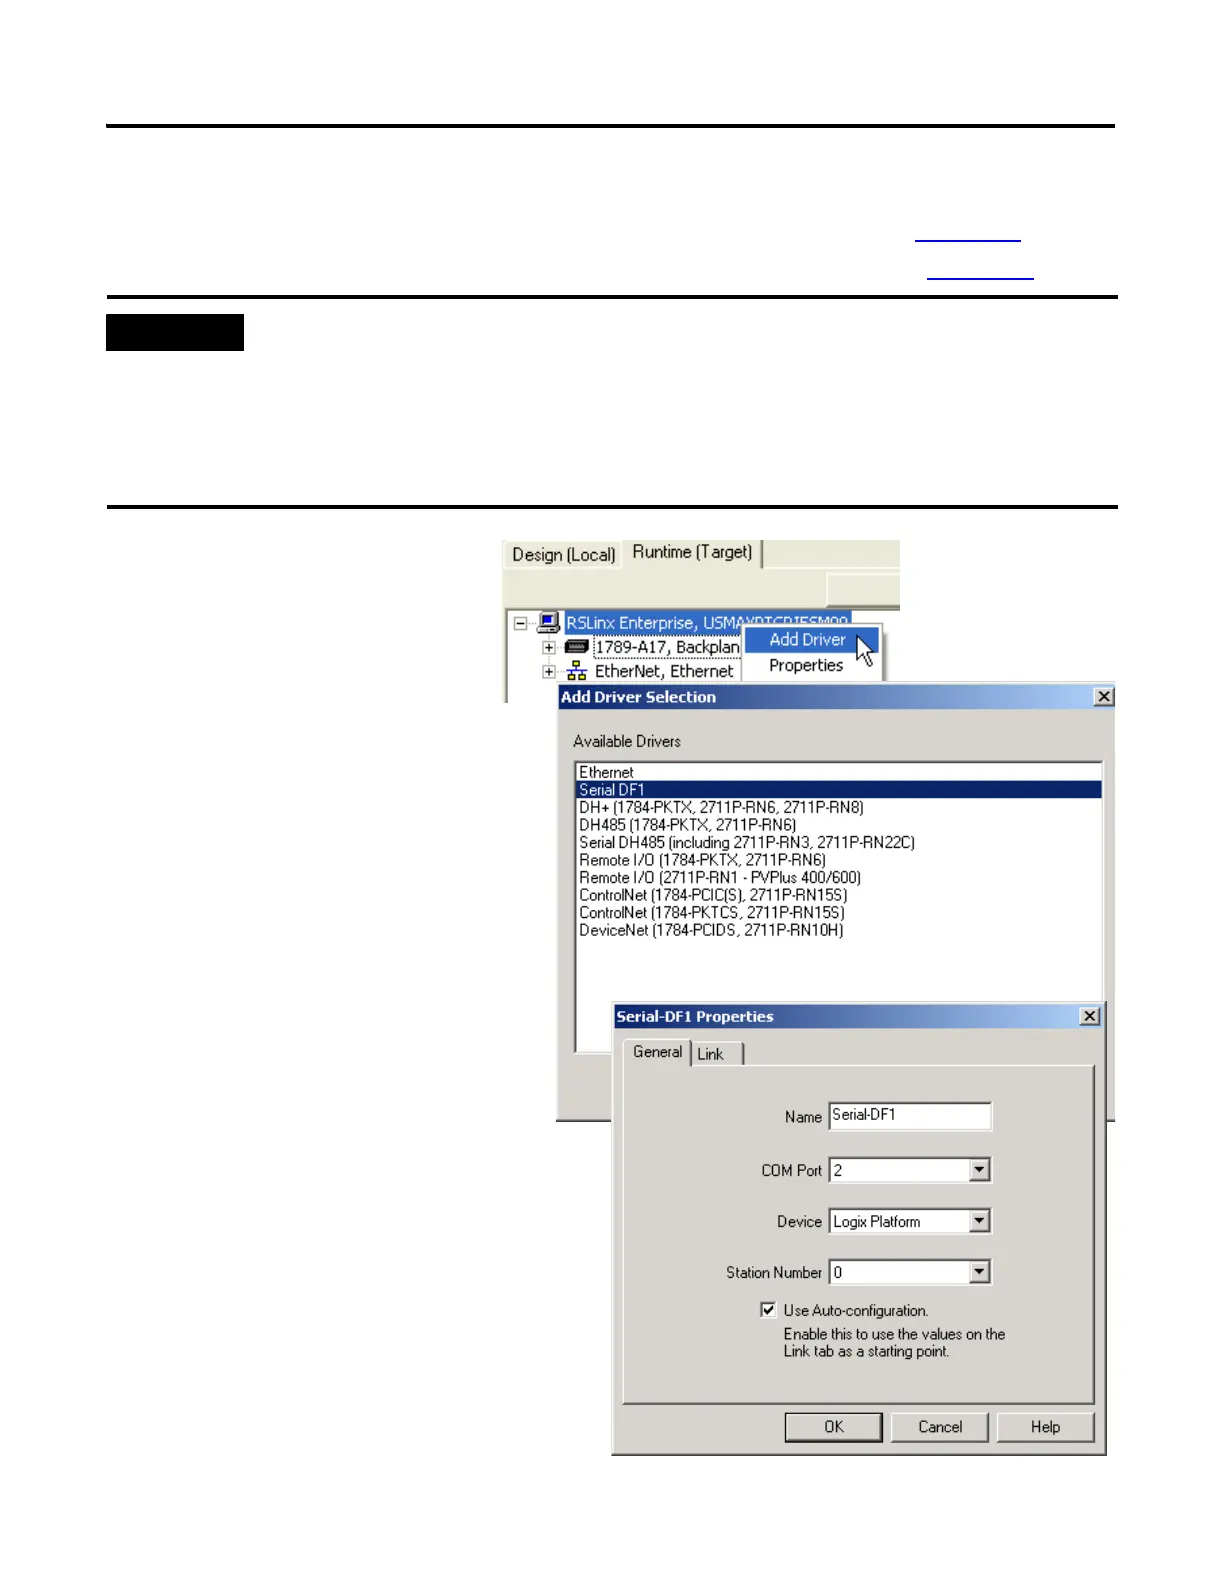
1. Right-click RSLinx
Enterprise and select
Add Driver.
2. Select the Serial DF1 driver
and click OK.
3. Select the Comm Port on your
computer to which you connected the
1756-CP3 cable.
4. In the Devices field, select Logix
Platform.
5. Check the Use Auto-configuration
checkbox and click OK.

Table of Contents

Other manuals for Allen-Bradley PowerFlex 40

Questions and Answers:

Question and Answer IconNeed help?

Do you have a question about the Allen-Bradley PowerFlex 40 and is the answer not in the manual?

Allen-Bradley PowerFlex 40 Specifications

General IconGeneral
Output Voltage0 to Input Voltage
EnclosureIP20
Control MethodV/Hz, Sensorless Vector Control
CommunicationRS485
Frequency0 to 400 Hz
ProtectionOverload, Overvoltage, Undervoltage, Short Circuit
Operating Temperature-10 to 50°C (14 to 122°F)
Storage Temperature-40...70 °C (-40...158 °F)
Humidity5% to 95% non-condensing
Input Voltage200-240V AC, 380-480V AC, 500-600V AC (depending on model)

Related product manuals