ii
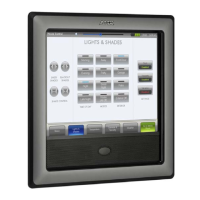
12" Modero® VideoNXD/T-1200V Wall/Flush Mount Touch Panel
Table of Contents
Charging the NXT-BP batteries with the NXA-BASE/B ................................................. 25
NXT-CHG Battery Charger Kit (FG2255-50K) ......................................................... 26
Product Specifications .................................................................................................. 26
Powering the NXT-CHG ................................................................................................ 26
Reading NXT-CHG LED Indicator .................................................................................. 27
Charging the NXT-BP batteries using the NXT-CHG ..................................................... 27
Recalibrating the batteries ............................................................................................ 27
Installation Procedures: NXD-1200V Panels .....................................................29
Overview ................................................................................................................ 29
Unpacking the Panel ............................................................................................... 29
Installing the Internal Components ......................................................................... 29
Upgrading to the MB-TP12 VESA Mounting Kit ..................................................... 29
Removing the Original Modero Back Box ..................................................................... 29
Installing the MP-TP12 Back Box ................................................................................... 30
Cable Installation for the MP-TP12 Back Box ................................................................ 31
Finalizing the installation............................................................................................... 31
Pre-wall Installation of the Conduit Box.................................................................. 33
Installation of the NXD Touch Panel ....................................................................... 34
Installing the NXD panel within a Conduit Box ............................................................. 34
Installing the NXD into drywall using Expansion Clips .................................................. 35
Installing the NXD into a Flat Surface using #4 screws ................................................. 38
Installing an NXD into an (optional) Rack Mount Kit (NXA-RK12) ................................. 40
Wiring Guidelines for the 1200V Panels ................................................................. 41
Preparing captive wires................................................................................................. 41
Wiring a power connection ........................................................................................... 41
Audio/Video Port: Connections and Wiring ............................................................ 42
Ethernet/RJ-45 Port: Connections and Wiring ........................................................ 42
Panel Calibration ..............................................................................................43
Overview ................................................................................................................ 43
Calibrating the Modero Panel................................................................................. 43
Testing your Calibration ................................................................................................ 44
Configuring Communication .............................................................................45
Overview ................................................................................................................ 45
Modero Setup and System Connection .................................................................. 45
Configuring and Using USB with a Virtual Master .................................................. 47
Step 1: Setting up the Panel and PC for USB Communication ...................................... 47
Step 2: Confirming the Installation of the USB Driver on the PC .................................. 47
Step 3: Confirm and View the current AMX USB device connections ........................... 49
Step 4: Using a USB to Configure a Virtual Master (using NetLinx Studio) ................... 50
Step 5: Confirm and View the current AMX USB device connections ........................... 51

 Loading...