Configuring Communication
52
10" Modero Touch Panels
5. Toggle the blue Type field (from the Master Connection section) until the choice cycles to USB. Refer to
the System Settings Page section on page 127 for more information about the fields on this page.
6. Press the Back button on the touch panel to return to the Protected Setup page.
7. Press the on-screen Reboot button to both save any changes and restart the panel. Remember that the
panel’s connection type must be set to USB prior to rebooting the panel and prior to inserting the USB
connector.
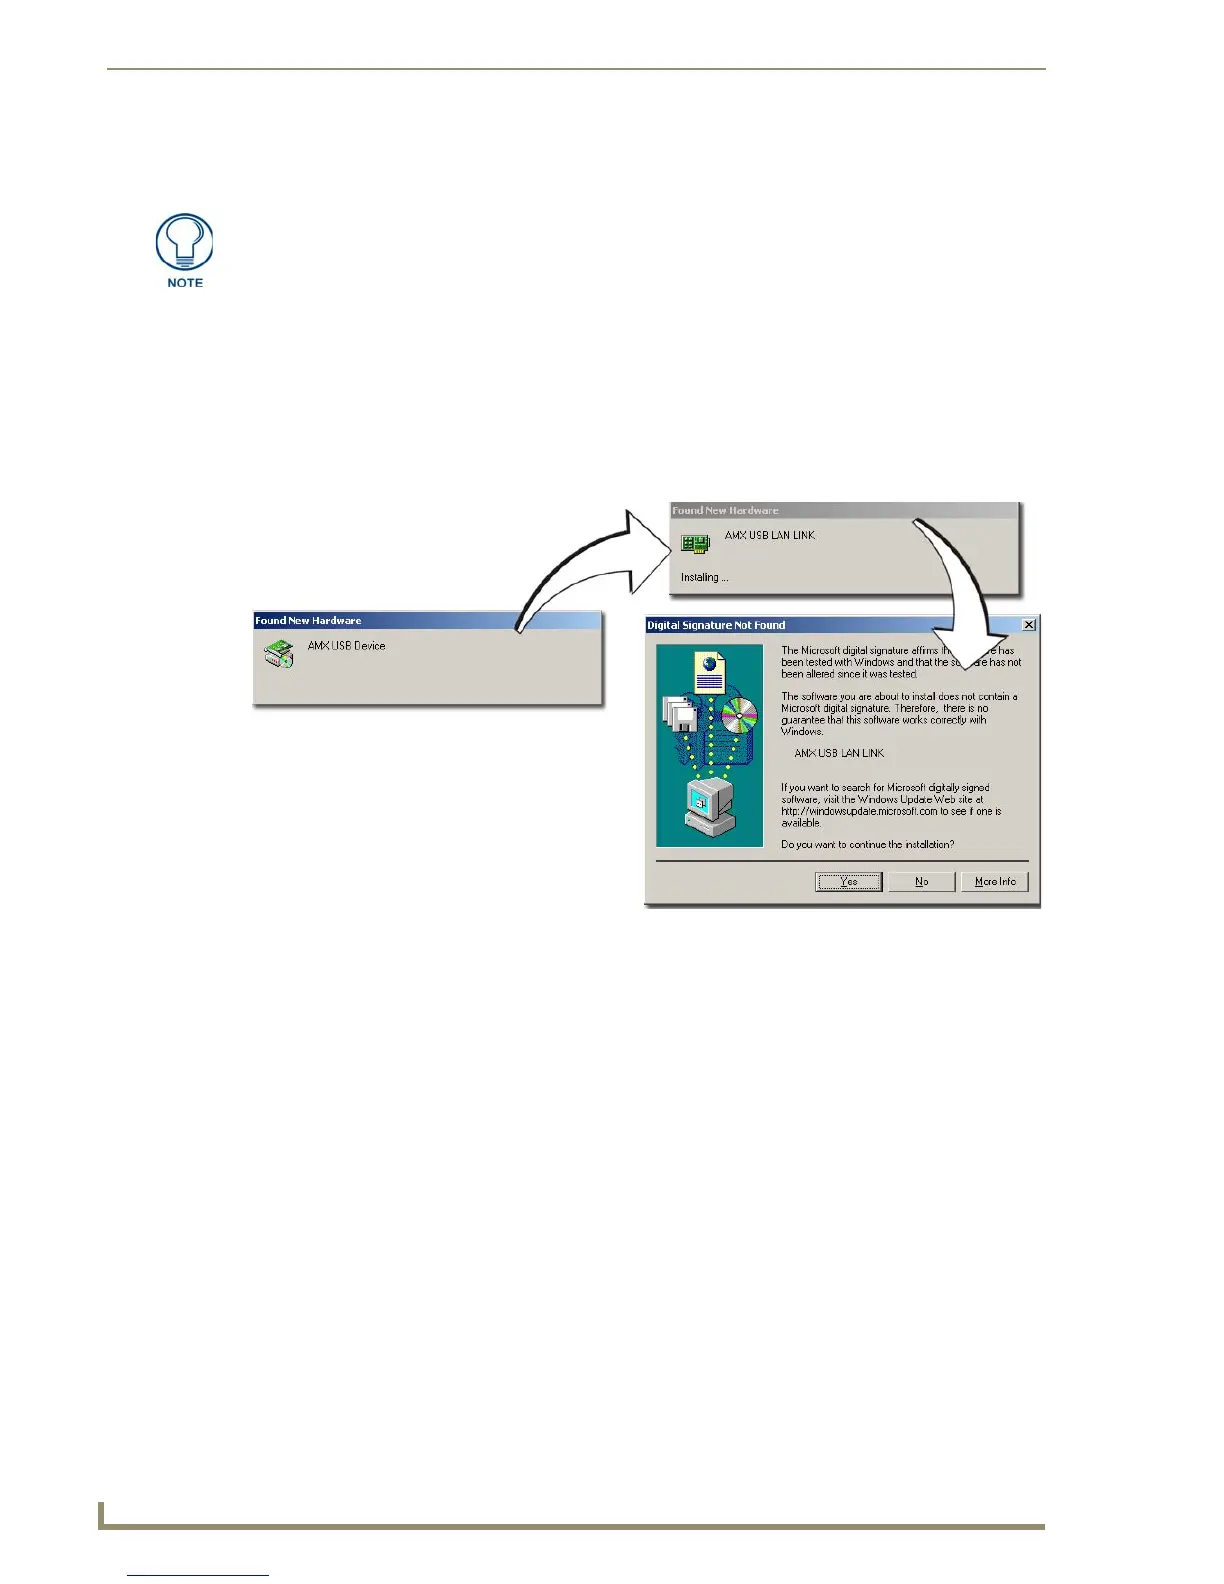
8. ONLY AFTER the unit displays the first panel page, THEN insert the mini-USB connector into the
Program Port on the panel. It may take a minute for the panel to detect the new connection and send a
signal to the PC (indicated by a green System Connection icon). If this is your first time installing the
USB driver, a USB driver installation popup window (FIG. 55) appears on the PC.
This window notifies you that the panel has been detected by the PC as a USB-compliant device
and the PC is installing an appropriate USB driver to establish a proper communication to the
panel.
This driver was installed on your PC during the installation of the latest NetLinx Studio and
TPDesign4 software application installations. These applications should be installed prior to
setting up a USB connection to the panel.
The driver does not contain a Microsoft
®
digital signature and Windows
®
then informs you of such.
9. Click Ye s when told that a digital signature was not found. This action accepts the installation of the new
AMX USB driver. The panel is now configured to communicate directly with the PC.
This process completes the association between driver and device.
Each time the same touch panel is connected to the computer the driver is automatically
loaded (using a unique name - example USB LAN LINK #1, #2).
Each time a different touch panel is connected to the computer, the previous procedures will
need to be repeated.
10. Navigate back to the System Settings page.
ALL fields are then greyed-out and read-only, but still display any previous network
information.
FIG. 55 USB driver installation popup window