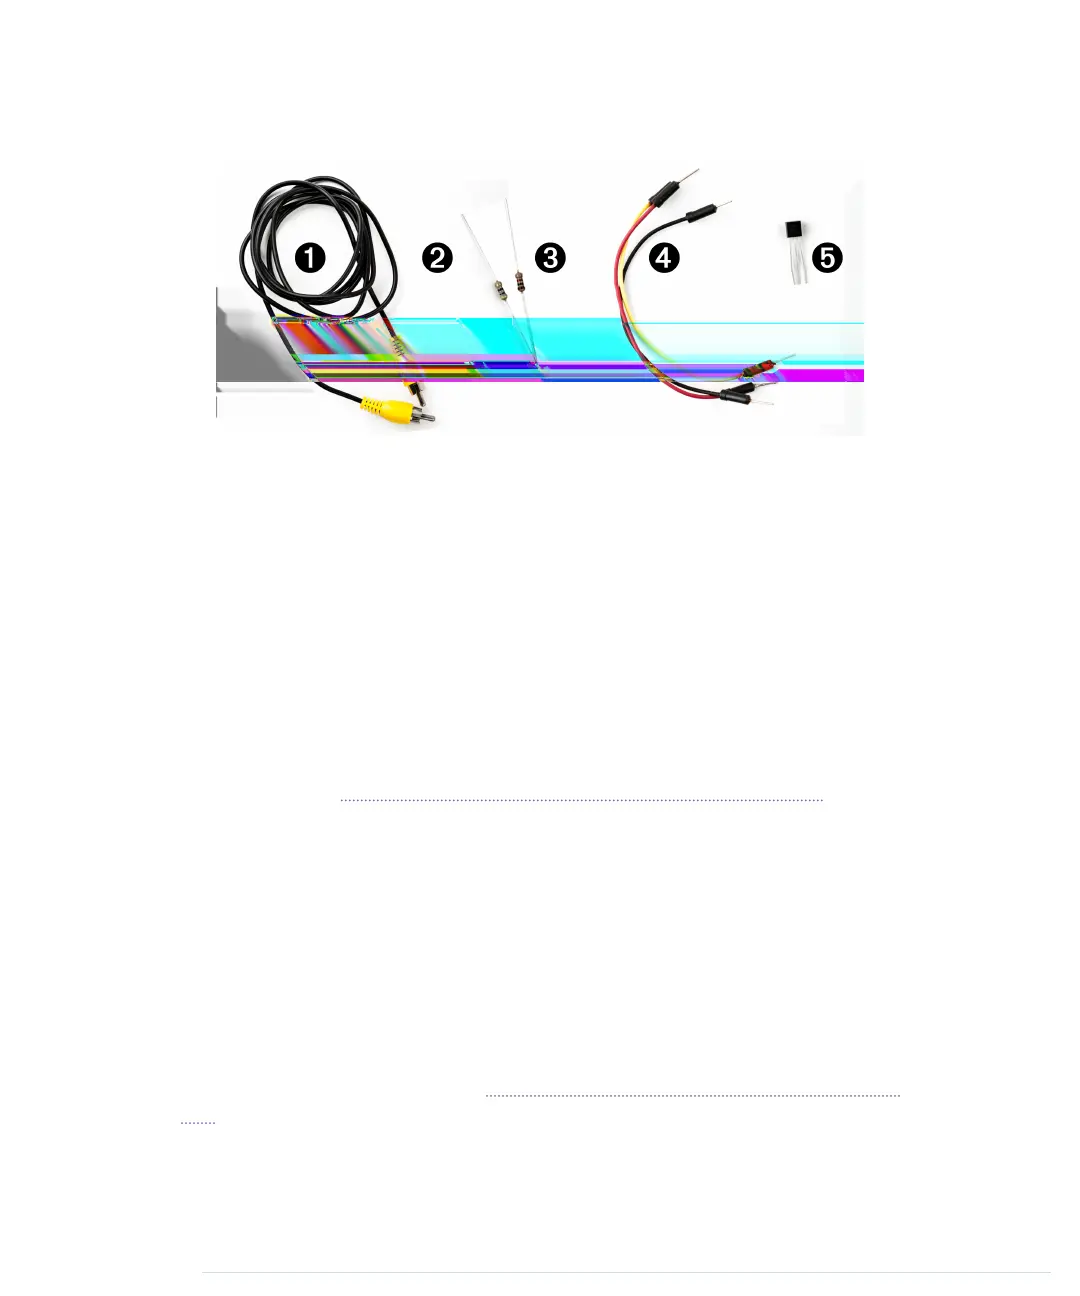
What You Need
1. An RCA cable
2. A 470Ω resistor
3. A 1kΩ resistor
4. Some wires
5. A TMP36 temperature sensor from Analog Devices
6. An Arduino board, such as the Uno, Duemilanove, or Diecimila
7. A USB cable to connect the Arduino to your computer
How Analog Video Works
Before you create your own video signals, it helps to understand how analog
TV systems work in general. If you’re impatient, you can skip the theory and
jump straight to Connecting the Arduino to Your TV Set, on page 131.
First of all, you should note that analog video is completely different from
digital video in most regards. In this chapter, we’ll only talk about analog
video signals that you can feed to your TV set’s composite input.
You might remember the good old days when TV sets were huge, heavy boxes
with ridiculously tiny screens. These boxes had to be so big because they
contained a small electron cannon that produced images by firing electrons
to the screen. The cannon drew an image line by line—that is, it started at
the top-left corner of the screen and drew the first line of the image. At the
end of the line, it moved back to the left side and drew the second line. This
technique is called raster scan. Figure 23, How raster scan works, on page
129 shows how it worked.
After the last line was drawn, the electron beam moved back to the top and
drew the next image. Depending on the TV standard, this process happened
Chapter 8. Generating Video Signals with an Arduino • 128
report erratum • discuss
www.it-ebooks.info

 Loading...


