The Arduino team didn’t only constantly improve the hardware design, they
also invented new designs for special purposes. For example, they created
the Arduino LilyPad
5
to embed a microcontroller board into textiles. You can
use it to build interactive T-shirts.
In addition to the official boards, you can find countless Arduino clones on
the Web. Everybody is allowed to use and change the original board design,
and many people created their very own version of Arduino-compatible boards.
Among many others, you can find the Freeduino, Seeeduino, Boarduino, and
the amazing Paperduino,
6
an Arduino clone without a printed circuit board.
All of its parts are attached to an ordinary piece of paper.
Arduino is a registered trademark—only the official boards are named
“Arduino”—so clones usually have names ending with “duino.” You can use
every clone that is fully compatible with the original Arduino to build all of
the book’s projects.
Exploring the Arduino Board
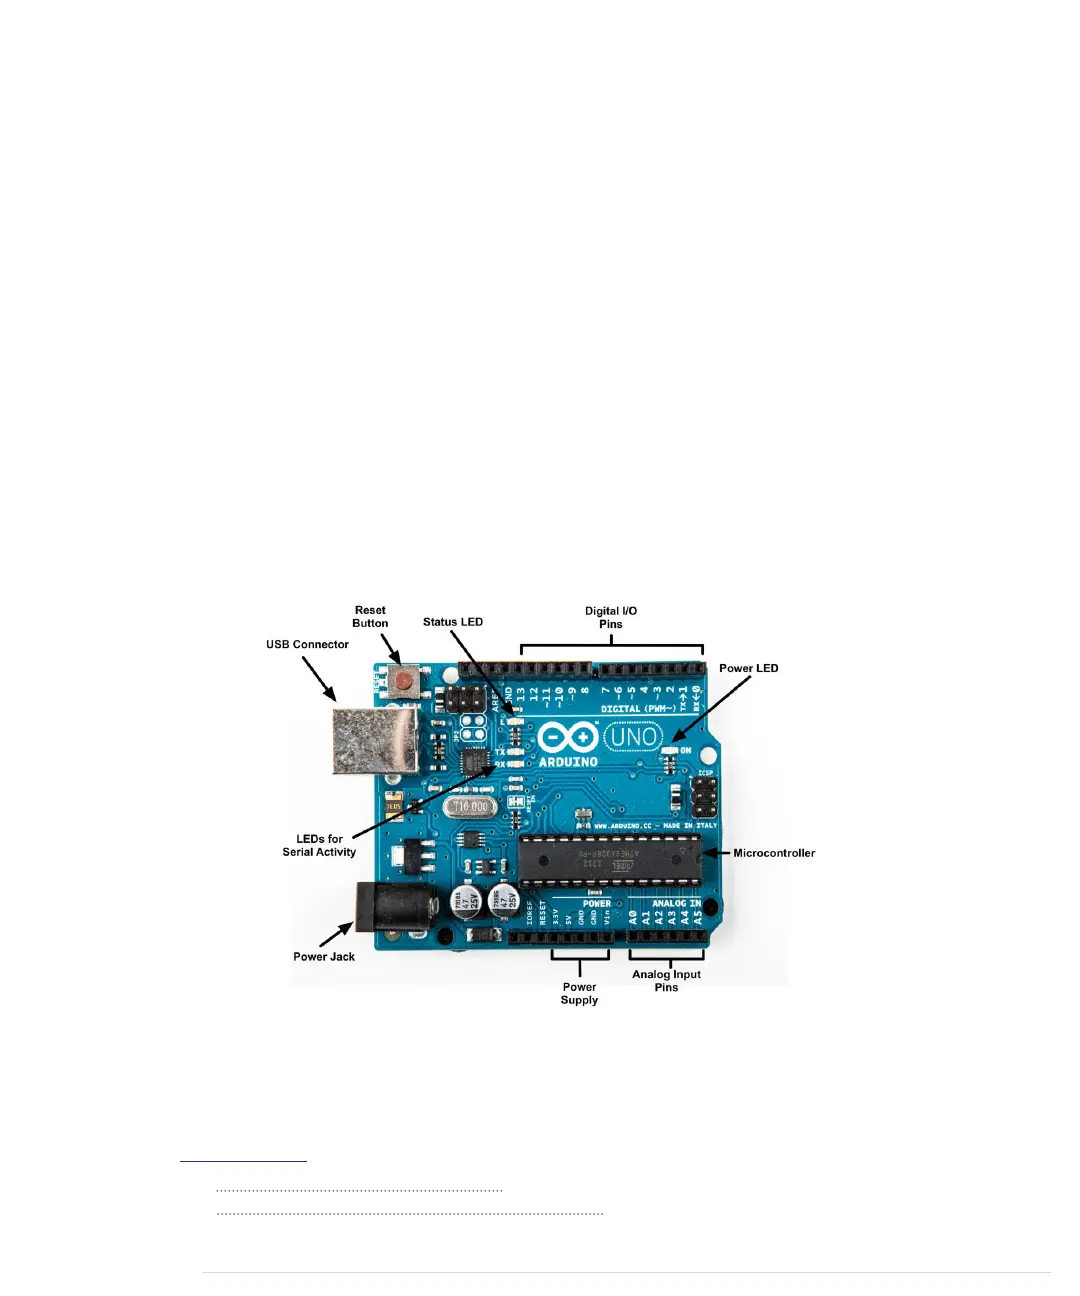
The photo shows an Arduino Uno board and its most important parts. I’ll
explain them one by one. Let’s start with the USB connector. To connect an
Arduino to your computer, you just need a USB cable. The type of the USB
cable depends on the type of Arduino board you’re using. The Arduino Uno
5.
http://arduino.cc/en/Main/ArduinoBoardLilyPad
6.
http://lab.guilhermemartins.net/2009/05/06/paperduino-prints/
Chapter 1. Welcome to the Arduino • 6
report erratum • discuss
www.it-ebooks.info

 Loading...


