EasyManua.ls Logo

Arduino uno User Manual

Arduino uno
311 pages
To Next Page IconTo Next Page
To Previous Page IconTo Previous Page
Page #151 background imageLoading...
Page #151 background image
Don’t worry! Of course there’s a library for that. The TVout library
3
not only
generates crystal-clear video signals, but also comes with a lot of utility
functions for drawing geometric shapes. On top of that, it supports different
fonts in several sizes.
Note that the TVout library doesn’t support every Arduino board. For example,
it won’t work on the Arduino Leonardo or the Arduino Due. Check the TVout’s
website for a list of compatible hardware.
Download TVout,
4
unzip it, and copy the contents of the zip archive to the
libraries
folder of the Arduino IDE. Then restart your IDE.
The library comes with a few examples. The most important ones are
DemoNTSC and DemoPAL. In principle, it’s only one example that demon-
strates all of the library’s features, but it comes in two flavors: NTSC and PAL.
This is necessary because there are different standards for analog TV. NTSC
and PAL are two very popular ones. They don’t differ much, and modern TV
sets are usually capable of working with both. Still, your TV set might be
pickier about its input. If you’re living in the United States, you’ll probably
need the NTSC demo; in Europe, PAL is the way to go.
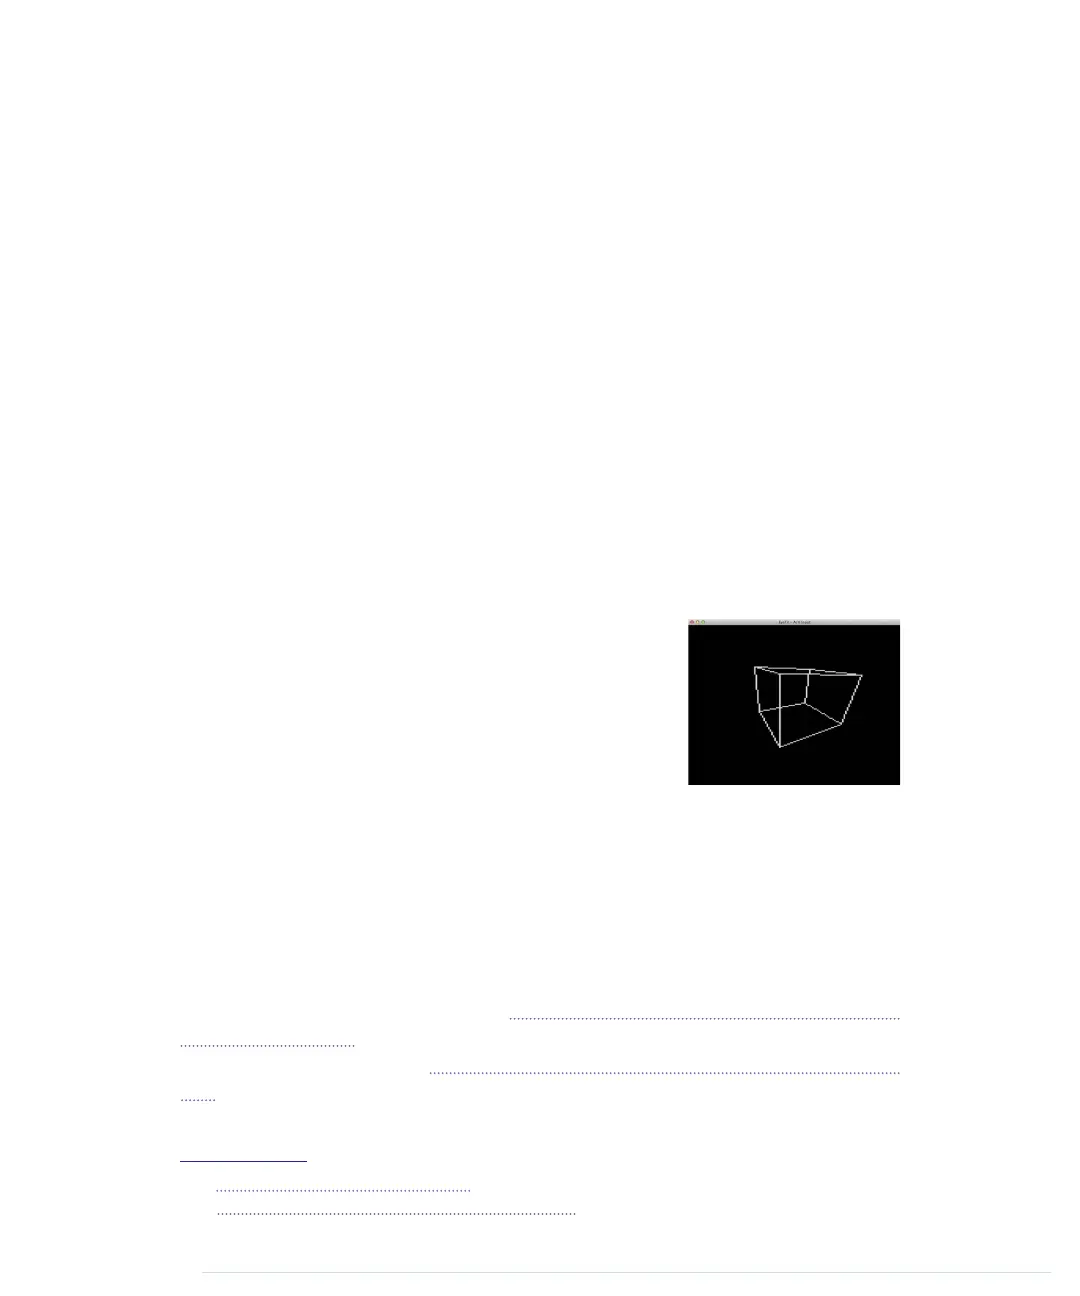
Compile and upload the sketch to your Arduino; then
connect the Arduino to your TV set’s composite input
using the RCA cable. You should see an impressive
demo showing TVout’s capabilities. At the end it even
shows the inevitable rotating 3D cube.
The library’s standard example shows nearly all of
TVout’s functions in action, so it’s a good idea to have
a look at the code. Still, the best way to learn how to use the library is to write
your own code. In the next section, you’ll create a graphical thermometer that
displays the current temperature on your TV screen.
Building a TV Thermometer
To build our TV thermometer, we’ll use the TMP36 sensor again, so we’ll
combine the circuit we created in Increasing Precision Using a Temperature
Sensor, on page 86, with the circuit we created for generating the video signal.
You can see the result in Figure 24, Circuit of the TV thermometer, on page
135.
3.
https://code.google.com/p/arduino-tvout/
4.
https://arduino-tvout.googlecode.com/files/TVoutBeta1.zip
Chapter 8. Generating Video Signals with an Arduino • 134
report erratum • discuss
www.it-ebooks.info

Table of Contents

Other manuals for Arduino uno

Question and Answer IconNeed help?

Do you have a question about the Arduino uno and is the answer not in the manual?

Arduino uno Specifications

General IconGeneral
Form factorArduino
CertificationRoHS, FC, CE
Processor model-
Processor frequency- MHz
Microcontroller modelATmega328
Microcontroller frequency16 MHz
DC input voltage7-12 V
Operating voltage5 V
DC current per I/O pin40 mA
Flash memory0.032 MB
Maximum internal memory- GB
SRAM (Static Random Access Memory)2 KB
EEPROM (Electrically Erasable Programmable Read-Only Memory)1 KB
Wi-FiNo
Number of analog I/O pins6
Number of digital I/O pins14
Weight and Dimensions IconWeight and Dimensions
Board dimensions53.4 x 68.6 mm

Summary

Arduino Uno and the Arduino Platform

The Parts You Need

Chapter 1: Welcome to the Arduino

Installing the Arduino IDE

Provides step-by-step instructions for installing the Arduino Integrated Development Environment.

Hello, World!

Introduces the first project: making an LED blink using the Arduino.

Compiling and Uploading Programs

Explains how to compile and upload sketches to the Arduino board.

Chapter 2: Creating Bigger Projects with the Arduino

Changing Preferences

Explains how to customize Arduino IDE settings for better workflow.

Using Serial Ports

Explains serial communication for data exchange between Arduino and computer.

Chapter 3: Building Binary Dice

Working with Breadboards

Explains how breadboards work and how to connect components.

First Version of a Binary Die

Implements the first version of a binary die using three LEDs.

Working with Buttons

Details how pushbuttons work and how to connect them to the Arduino.

Building a Dice Game

Completes the dice project by adding a guess button and game logic.

Chapter 4: Building a Morse Code Generator Library

Building a Morse Code Generator

Starts the implementation of the Telegraph C++ class.

Fleshing Out the Morse Code Generator’s Interface

Defines the Telegraph class interface and Morse code data arrays.

Installing and Using the Telegraph Class

Guides on integrating the custom Telegraph library into Arduino IDE.

Chapter 5: Sensing the World Around Us

Measuring Distances with an Ultrasonic Sensor

Introduces ultrasonic sensors and builds a distance measuring device.

Increasing Precision Using a Temperature Sensor

Integrates a temperature sensor to refine distance measurements.

Chapter 6: Building a Motion-Sensing Game Controller

Wiring Up the Accelerometer

Details connecting the ADXL335 accelerometer to the Arduino.

Bringing Your Accelerometer to Life

Reads and outputs raw accelerometer data for three axes.

Building Your Own Game Controller

Integrates a pushbutton and refined accelerometer data for a game controller.

Chapter 7: Writing a Game for the Motion-Sensing Game Controller

Writing a GameController Class

Creates a JavaScript class for convenient access to Arduino motion data.

Creating the Game

Implements a Breakout clone using JavaScript and the motion controller.

Chapter 8: Generating Video Signals with an Arduino

Building a Digital-to-Analog Converter (DAC)

Details building a binary-weighted DAC for video signal generation.

Connecting the Arduino to Your TV Set

Describes modifying an RCA cable to connect to the Arduino.

Using the TVout Library

Introduces the TVout library for generating video signals on a TV.

Building a TV Thermometer

Creates a graphical thermometer display on a TV screen using sensors.

Chapter 9: Tinkering with the Wii Nunchuk

Wiring a Wii Nunchuk

Details wiring the Nunchuk controller to Arduino analog pins.

Building a Nunchuk Class

Creates a C++ class for interfacing with the Nunchuk controller.

Using Our Nunchuk Class

Demonstrates reading Nunchuk data (joystick, accelerometer, buttons).

Chapter 10: Networking with Arduino

Chapter 11: Creating a Burglar Alarm with Email Notification

Chapter 12: Creating Your Own Universal Remote Control

Chapter 13: Controlling Motors with Arduino

What You Need

Lists components for motor control: servo motor, wires, Arduino.

What If It Doesn’t Work?

Troubleshooting motor control: power consumption, weight, adjustments.

APPENDIX 1: Electronics and Soldering Basics

APPENDIX 2: Advanced Arduino Programming

APPENDIX 3: Advanced Serial Programming

APPENDIX 4: Controlling the Arduino with a Browser

Related product manuals