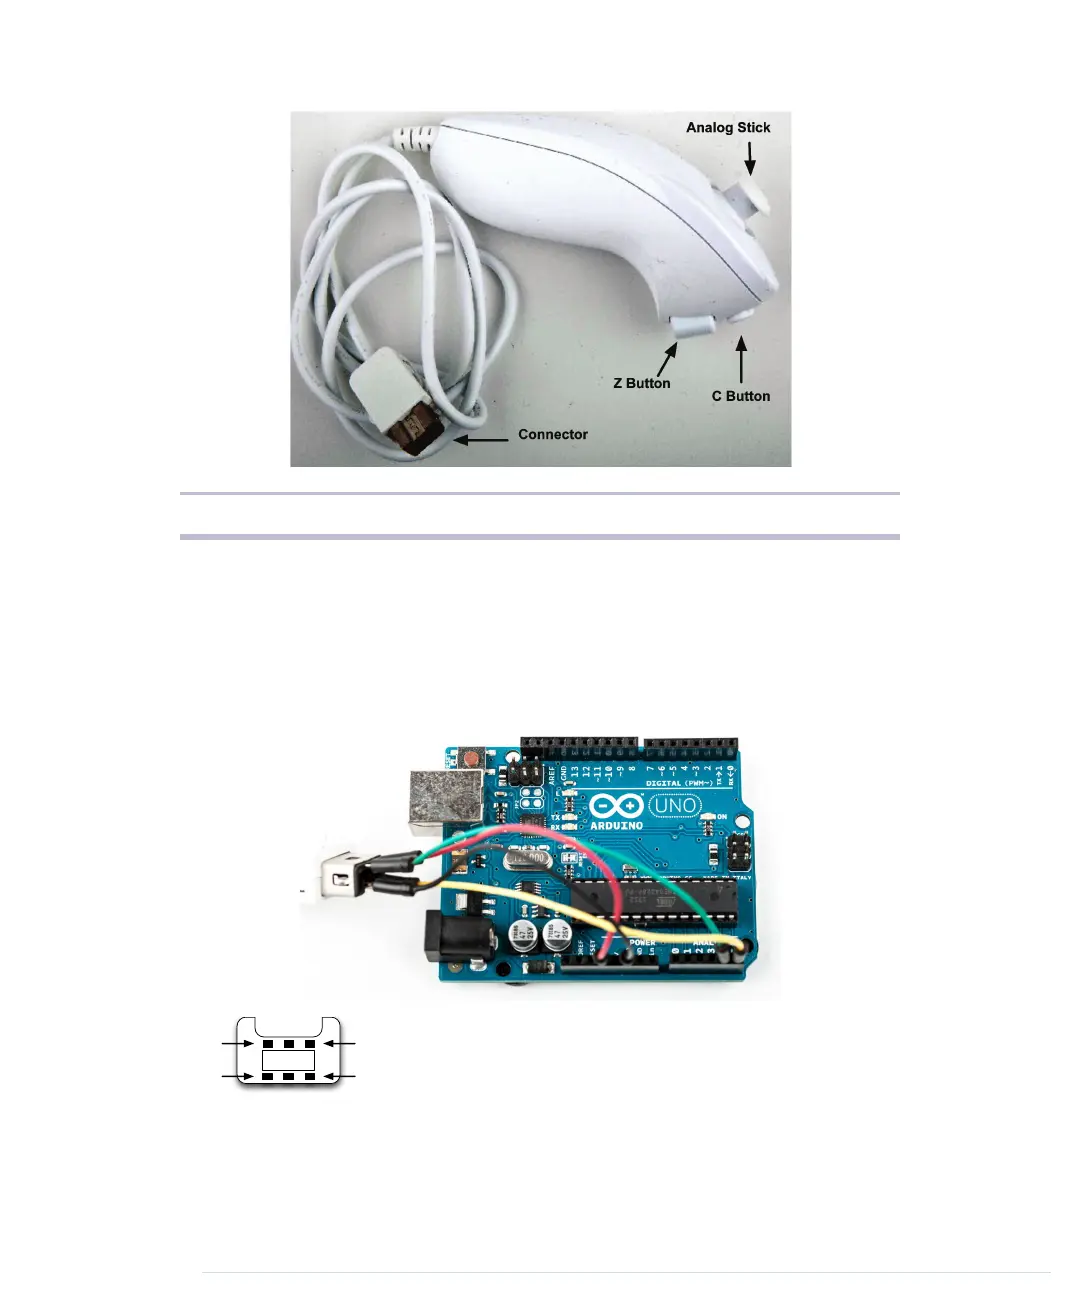
EasyManuals Logo

Arduino uno User Manual

Arduino uno
311 pages
To Next Page IconTo Next Page
To Previous Page IconTo Previous Page
Page #163 background imageLoading...
Page #163 background image
Figure 26A Nintendo Nunchuk controller
Wiring a Wii Nunchuk
Wiring a Nunchuk to an Arduino really is a piece of cake. You dont have to
open the Nunchuk or modify it in any way. You only have to put four wires
into its connector and then connect the wires to the Arduino:
GND
3.3V Data
Clock
It has six connectors, but only four of them are active:
GND, 3.3V, Data, and Clock. Heres the pinout of a
Nunchuk plug:
Put a wire into each connector and then connect the
wires to the Arduino. Connect the data wire to analog pin 4 and the clock
wire to analog pin 5. The GND wire has to be connected to the Arduinos
ground pin, and the 3.3V wire belongs to the Arduinos 3.3V pin.
Chapter 9. Tinkering with the Wii Nunchuk 146
report erratum discuss
www.it-ebooks.info

Table of Contents

Other manuals for Arduino uno

Questions and Answers:

Question and Answer IconNeed help?

Do you have a question about the Arduino uno and is the answer not in the manual?

Arduino uno Specifications

General IconGeneral
Form factorArduino
CertificationRoHS, FC, CE
Processor model-
Processor frequency- MHz
Microcontroller modelATmega328
Microcontroller frequency16 MHz
DC input voltage7-12 V
Operating voltage5 V
DC current per I/O pin40 mA
Flash memory0.032 MB
Maximum internal memory- GB
SRAM (Static Random Access Memory)2 KB
EEPROM (Electrically Erasable Programmable Read-Only Memory)1 KB
Wi-FiNo
Number of analog I/O pins6
Number of digital I/O pins14
Weight and Dimensions IconWeight and Dimensions
Board dimensions53.4 x 68.6 mm

Related product manuals