Although using the IDE is easy, you might run into problems or want to look
up something special. In such cases, take a look at the Help menu. It points
to many useful resources at the Arduino’s website that provide not only quick
solutions to all typical problems, but also reference materials and tutorials.
Hello, World!
To get familiar with the IDE’s most important features, we’ll create a simple
program that makes an light-emitting diode (LED) blink. An LED is a cheap
and efficient light source, and the Arduino already comes with several LEDs.
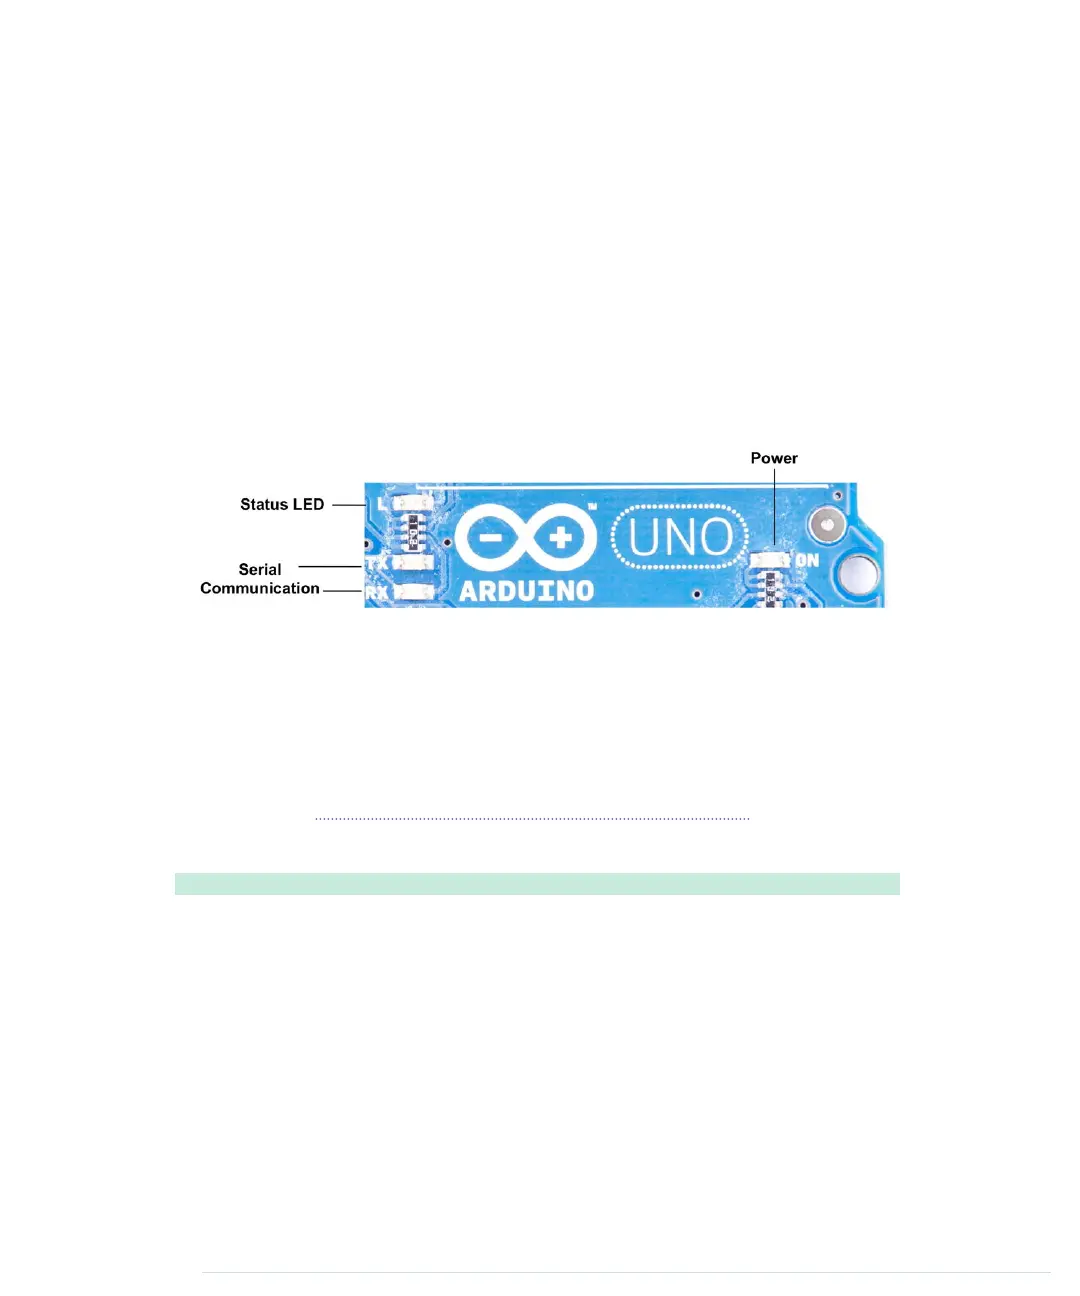
One LED shows whether the Arduino is currently powered, and two other
LEDs blink when data is transmitted or received via a serial connection.
In our first little project, we’ll make the Arduino’s status LED blink. The status
LED is connected to digital IO pin 13. Digital pins act as a kind of switch and
can be in one of two states: HIGH or LOW. If set to HIGH, the output pin is
set to 5 volts, causing a current to flow through the LED so it lights up. If set
back to LOW, the current flow stops, and the LED turns off. You don’t need
to know exactly how electricity works at the moment, but if you’re curious,
take a look at Current, Voltage, and Resistance, on page 239.
Open the IDE and enter the following code in the editor:
Welcome/HelloWorld/HelloWorld.ino
const unsigned int LED_PIN = 13;
Line 1
const unsigned int PAUSE = 500;
-
-
void setup() {
-
pinMode(LED_PIN, OUTPUT);
5
}
-
-
void loop() {
-
digitalWrite(LED_PIN, HIGH);
-
delay(PAUSE);
10
digitalWrite(LED_PIN, LOW);
-
delay(PAUSE);
-
}
-
Chapter 1. Welcome to the Arduino • 16
report erratum • discuss
www.it-ebooks.info
 Loading...


