of 180 degrees, but that’s sufficient for many applications. With continuous
rotation servos, you can increase the range to 360 degrees, but you lose the
ease of control.
In the next section, you’ll learn how easy it is to control standard servo motors
with an Arduino.
First Steps with a Servo Motor
The Arduino IDE comes with a library for controlling servo motors that we’ll
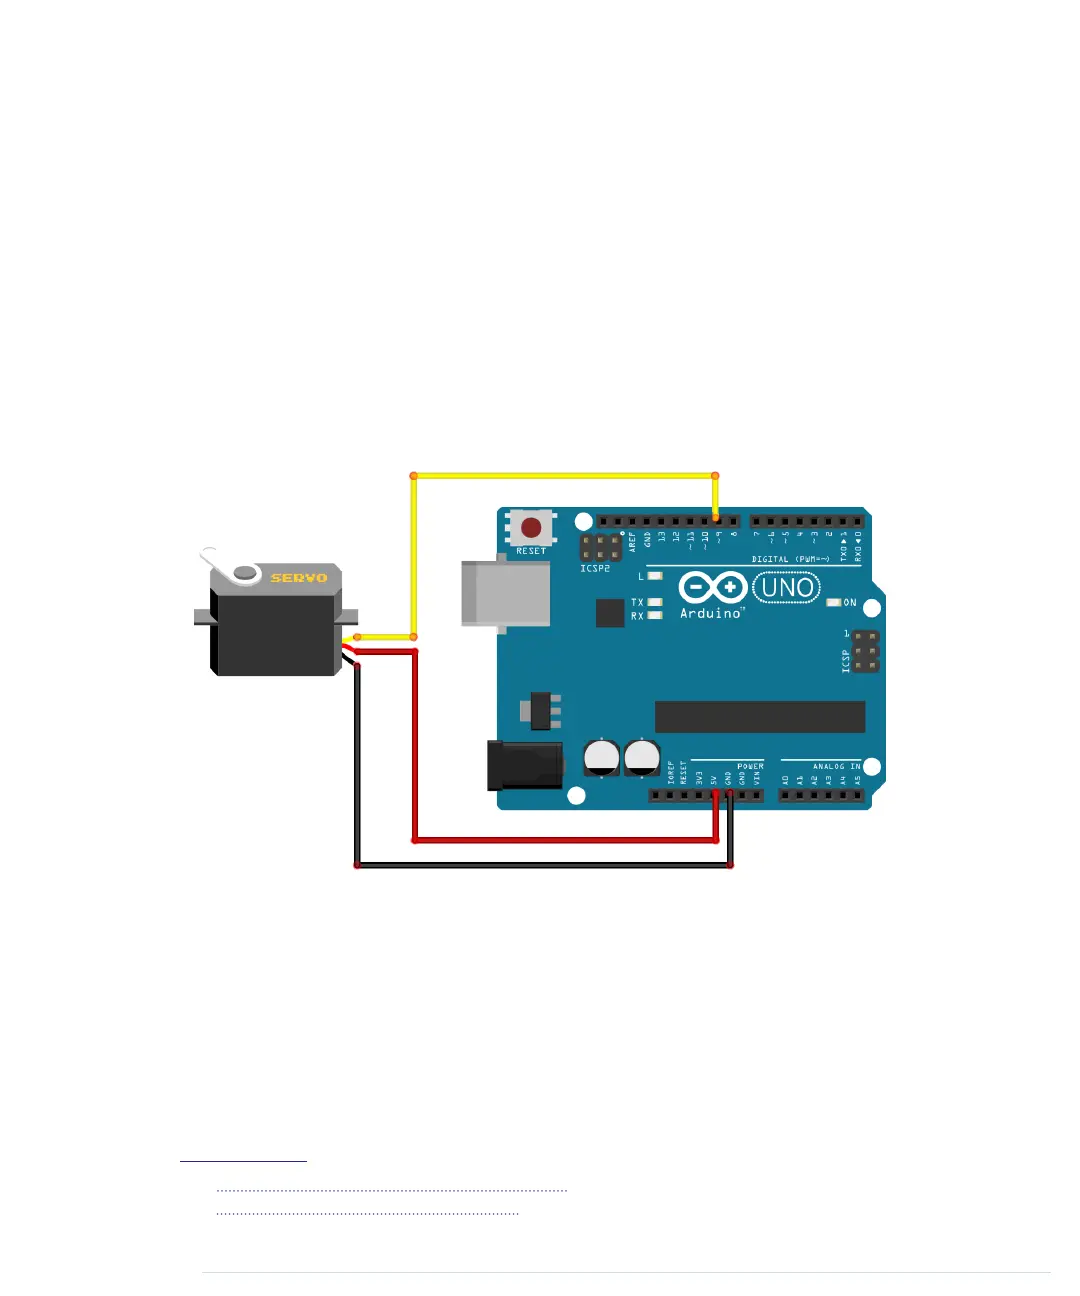
use for our first experiments. The following figure shows a basic circuit for
connecting an Arduino to a servo motor. Connect the ground wire to one of
the Arduino’s GND pins, connect power to the Arduino’s 5V pin, and connect
the control line to pin 9.
Please note that this works only for a 5V servo! Many cheap servos use 9V,
and in that case you need an external power supply, and you can no longer
connect the servo to the Arduino’s 5V pin. If you have a 9V servo, attach an
external power supply, such as an AC-to-DC adapter or a DC power supply,
to your Arduino’s power jack. Then connect the servo to the Vin pin.
1
You
should also check the specifications of your Arduino board. For example, you
should not use an Arduino BT
2
to control motors, because it can only handle
a maximum of 5.5V.
1.
http://www.arduino.cc/playground/Learning/WhatAdapter
2.
http://arduino.cc/en/Main/ArduinoBoardBluetooth
report erratum • discuss
First Steps with a Servo Motor • 227
www.it-ebooks.info

 Loading...


