breakout board you’re using!) Naturally, you’ll move around the accelerometer
a lot, so it’s best to use long wires.
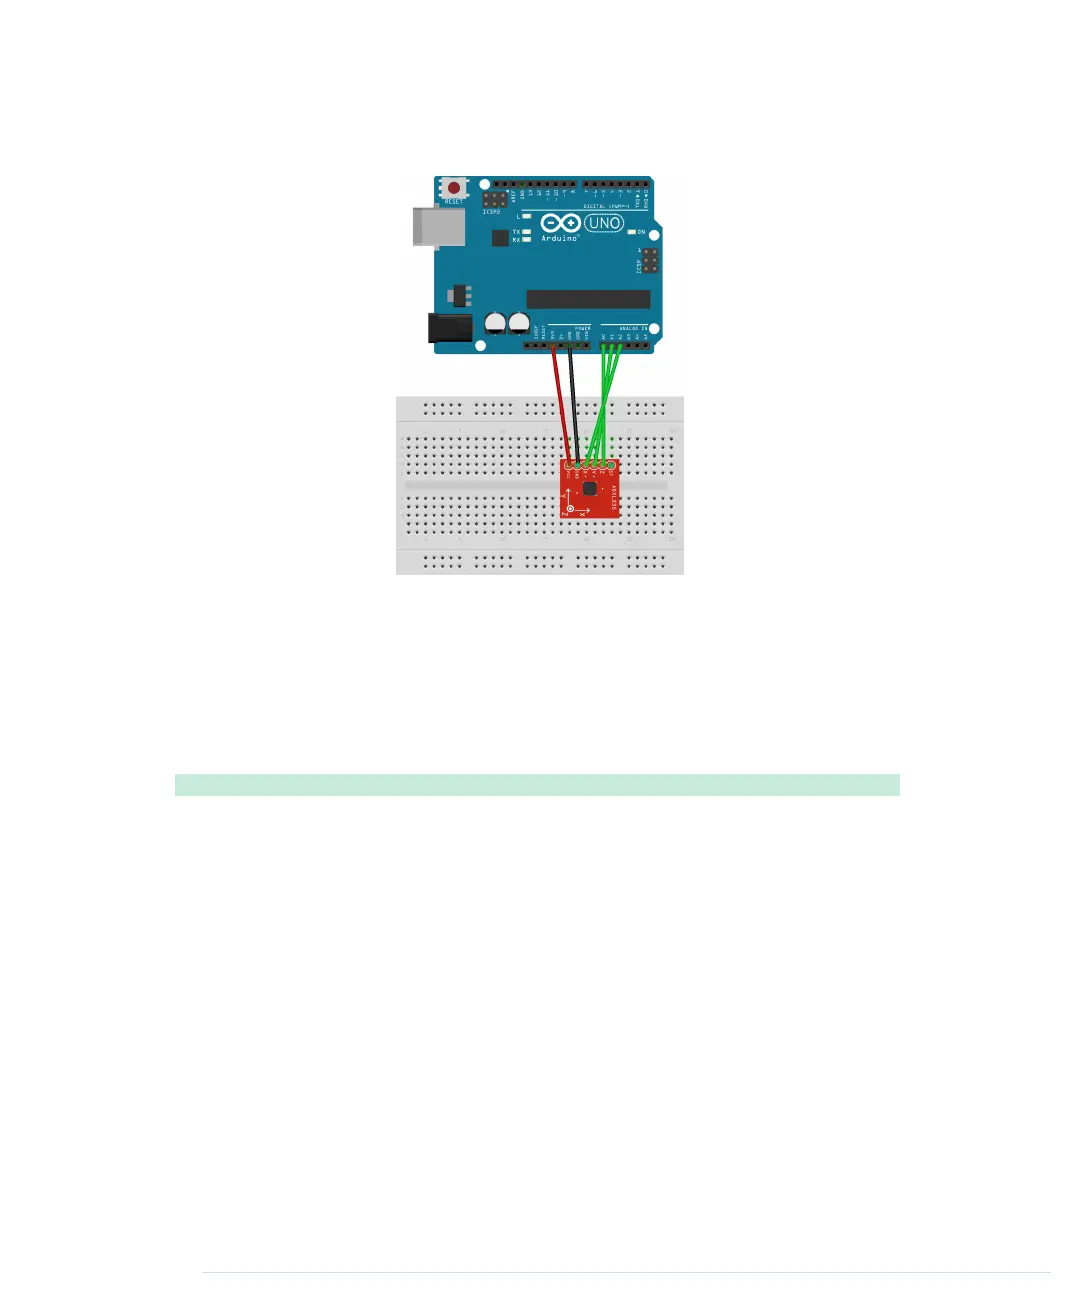
Now that we’ve connected the ADXL335 to the Arduino, let’s use it.
Bringing Your Accelerometer to Life
A pragmatic strategy to get familiar with a new device is to hook it up and
see what data it delivers. The following program reads input values for all
three axes and outputs them to the serial port:
MotionSensor/SensorTest/SensorTest.ino
const unsigned int X_AXIS_PIN = A2;
const unsigned int Y_AXIS_PIN = A1;
const unsigned int Z_AXIS_PIN = A0;
const unsigned int BAUD_RATE = 9600;
void setup() {
Serial.begin(BAUD_RATE);
}
void loop() {
Serial.print(analogRead(X_AXIS_PIN));
Serial.print(" ");
Serial.print(analogRead(Y_AXIS_PIN));
Serial.print(" ");
Serial.println(analogRead(Z_AXIS_PIN));
delay(100);
}
Chapter 6. Building a Motion-Sensing Game Controller • 102
report erratum • discuss
www.it-ebooks.info

 Loading...


