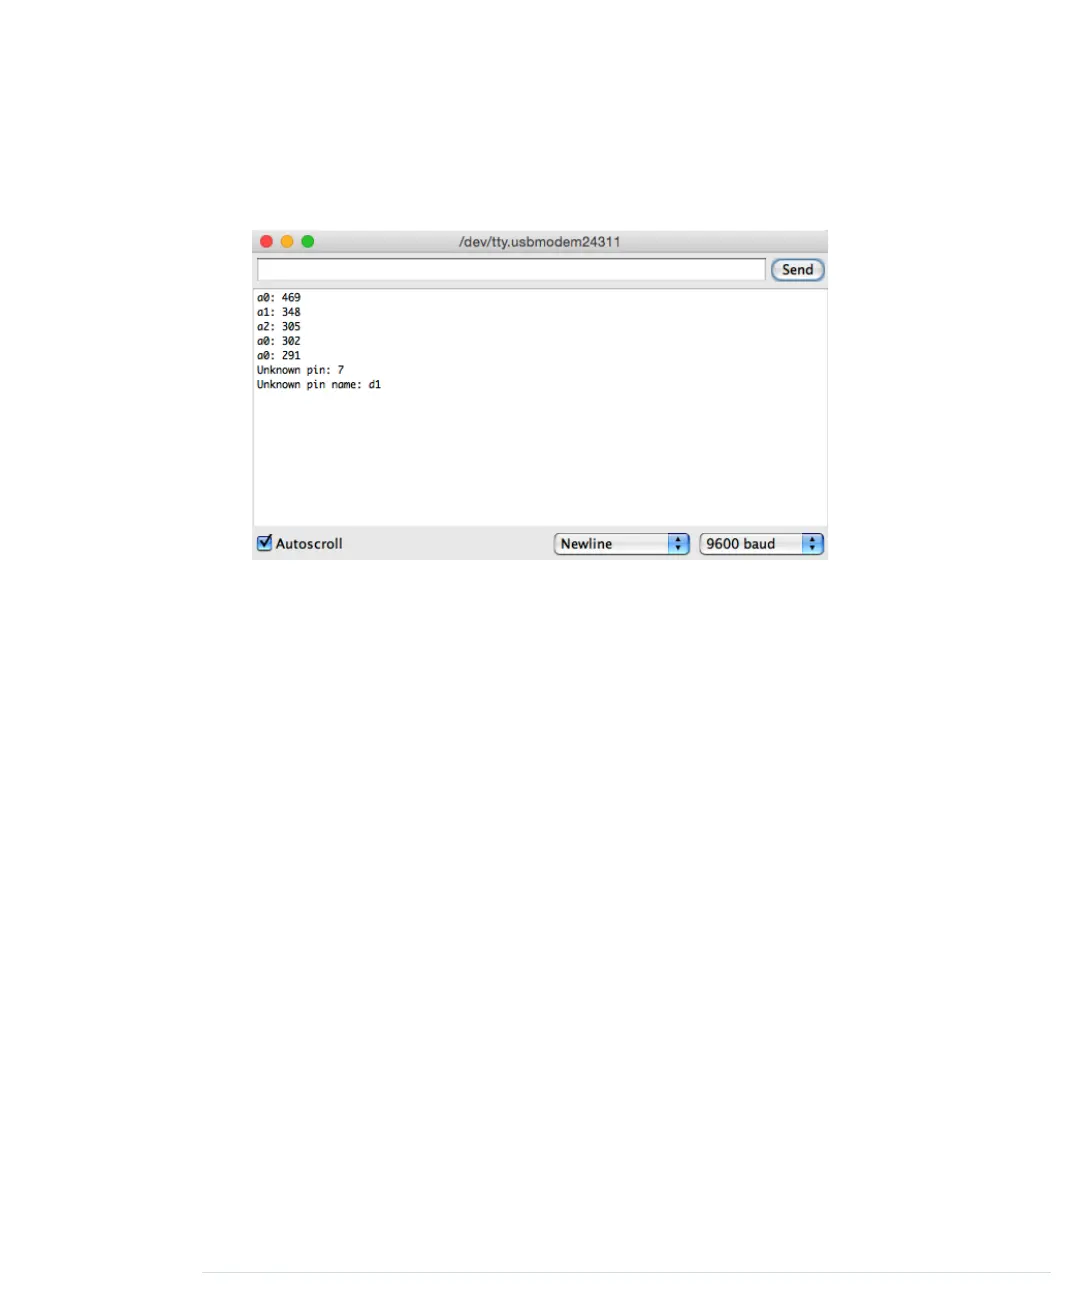
This program waits for the name of an analog pin (a0, a1,…a5) and returns
its current value. So, all of our clients have to send data to the Arduino (the
name of the pin), and they have to receive the result. In the following figure,
you can see it working with the IDE’s serial monitor.
Although you have already seen a few Arduino programs using the serial port,
you should pay special attention to the sketch above, because it uses one of
the new features in Arduino 1.0: the
serialEvent
function. The Arduino calls
this function automatically at the end of the
loop
function, and you can use
it to process data arriving at the serial port. This nicely decouples your
application’s logic from the more or less mechanical task of performing serial
communication.
Programs using
serialEvent
often follow the same pattern. They define a global
variable for aggregating incoming data (
pin_name
in our case), and they define
a global Boolean variable that indicates whether new data is available
(
input_available
, in our case). Whenever we read a newline character from the
serial port, we set
input_available
to
true
. So, when the Arduino calls
loop
the next
time, we know that new data has arrived, and we also know that we can find
it in
pin_name
. After we have processed the data, we set the input string to an
empty string and set
input_available
to
false
.
Back to the clients we’re going to implement. Although we use different pro-
gramming languages to implement them, they all look similar: they expect
the name of the serial port to connect to as a command-line argument; they
constantly send the string “a0” to the Arduino to get back the current value
of analog pin 0; they print the result to the console; they use a constant baud
rate of 9600; and they wait for two seconds after opening the serial port,
because many Arduinos reboot upon opening a serial connection.
Appendix 3. Advanced Serial Programming • 256
report erratum • discuss
www.it-ebooks.info

 Loading...


