If you have administrative privileges on your machine, use the installer
because it installs not only the IDE, but also all the drivers you need. In this
case you usually don’t need anything else and can use the IDE right away.
If you don’t have administrative privileges, download the zip archive and
extract it to a location of your choice. Before you first start the IDE, you must
install drivers for the Arduino’s USB port. This process depends on the Arduino
board you’re using and on your flavor of Windows.
Installing the Drivers for Current Arduino Boards
To install drivers for recent
boards, such as the Arduino
Uno, plug the Arduino into a
USB port first to start the auto-
matic driver installation process.
This process will likely fail, and
you’ll have to open the system
Control Panel and start the
Device Manager. (You can find it
under
System and Security
.)
10
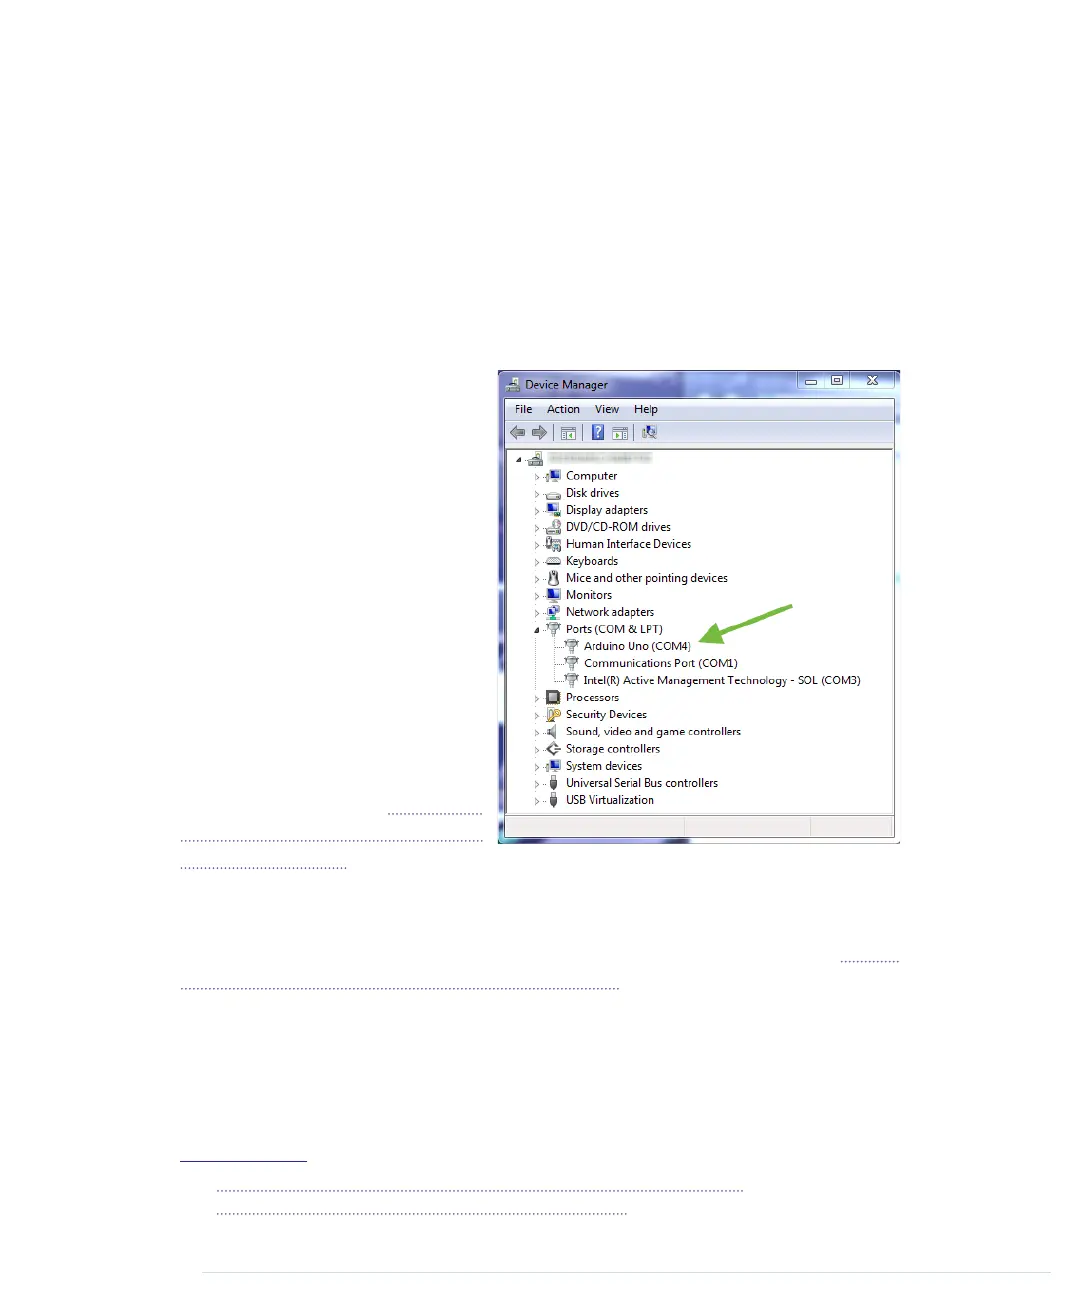
In the
Ports (COM & LPT)
section, you’ll
probably find an entry named
Arduino Uno (COMxx)
.
If you can’t find that entry,
search for
Unknown Device
in the
Other Devices
menu—Figure 3,
Sometimes the Arduino isn't recog-
nized, on page 12.
Right-click the entry belonging to the Arduino board and choose
Update Driver
Software
. Select the
Browse My Computer for Driver Software
option. Go to the
drivers
folder of the archive you’ve extracted and select the
arduino.inf
file. (See Figure
4, The content of the drivers folder, on page 12.) In older versions of the IDE
the file was named
Arduino Uno.inf
.
After you’ve installed the driver, you can start the Arduino IDE and work with
the board. (If you’re running Windows 8.x, you have to disable some protection
mechanisms before you install the driver.)
11
10.
http://windows.microsoft.com/en-us/windows/open-device-manager#1TC=windows-7
11.
https://learn.sparkfun.com/tutorials/installing-arduino-ide/windows
report erratum • discuss
Installing the Arduino IDE • 11
www.it-ebooks.info

 Loading...


