TD 92675GB
10 January 2011/ Ver. A
Configuration Manual
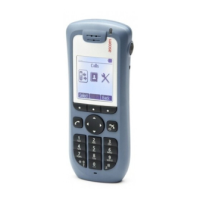
Ascom i62 VoWiFi Handset
9
4 Installation of Handsets
This section describes the recommended procedure for installing and configuring handsets.
There are several ways to install a handset, but the procedures described here guarantees
simple maintenance of the network.
It is recommended to use the IMS2 to install and maintain handsets in a large network. The
reason is that it enables to install, upgrade and configure a large amount of handsets
simultaneously. Another benefit is that the collection of the handsets from the user is not
needed due to configuration is performed over the air (OTA). The handset must first be
configured in the WinPDM to access the IMS2 later on. See Installation steps in large VoWiFi
Systems using IMS2 and WinPDM.
The WinPDM enables administration of one handset at the time inserted in a Desktop
Programmer (DP1) connected via USB to the administrator’s computer. See Installation
steps in small VoWiFi Systems using WinPDM.
Installation steps in large VoWiFi Systems using IMS2 and WinPDM
Note: If the handset to be installed must use certificate to access a WLAN, follow the
instructions in chapter 4.2 Installation without Central Device Management (IMS2) on page
12.
These WLAN settings are common network settings for all handsets.
1 Create templates in the Device Manager in IMS2 ; one with network settings and
another with common settings.
2 Create Numbers and apply the templates.
3 Create a template with identical network settings in the WinPDM.
See 4.1 Installation with Central Device Management (IMS2) on page 9 for more
information.
Installation steps in small VoWiFi Systems using WinPDM
1 Create Numbers.
2 Create one template for all settings in the WinPDM.
See 4.2 Installation without Central Device Management (IMS2) on page 12 for more
information.
4.1 Installation with Central Device Management (IMS2)
When installing a large amount of handsets in a VoWiFi system, it is recommended to have
both the IMS2 and the WinPDM to make the maintenance and handling of the system as
simple as possible.
4.1.1 Create a Network Template in the IMS2
Create one template that contains the network parameters (also include the security
settings). Besides the network parameters, additional parameters might also be set, for
example VoIP settings and IP address to IMS2. The template must be created to prevent
the IMS2 from restoring the parameters to default during the first synchronization.
Note: Only select the parameters that are changed, if all parameters are selected the system
performance decreases.
1 Open a webbrowser and enter the address to the IMS2.