TD 92675GB
10 January 2011/ Ver. A
Configuration Manual
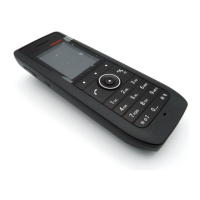
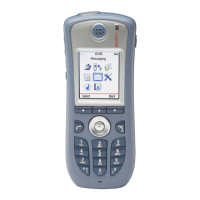
Ascom i62 VoWiFi Handset
13
16 In the Numbers tab, right-click the handset’s number and select "Edit parameters".
17 Select "Network X" (X represents A, B, C, or D).
18 In the Security mode drop-down list, select "EAP-TLS".
19 In the EAP client certificate drop-down list, select the client certificate to be used.
Click "OK".
20 Remove the handset when synchronisation is finished.
Repeat the steps 11-13, 20 (if needed, perform the steps 14-19) for all handsets.
4.3 Installation using the Handset’s Admin Menu
It is possible to install a handset using its Admin menu. This is useful when no WinPDM/
IMS2 is available and the handset needs to be installed quickly.
Note: It is only possible to configure the basic settings via the Admin menu.
1 There are two options to access the Admin menu:
• If the handset has been factory reset or not been configured; in idle mode, enter
40022.
• If the handset has been configured; press "Menu", select "Settings" and enter
40022.
2 Set the following parameters:
• Network settings
1
(located under Network setup)
• VoIP settings
2
(located under VOIP)
• Unite settings
3
(if any) (located under Unite)
• Syslog settings
4
(if any) (located under Syslog)
4.4 Configure a Handset with a Template
It is possible to select a handset in the WinPDM and directly change one or more
configuration parameters. By using a template, the same configuration can easily be applied
to many handsets simultaneously. Templates are also an efficient way to give good control
over which changes that are applied to each handset.
Templates enables configuration of all aspects of a handset from sound volume to keypad
shortcuts.
Your supplier can provide example templates for different PBX:s. The handset will have full
functionality towards the PBX even without such a template. By using such a template,
though, the handset will be customized for that PBX with menu options for PBX specific
functions.
4.4.1 Create a template
1 Open the WinPDM or the Device Manager in the IMS2.
2 Select the Templates tab and open the menu "Template > New...". The New Template
window is opened.
3 Select the device type and parameter version that matches the software version
installed on the handset. Give the template a descriptive name.
1.All required system settings for the WLAN. For example SSID and Security mode
2.VoIP protocol, Gatekeeper IP address or SIP proxy IP address used to access the PBX.
3.IP address and password (if any) to the IMS2.
4.The parameter "Syslog" must be enabled in order to set the "Syslog IP address".