6. Lamps and lamp houses
2,5 Nm
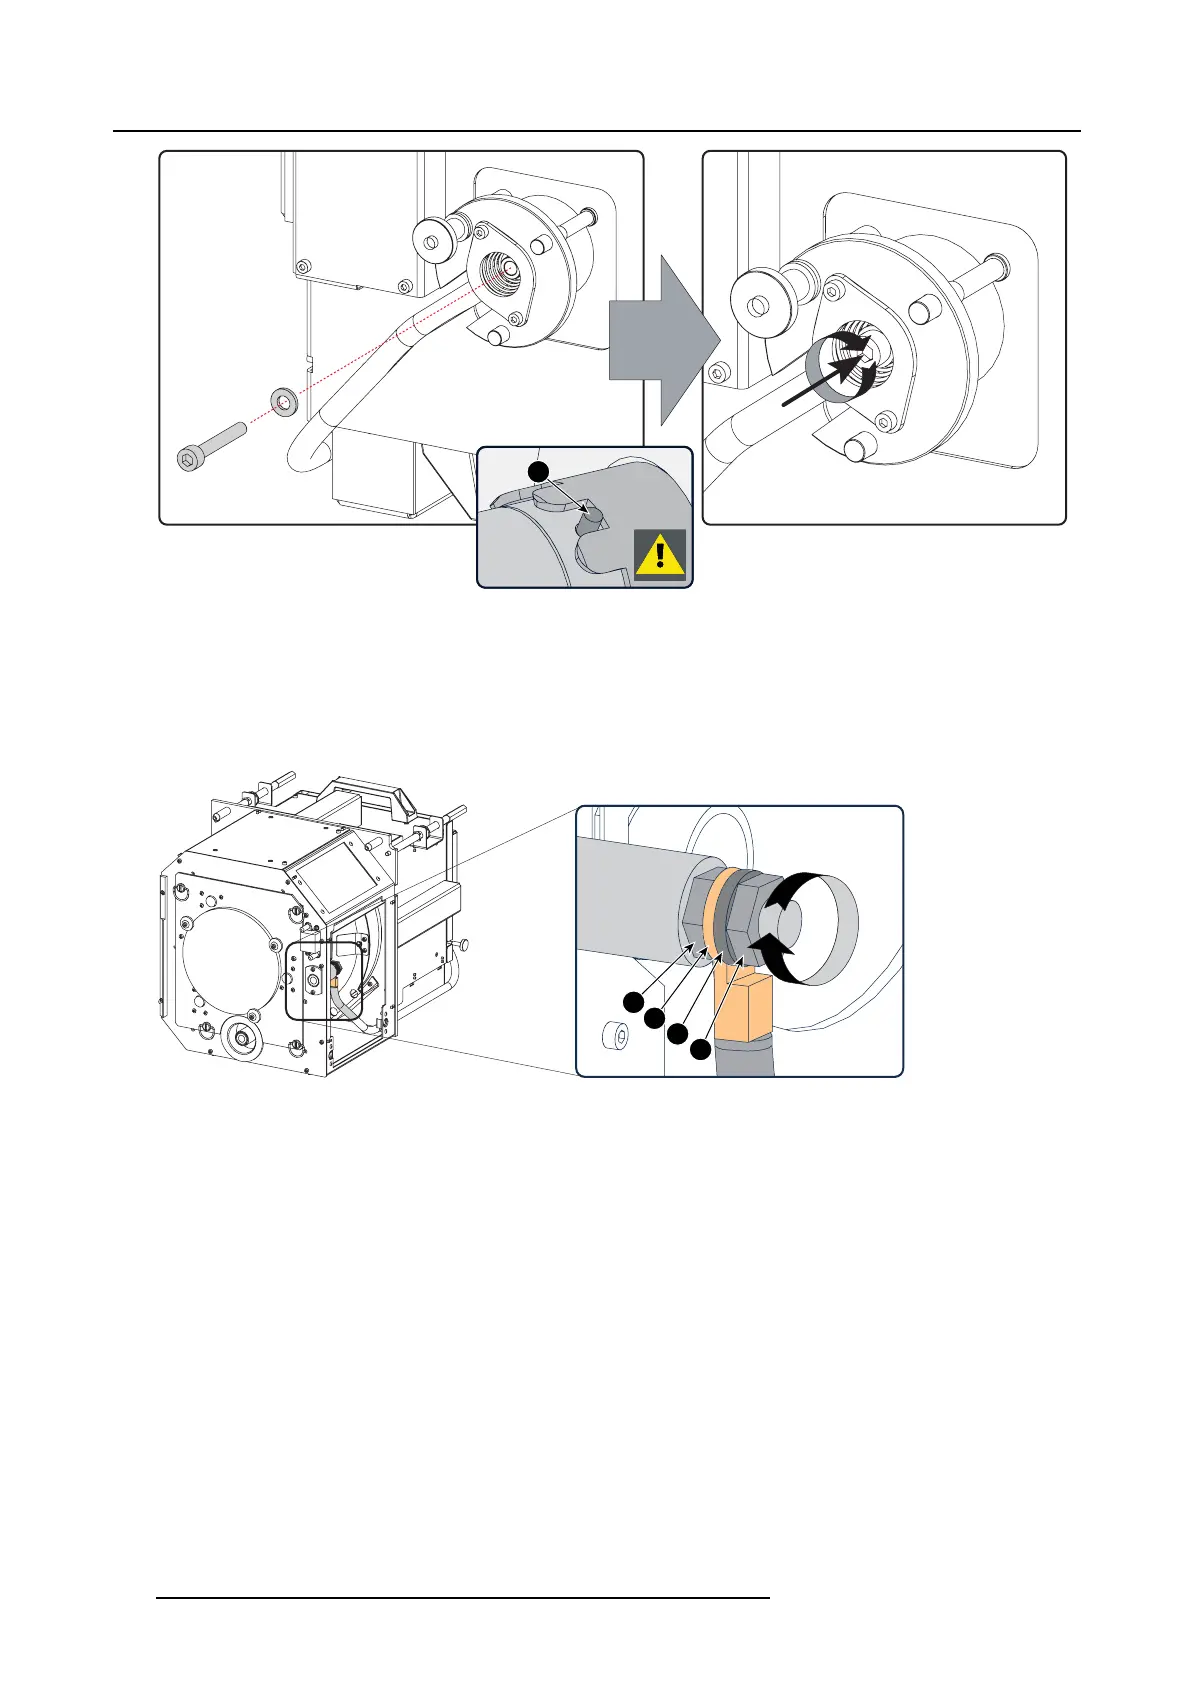
10
Image 6-21
Fasten cathode side
10.C heck the cathode connec tion inside the Lamp House. Use a 17 mm open-end wrench t o hold t he first n ut wh ile fastening the
second nut on the rod with a torque of 9Nm(6,64 lbf*ft) using a torque wrench with 17 m m hexagon socket. Ensure that there
is a flat washer (reference 3) between the lock nut and the w ire lug.
Caution: This cathode connection m ust be c hecked with every lamp c hange!
Caution: Do not tighten the first nut (reference 1) against the connector hous ing. T here must be s ome play (1 m m m aximum).
This is impor tant to insert the Lamp Hou se s moothly into the projec tor.
1
2
3
4
9Nm
Image 6-22
Check cathode connection
Note: The electrical connection pins of older Lamp H ouses may contain two flat washers, one on each side of the wire lug. N ew
Lamp Houses can contain only one flat washer due to the shorter thread clearance of the new im proved connection pins.
11.R einstall the side c over of the Lamp House as illustrated.
Note: Please ensure that the thumb sc rews turning wires ar e flash with the cover or interference w ill occur while inserting t he
Lamp House into the projector.
106
R5905043 DP2K-12C/11CX 19/02/2018
 Loading...


