CHASSIS INFORMATION — 10
214
20 08 CONTESSA
During a lubricant change, ne metal
particles may be observed clinging to the
magnetic ll and drain plugs of the axle.
These particles are normal wear particles from
the axle components, but will cause faster
than normal wear of the axle components if
allowed to circulate through the lubricant. It is
recommended that the magnetic plugs be tested,
and if necessary, replaced at each lubricant
change. These plugs should have sufcient
magnetic strength to pick up a 1.5 lbs. weight of
low carbon steel. Never replace a magnetic plug
with a non-magnetic “pipe plug” as they will
not keep the lubricant clear of metal particles or
properly seal.
The level of lubricant in the rear axle should
be checked every 30,000 miles or annually,
whichever occurs rst. This will ensure adequate
lubricant in the axle for proper operation. Regular
inspection of the drive axle lube levels is an
essential maintenance procedure.
WARNING:
Never place yourself under motorhome
without first properly blocking frame
(jackstands) from coming down in case
of rapid deflation of air system.
Proper Drive Axle Lubricant Level:
With the motorhome parked on a level
surface and rear axle warm, place a large
container under axle.
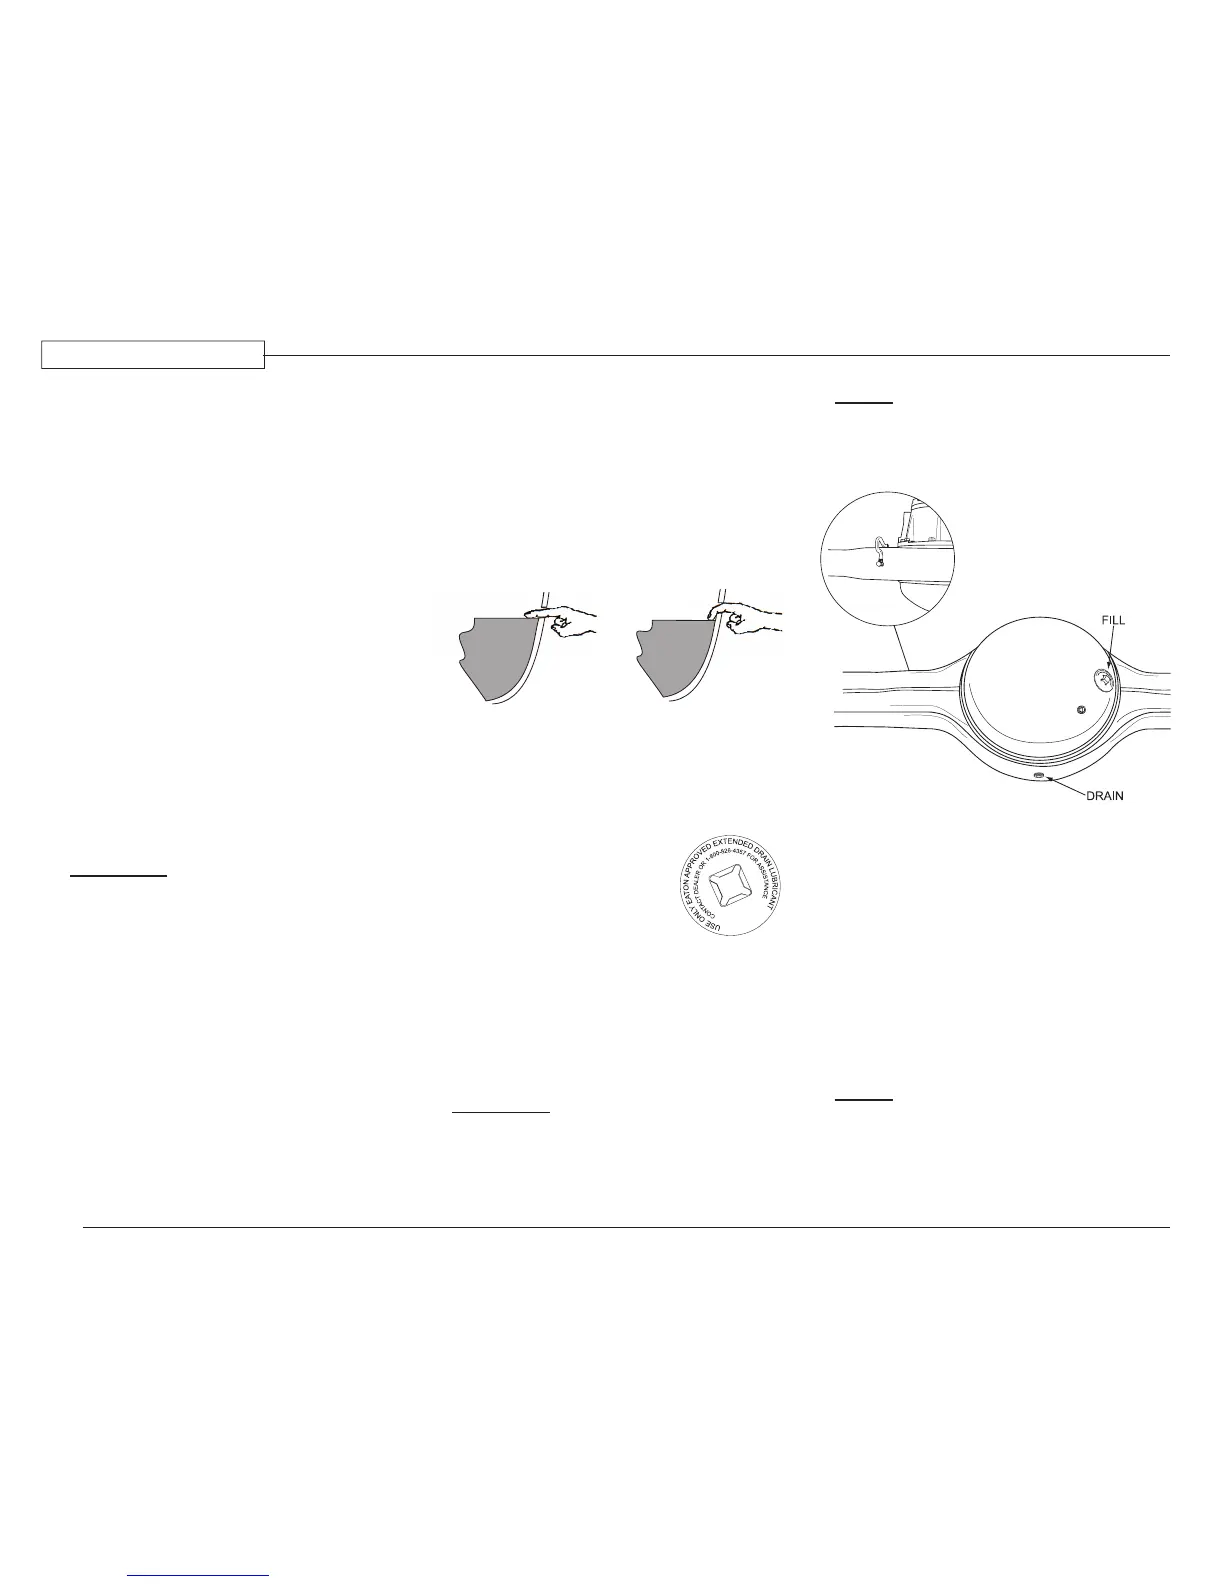
Clean the area around the ll plug,
which is located approximately halfway
up the axle housing bowl.
Remove the ll plug and observe the
lubricant level.
The lubricant should be level with
bottom of the hole.
Important: The lube level close enough
to the hole to be seen or touched is not
sufcient. The lube must be level with
the hole.
Correct the level as necessary.
Re-install the ll plug and tighten to 35
to 50 ft. lbs.
To Drain and Replace Lubricant:
1. Place a large container under the axle.
2. Remove drain plug and allow axle to
completely drain.
3. Properly dispose of oil.
4. Clean the drain plug and
test (replace the drain plug
if needed).
5. Install and tighten drain
plug to 35 to 50 ft. lbs.
6. Clean the area around the ll plug from
the axle-housing bowl.
7. Fill the axle with approved lubricant
until the level is even with the bottom
of the ll plug hole.
WARNING:
When checking or changing the
lubricant, always ensure that the axle
is not hot. Oil temperature 90º F. or
hotter can easily cause severe burns.
NOTE:
When checking the lube level also check
the housing breathers on top of axle
housing. Clean the breathers if dirty or
replace them if damaged.
Drive Shaft:
The drive shaft transfers the power produced
by the engine to the drive axle. A worn or out of
balance drive shaft causes chassis vibration that
generally increases in intensity with road speed.
Lubrication Maintenance:
The drive shaft requires periodic lubrication
maintenance. Lubricate the slip joint and
universal joints every 5,000 miles or six months,
whichever occurs rst. Use NLGI #2 chassis
lubricant.
NOTE:
It will be necessary to move the
motorhome forward or backward to
access all fittings on the drive shaft.
Incorrect Oil Level
Correct Oil Level
090264
090467b
Fill Plug
090467d