37
20 08 CONTESSA
DRIVING & SAFETY — 2
Storage of Tires - Long Term
A cool, dry garage with a sealed cement oor
is the preferred method of storage. Tires stored
outside may prematurely age.
Prior to Storage:
Thoroughly clean the tires.
Unload the motorhome to reduce weight
on the tires.
Ensure the surface is reasonably level,
rm, clean and has adequate drainage.
Inate the tires to the maximum ination
pressure as indicated on the Federal
Identication Tag.
During Storage:
Cover the tires to block direct sunlight.
Periodically check tires for proper
pressure.
Move the motorhome every three
months to prevent cracking in bulge
areas, as well as at spotting from
prolonged sidewall strain and tread
deection.
Removal from Storage:
Before removing the motorhome from long-
term storage, thoroughly inspect each tire’s
tread area and air pressure. If tires have lost
air during storage, inate them to the correct
pressure.
WHEEL MOUNTING
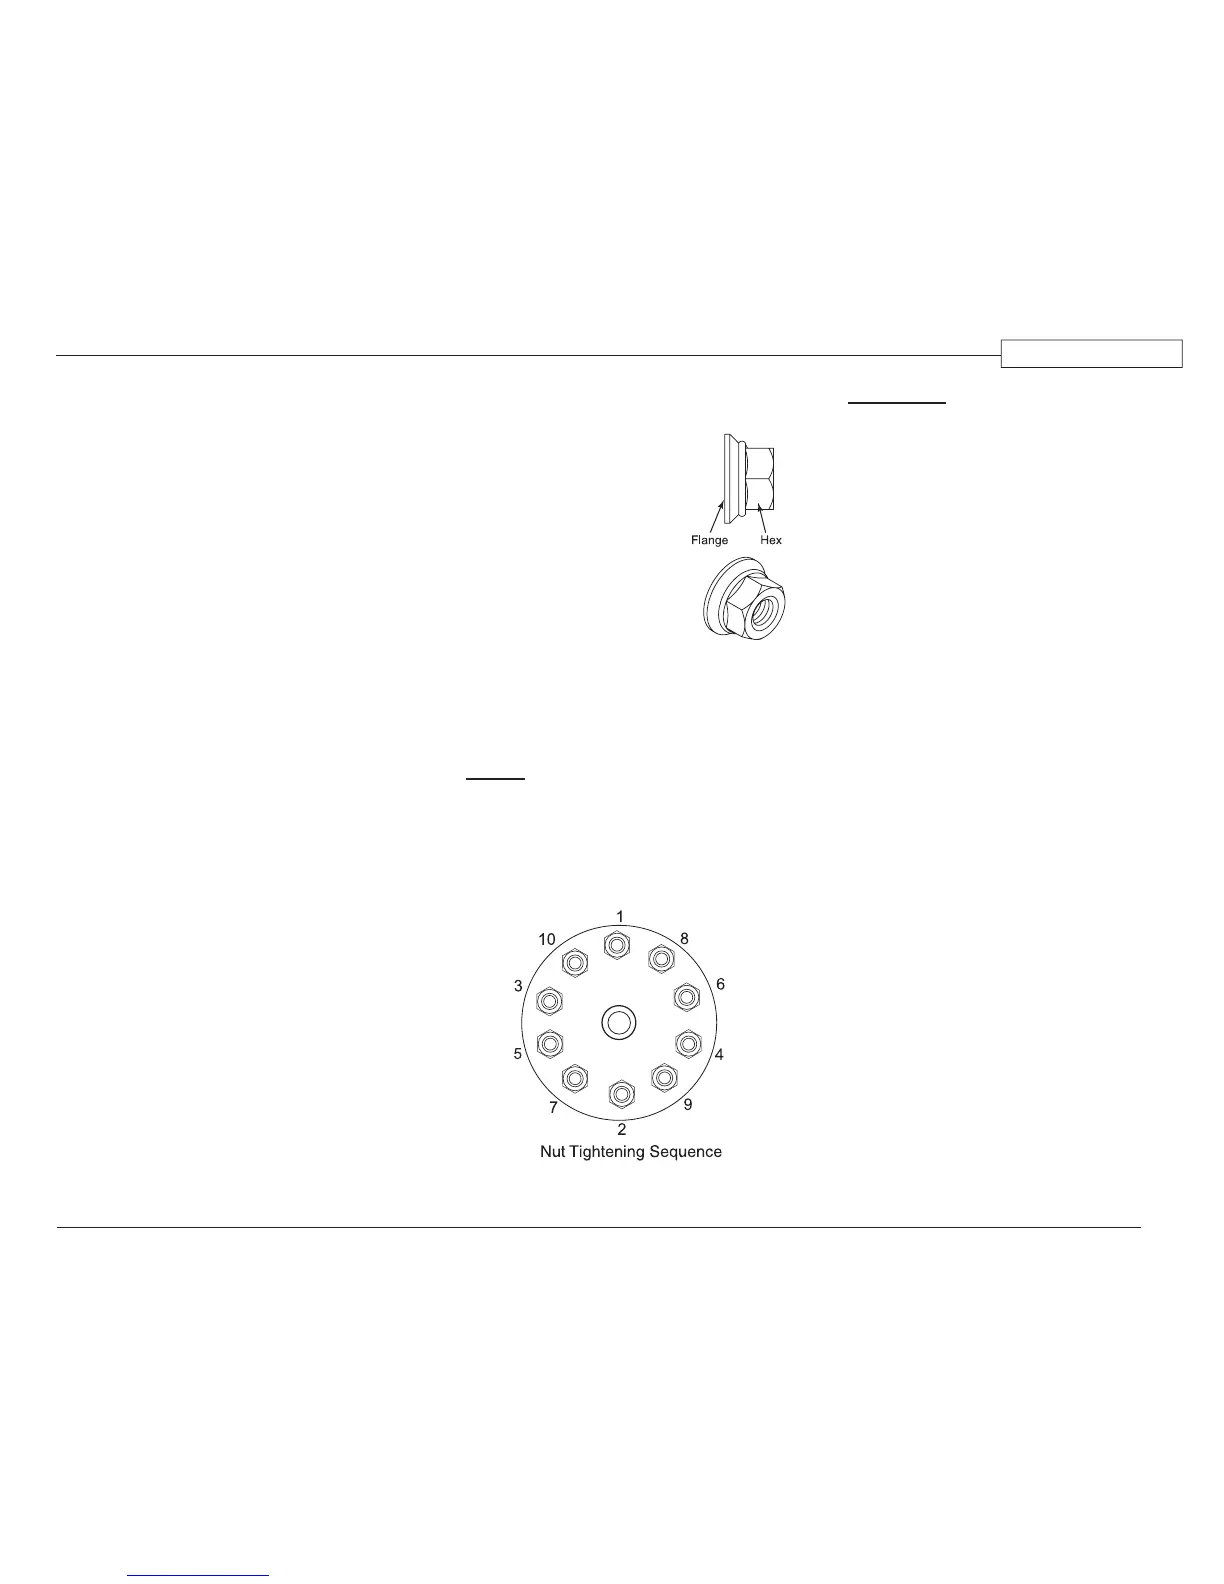
Hub Piloted Mounting:
Flange nuts generate higher
clamping force. Always use
grade eight studs with hub
mount wheels.
Before installing the wheels,
lubricate the hub pilot pads
with a drop of oil to prevent
galling. DO NOT lubricate
any other wheel or hub
surface.
For a hub with intermittent
pilot pads, position a pad at
the twelve o’clock position
to center the wheel and reduce runout.
NOTE:
Loosen and tighten lug nuts in sequence
(as in illustration). Sequence tighten to
50 ft. lbs. first, then sequence tighten to
500 ft. lbs. Over-tightening can cause
distortion.
WARNING:
Never use wheels or lug nuts different
than the original equipment as
this could damage the wheel or the
mounting system. Damage to the wheel
or mounting system could cause a wheel
to come off while the motorhome is in
motion.
Front Wheels:
Slide the front wheel over the studs. Use
caution to avoid damaging stud threads. Snug
the nuts in sequence. When all nuts have
been seated, tighten the nuts to 500 ft. lbs. in
sequence (as shown in illustration).
Dual Rear Wheels:
Slide the inner dual wheel over the studs. Use
caution to avoid damaging threads. Align the
handholds for valve access and slide the outer
dual wheel over the studs, again using caution
to avoid damaging the stud threads. When all
nuts are seated, tighten the nuts to 500 ft. lbs. in
sequence (as in illustration).
The hub mount wheels use two-piece ange
cap nuts for both front and rear applications. No
inner cap nuts are required.
Flange Nut:
Front & Side
View.
090268c
090268 copy2