1 695 600 968 2019-01-28| Beissbarth GmbH
90 | MT ZERO 6 LCD | Fitting and removing the flange
5. Fitting and removing the
flange
The flange must be fitted in the following situations:
R Initial commissioning
R Change of flange type (universal – 3-4-5-hole*)
R Change of wheel type (passenger car – motorcycle*)
* Special accessories
! Balancing accuracy will be affected if the flange has
not been properly fitted to the shaft. Before fitting
the flange, clean and degrease (remove corrosion
protection) the cone of the shaft and the flange
opening.
5.1 MT ZERO 6 LCD AWx
5.1.1 Removing the flange
i The MT ZERO 6 LCD AWx must be connected to
the mains.
1. Push the pedal down.
This will lock the shaft.
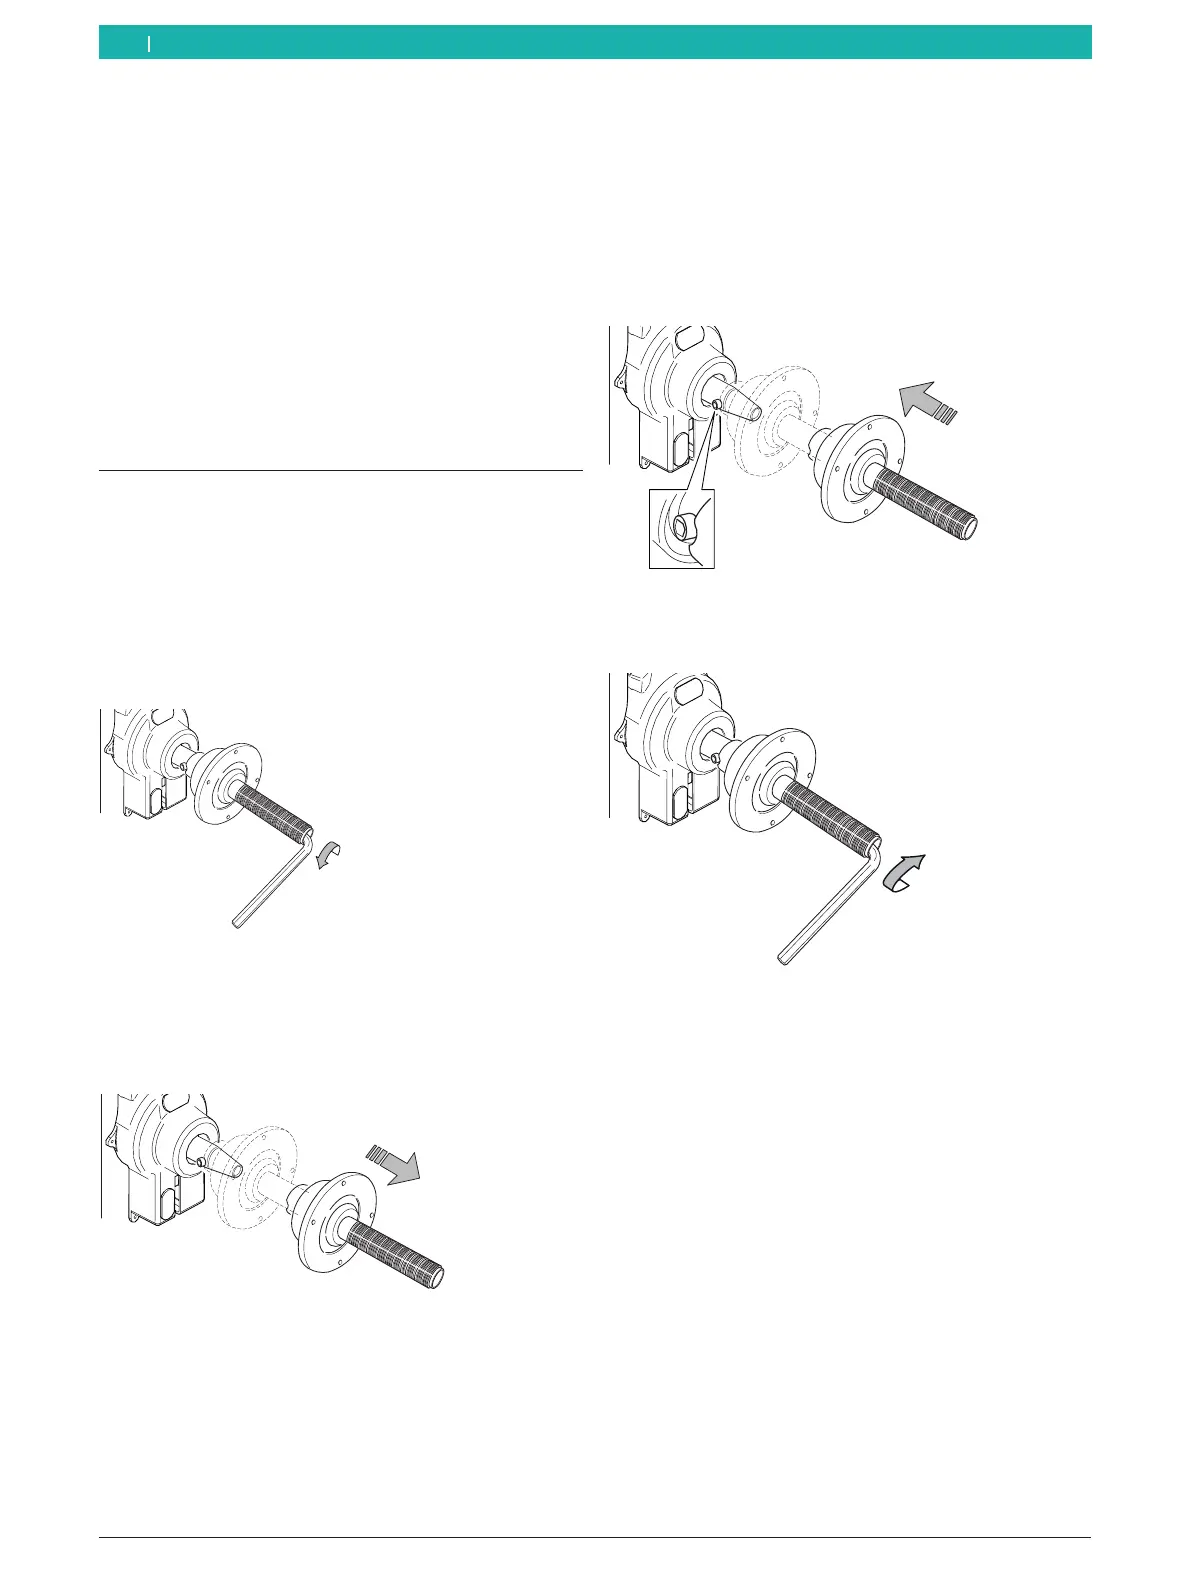
2. Slacken off the hex socket head cap screw.
651127-73 _BM
Fig. 50: Slackening off the hex socket head cap screw
3. Loosen the flange by tapping it on the cone end with
a rubber mallet.
4. Pull the flange off the cone.
651127-74 _BM
Fig. 51: Pulling the flange off the cone
" Flange detached.
5.1.2 Fitting the flange
i Clean and degrease the shaft and the flange
opening.
1. Push the pedal down.
This will lock the shaft.
2. Slide the flange onto the shaft.
651127-75 _BM
Fig. 52: Sliding the flange onto the shaft
3. Tighten the hex socket head cap screw.
651127-76 _BM
Fig. 53: Tightening the hex socket head cap screw
" Flange fitted.
en