1 695 600 968 2019-01-28| Beissbarth GmbH
Operation | MT ZERO 6 LCD | 109
8.13.2 With the electronic rim distance gauge
1. Insert the adhesive balance weight of the value
required for balancing into the associated mount on
the electronic rim distance gauge.
2. Remove the electronic rim distance gauge towards
the balancing position, and wait for the acoustic
confirmation.
The electronic rim distance gauge will be locked
in that position.
The weight symbol is now green instead of yellow.
3. Turn the electronic rim distance gauge, and attach
the balance weight by pushing firmly to make it
adhere properly.
651076-35_Im
Fig. 88: ALU2 – attaching an adhesive balance weight in the 1st
balancing plane
651076-39_Im
Fig. 89: ALU3 – ALU2 – attaching an adhesive balance weight in the
2nd balancing plane
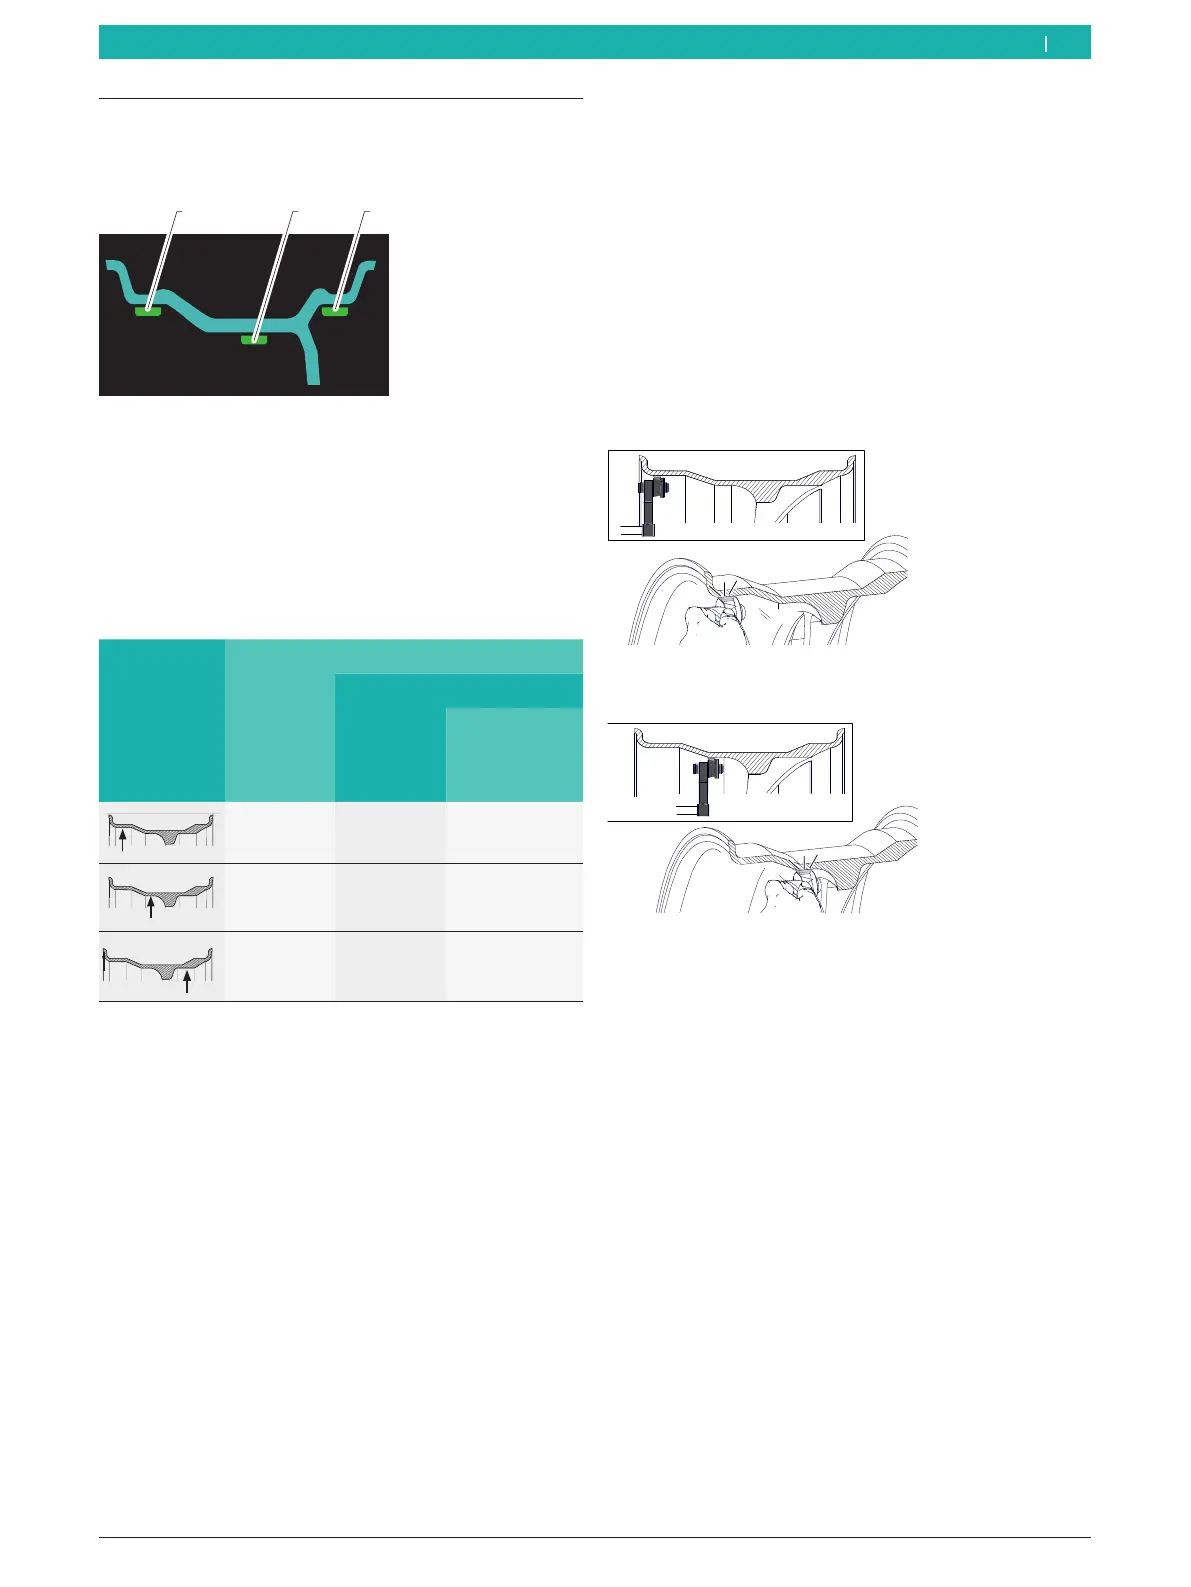
8.13 Attaching adhesive balance weights
The adhesive balance weights are shown on the screen
as explained below.
1 32
Fig. 87: Display of the adhesive balance weights
1 Adhesive balance weight inside the first rim well
2 Adhesive balance weight inside the second rim well
3 Adhesive balance weight outside
! Use the plastic spatula to remove the adhesive
balance weight.
8.13.1 Overview of tools used
Balance weight
position
Rim-distance gauge
Electronic Weight positioning gauge
Internal
balance-
weight
holder
External
balance-weight
holder
OK OK –
OK – OK
– OK –
Tab. 3: Overview of tools used
en