1 695 600 968 2019-01-28| Beissbarth GmbH
Operation | MT ZERO 6 LCD | 101
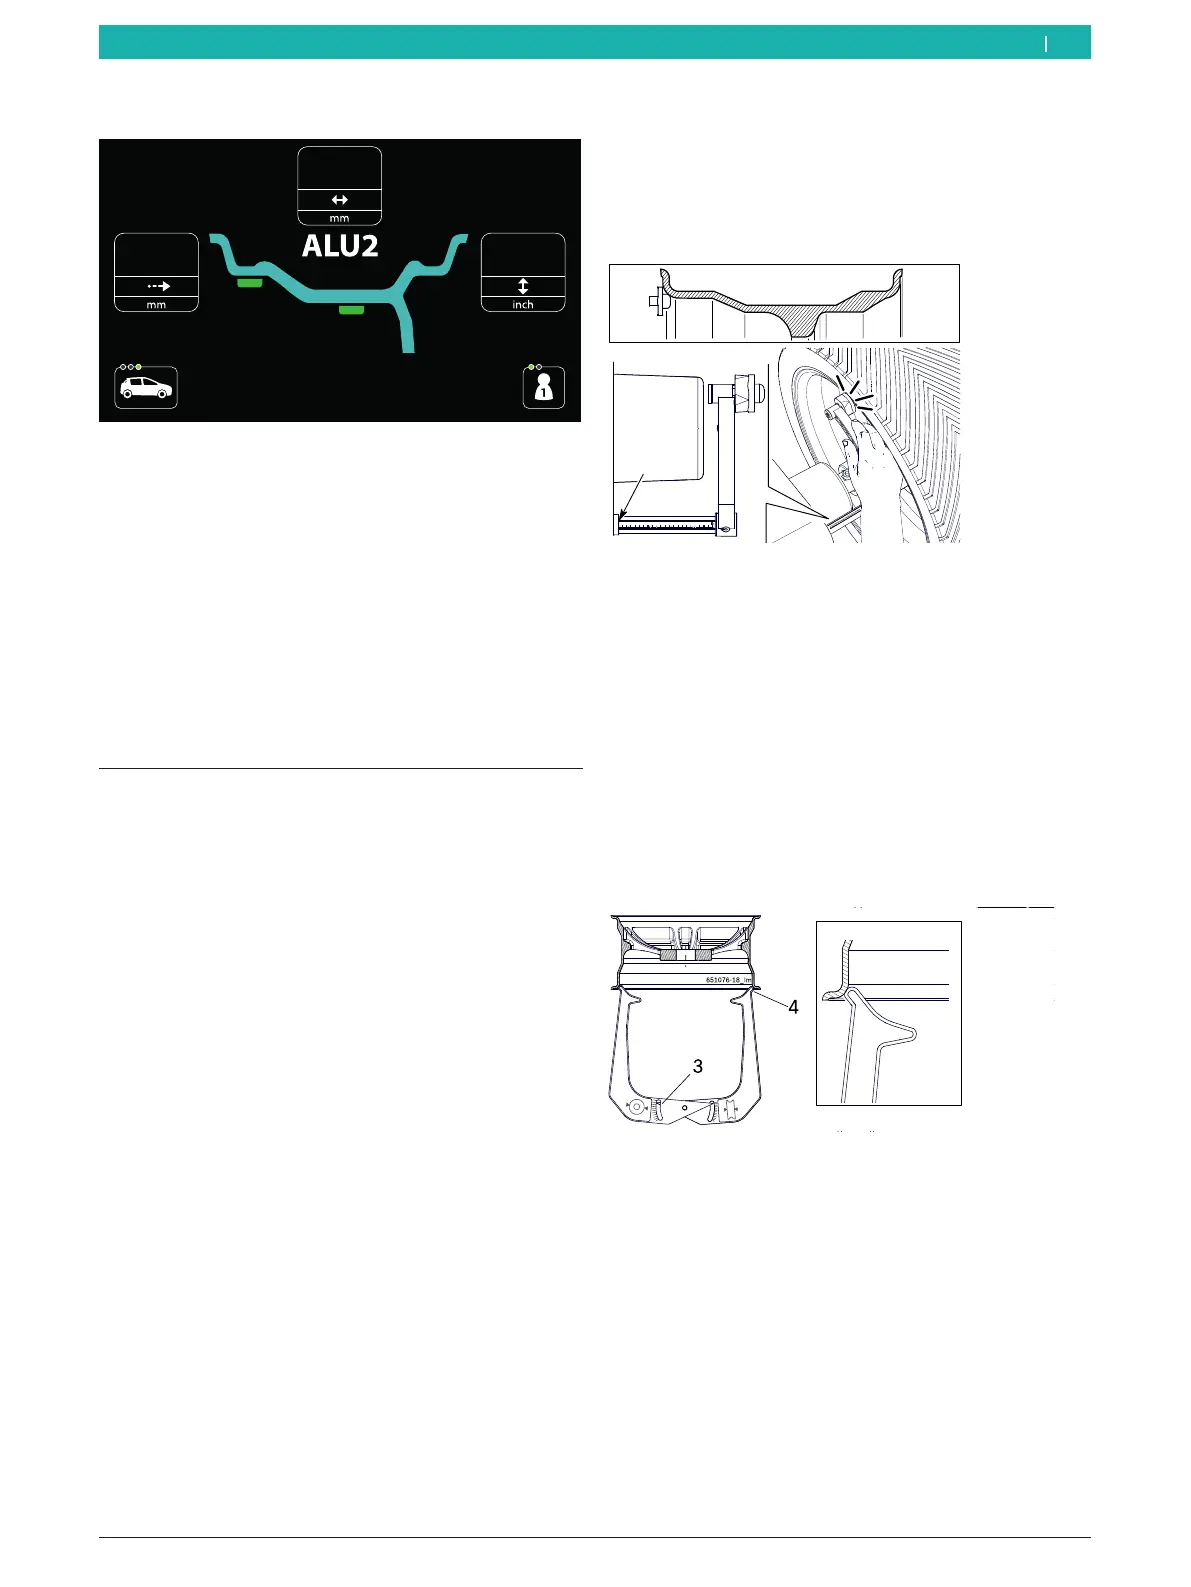
8.8.2 ALU2 (PAX2) and ALU3
Fig. 74: Example of a data collection screen for ALU2 programs
Distance, rim diameter and rim width
After the automatic selection of the balancing program,
all input boxes will be automatically filled in.
i To change the values recorded for the various
menu items, press the <RIM DISTANCE>, <RIM
DIAMETER> or <RIM WIDTH> key and scroll through
the numerical values to the desired value with the
aid of the <+> or <-> key.
8.9 Manual rim data measurement
i If the rim distance and rim diameter cannot be
measured electronically, the rim data can also be
entered manually.
i Following deactivation of the electronic rim-distance
gauge, take the following steps to enter the rim
distance and rim diameter.
¶ Press the <RIM DISTANCE>, <RIM DIAMETER> or
<RIM WIDTH> key.
The data collection screen is displayed.
8.9.1 Standard, ALU1 (PAX1), ALU4, ALU5 and all
static balancing programsxxx
Distance
1. Select balancing program.
2. Position the rim-distance gauge on the rim and read
off the value at position "K" on the millimeter scale.
651127-69_Im
20
30
40
50
07 06
80
90
100
10
k
Fig. 75: Determining the distance between the rim and the
MT ZERO 6 LCD
3. Press the <RIM DISTANCE> key to change the value.
4. Use the <+> or <-> key to enter the recorded value.
Rim diameter
i The rim diameter can be determined (read off)
at the rim itself or measured with the measuring
compass.
1. Position the measuring compass as shown in the
figure.
Fig. 76: Determining rim data with the measuring compass
3 Rim diameter scale
4 Outer tip for rim diameter Server
2. Read off the rim diameter.
3. Press the <RIM DIAMETER> key to change the value.
4. Use the <+> or <-> key to enter the recorded value.
en